Physical Address
304 North Cardinal St.
Dorchester Center, MA 02124
Physical Address
304 North Cardinal St.
Dorchester Center, MA 02124

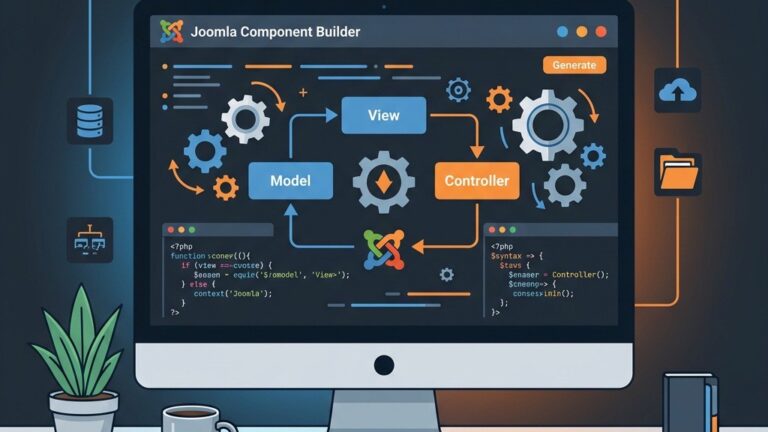
joomla template development is the art of shaping a site’s look and feel from the ground up. In this guide we walk through every step, from file structure to publishing.

Image: Coding a custom Joomla template
A template in Joomla is the skin that drapes over the raw content generated by components and modules. It decides where the header, footer, sidebars, and main article area will sit, much like a stage director arranges props before a play. By editing the template’s PHP and markup we can change fonts, colors, and the very grid that holds the page together. The result is a site that feels cohesive, as if every page were painted with the same brushstroke.
The template engine works by reading a small XML manifest that tells Joomla which files belong to the template and which positions are available. When a page request arrives, Joomla loads the template’s index.php, injects the appropriate module output, and finally renders the component view inside the designated area. This process happens for every request, which is why a well‑crafted template can make a site feel as smooth as a calm lake.
Because the template sits at the top of the rendering stack, it can also inject JavaScript and CSS through Joomla’s WebAssetManager, ensuring that assets are loaded only once and in the correct order. This mechanism prevents duplicate script tags and reduces page weight, giving visitors a snappy experience.
Our template engine first builds the HTML skeleton and then injects module output into the positions we declare. Each position acts like a placeholder that the system fills with one or more modules, allowing us to rearrange sidebars, footers, or header blocks without touching the core code. The component output area, usually rendered by , sits in the middle of the layout and receives the main article or view that the user requested. At the same time, the template decides which CSS and JavaScript files are added to the page, ensuring that only the assets needed for the current layout are loaded.
We also use the template’s templateDetails.xml file to map assets to specific pages, which helps us keep the markup clean and the load time low. By assigning stylesheets to particular client‑side conditions, such as a mobile view, we can serve a lighter stylesheet when the browser matches the criteria. The same approach works for scripts; we can defer or async load them based on the presence of certain modules. This level of control gives us a predictable rendering pipeline that adapts to the site’s design goals.
Modules are small blocks of functionality—think of them as bricks that can be placed in any of the template’s positions. A module might display a login form, a menu, or a list of recent articles. The template defines where those bricks can be stacked, using statements.
Components, on the other hand, are larger building blocks that handle the main content of a page, such as the article manager or the contact form. The template calls the component with , allowing the component’s view to appear in the central area. This separation of concerns lets us swap a component or a module without touching the template’s core files.
The dance between template, modules, and components is orchestrated by Joomla’s MVC pattern. When a visitor clicks a link, the router decides which component to invoke, the component prepares its data, and the template paints the final picture. By mastering this choreography we can create sites that feel both elegant and adaptable.
Joomla 4 introduced a modern asset pipeline powered by WebAssetManager, replacing the older addStyleSheet file, letting Joomla handle versioning and caching automatically. and joomla.asset.jsonaddScript calls. This change means templates now declare their CSS and JavaScript in a
Joomla 5 builds on this foundation by adding support for child templates, a feature that lets developers extend an existing template without overwriting its core files. Child templates inherit the parent’s layout, styles, and positions, while allowing overrides for specific parts. This approach mirrors the way a child inherits traits from a parent but can still grow its own unique branches.
Both versions also embrace Bootstrap 5 as the default front‑end framework, encouraging developers to use its grid system and utility classes. The shift to Bootstrap 5 means we can rely on a responsive, mobile‑first foundation without writing a lot of custom CSS.
templateDetails.xml Manifest File Explained The manifest file is the heart of any Joomla template. It tells the system the template’s name, version, author, and which files belong to the package. Below is a minimal example that includes the required tags and a few optional ones for positions and languages.
<?xml version="1.0" encoding="utf-8"?>
<extension type="template" version="4.0" client="site">
    <name>mycustom</name>
    <creationDate>2026-03-10</creationDate>
    <author>Our Team</author>
    <authorEmail>[email protected]</authorEmail>
    <version>1.0.0</version>
    <description>My Custom Joomla Template</description>
    <files>
        <filename>index.php</filename>
        <filename>templateDetails.xml</filename>
        <folder>css</folder>
        <folder>js</folder>
        <folder>html</folder>
    </files>
    <media>
        <folder>media</folder>
    </media>
    <positions>
        <position>logo</position>
        <position>navigation</position>
        <position>sidebar</position>
        <position>footer</position>
    </positions>
</extension>
Each <position> section tells Joomla where to find assets like images, CSS, and JavaScript. tag registers a spot where a module can be placed, and Joomla will list these positions in the administrator UI. The <media><files> section points to the PHP and XML files that will be copied into the templates/[name] folder during installation. The
When we add new files later—such as a custom scss folder—we simply update the manifest to keep Joomla aware of the changes. This practice prevents missing‑file errors and ensures a smooth update path.
index.php: The Core Template File index.php tags to inject dynamic content. Below is a simple skeleton that demonstrates the basic structure. is the template’s main layout file. It combines HTML markup with Joomla’s <jdoc:include>
<?php
/*<em>
 </em> @package     Joomla.Site
 <em> @subpackage  Templates.mycustom
 </em>/

defined('_JEXEC') or die;

$app   = JFactory::getApplication();
$doc   = JFactory::getDocument();
$tpl   = $this->template;
$path  = 'templates/' . $tpl . '/';
?>
<!DOCTYPE html>
<html lang="<?php echo $doc->language; ?>" dir="<?php echo $doc->direction; ?>">
<head>
    <jdoc:include type="head" />
<link rel="stylesheet" href="<?php echo $this->baseurl . '/templates/' . $tpl . '/css/template.css'; ?>">
</head>
<body class="site <?php echo $tpl; ?>">
<header id="site-header">
        <jdoc:include type="modules" name="logo" style="none" />
        <jdoc:include type="modules" name="navigation" style="none" />
    </header>

    <main id="site-main" class="container">
        <jdoc:include type="component" />
    </main>

    <footer id="site-footer">
        <jdoc:include type="modules" name="footer" style="none" />
    </footer>
    <jdoc:include type="modules" name="debug" style="none" />
</body>
</html>
The <jdoc:include type="head" /> displays the main component output. tag injects meta tags, CSS, and JavaScript that Joomla and extensions have queued. The type="component"type="modules" statements pull in any modules assigned to the named positions, while
We can also add conditional logic in PHP to load different layouts for mobile devices or to switch themes based on user preferences. This flexibility turns a static HTML file into a dynamic, responsive canvas.
joomla.asset.json and WebAssetManager Joomla 4+ encourages developers to declare assets in a JSON file named joomla.asset.json. This file lets the WebAssetManager handle dependencies, versioning, and caching automatically. Below is a sample configuration for a template that uses Bootstrap 5 and a custom script.
{
    "name": "mycustom",
    "type": "template",
    "assets": {
        "css": [
            {
                "name": "bootstrap",
                "uri": "media/vendor/bootstrap/css/bootstrap.min.css",
                "dependencies": []
            },
            {
                "name": "template",
                "uri": "css/template.css",
                "dependencies": ["bootstrap"]
            }
        ],
        "js": [
            {
                "name": "bootstrap",
                "uri": "media/vendor/bootstrap/js/bootstrap.bundle.min.js",
                "dependencies": []
            },
            {
                "name": "custom",
                "uri": "js/custom.js",
                "dependencies": ["bootstrap"]
            }
        ]
    }
}
When Joomla loads the template, the WebAssetManager reads this file and ensures that the CSS and JavaScript are added to the page in the correct order. If a later version of Bootstrap is released, we simply replace the file in the media/vendor/bootstrap folder and bump the version number in the manifest.
Using this approach eliminates the need for manual <link>, reducing clutter and preventing duplicate loads. It also makes it easy to share assets across multiple templates or extensions, fostering a clean, maintainable codebase. or index.php<script> tags in
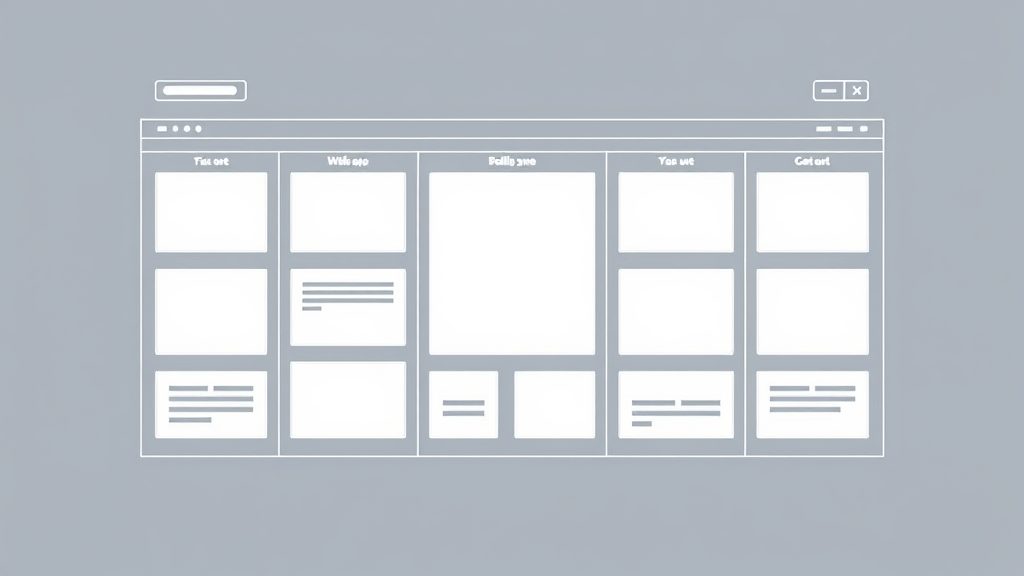
Image: Designing template layouts with module positions
For more on this topic, check out our best Joomla templates.
Module positions are declared in the templateDetails.xml, we tell Joomla where to drop modules that the administrator assigns to that spot. file, but they also need to be referenced in the layout. By naming a position, for example sidebar
In index.php. we use html5<jdoc:include type="modules" name="sidebar" style="xhtml" /> to render all modules assigned to that position. The style attribute determines how each module’s HTML wrapper is generated; common values are none, xhtml, and
We can also create hidden positions that are used only for technical purposes, such as loading a script module that should not appear on the page. These hidden positions are declared in the manifest but never rendered in the layout, keeping the markup tidy.
jdoc:include Statements for Dynamic Content The <jdoc:include> without a name. tag is the conduit through which Joomla injects dynamic content into a static template. For modules we specify the type="component"name attribute, while for the main component we use
Each include can be wrapped in a <div> element gives us a semantic container that can be targeted by CSS. or other HTML element to apply styling or layout rules. For example, wrapping a navigation module in a <nav>
Because the include statements are processed after the PHP portion of index.php runs, we can embed PHP variables inside the markup to customize the output further. This capability lets us build adaptive layouts that react to the presence or absence of modules.
Custom positions give us the freedom to design unique page structures without hard‑coding every element. Suppose we want a “hero†area that only appears on the homepage; we can define a position called hero and conditionally render it based on the current view.
<?php if ($app->input->get('option') === 'com_content' && $app->input->get('view') === 'featured'): ?>
    <section id="hero">
        <jdoc:include type="modules" name="hero" style="none" />
    </section>
<?php endif; ?>
This snippet checks the current component and view, then includes the hero modules only when the conditions are met. By combining such logic with CSS Grid or Flexbox, we can craft pages that feel as fluid as a river, adapting to content without breaking the design.
For more on this topic, check out our Joomla module development.
Template overrides allow us to replace the default output of a component or module with our own markup, without touching the core files. Joomla looks for override files inside the html folder of the template, mirroring the component’s view folder structure.
For example, to override the article view of com_content. Joomla will load this file instead of the core view, letting us add custom classes, change the order of elements, or insert additional data. , we create templates/mycustom/html/com_content/article/default.php
Overrides are safe because they survive Joomla updates; the core component can be upgraded without affecting the custom markup we have placed in the template folder. This safety net encourages developers to experiment and refine the UI without fear of losing work.
To build an override, we first copy the original view file from the component’s tmpl folder, preserving the folder hierarchy. Then we edit the copy, adding our own HTML, CSS classes, or PHP logic. directory into the template’s html
When overriding a module, the process is similar: copy the module’s tmpl/default.php. We can then adjust the module’s output to match the design language of our template. into templates/mycustom/html/mod_module_name/default.php
It is good practice to keep overrides minimal, only changing what is necessary. Over‑customizing can make future maintenance harder, as each Joomla version may introduce new variables or markup that we need to merge manually.
Overrides live inside an html directory and then edit it as needed. Joomla automatically prefers the overridden file over the core one, so our changes appear without touching the core codebase. This method also protects our customizations when Joomla releases updates, because the core files remain untouched. folder that mirrors the component or module’s view hierarchy. To override a core view, we copy the original html/com_component/viewtmpl file into our template’s
The discovery process scans the html folder for matching paths and registers them with the component loader. If we name the override file exactly as the core expects, the system will load it without additional configuration. We can also create multiple overrides for the same view, each with a different layout name, and then select the desired layout in the menu item or module settings. This layered approach gives us granular control over the output of any component.
Child templates, introduced in Joomla 4, let us inherit a parent template’s layout while providing a separate folder for our customizations. The child’s templateDetails.xml tag that points to the parent template’s name. includes a <parent>
When Joomla renders a page, it first loads the child’s index.php. If a file is missing, it falls back to the parent’s version. This fallback mechanism ensures that we can update the parent template (for security or feature improvements) without losing our custom code.
A typical use case is to extend the default Cassiopeia template with a brand‑specific color palette. We create a child template that only adds a new CSS file and overrides a few layout blocks, leaving the bulk of Cassiopeia untouched. This approach gives us the best of both worlds: stability from the parent and flexibility from the child.
A child template inherits the parent’s layout files, assets, and configuration while allowing us to replace only the pieces we need to change. We create a new folder that contains a templateDetails.xml to add or replace assets without duplicating the entire manifest. pointing to the parent template via the joomla.asset.json<parent> tag, and then we add our custom index.php or CSS overrides. The child can also supply its own
We typically use a child template when we want to keep the core design of a popular template like Cassiopeia but need a different color scheme or a few additional module positions. If the project requires a completely unique structure, building a full template from scratch may be more efficient. The child approach reduces maintenance effort because any bug fixes or feature additions made to the parent automatically flow into the child. However, we must be careful not to override too many files, as that defeats the purpose of inheriting updates.
For more on this topic, check out our Joomla tutorial.
Joomla expects template assets to live under media/templates/site/[name]. Within this folder we can place CSS, JavaScript, images, and compiled Sass files. A clean structure might look like:
media/
└─ templates/
   └─ site/
      └─ mycustom/
         ├─ css/
         │   ├─ template.css
         │   └─ custom.css
         ├─ js/
         │   └─ custom.js
         └─ images/
             └─ logo.png
Keeping assets separate from the PHP files reduces clutter and makes it easier for designers to locate and edit styles. The template.css file is the main stylesheet that Joomla loads automatically, while additional styles can be added via the WebAssetManager.
We can also use versioned filenames, such as template.v1.2.css, to force browsers to fetch the latest file after a change. This technique avoids stale caches that might otherwise display outdated styles.
Bootstrap 5 provides a powerful, mobile‑first grid that we can use directly in our template markup. By adding the appropriate classes to our HTML elements, we create rows and columns that automatically re‑flow on smaller screens.
<div class="container">
<div class="row">
<div class="col-lg-8 col-md-12">
            <jdoc:include type="component" />
</div>
        <aside class="col-lg-4 col-md-12">
            <jdoc:include type="modules" name="sidebar" />
        </aside>
</div>
</div>
In this example, the main component occupies two‑thirds of the width on large screens but expands to full width on tablets and phones, while the sidebar behaves inversely. The grid’s built‑in gutters keep the layout breathing, preventing elements from crowding each other.
Because Joomla already ships with Bootstrap 5, we do not need to include the library manually; we simply reference the CSS and JS via the joomla.asset.json file. This integration saves bandwidth and ensures compatibility with Joomla’s core styles.
Sass (Syntactically Awesome Stylesheets) lets us write modular, nested CSS with variables, mixins, and functions. To use Sass in a Joomla template we create a scss files there. folder inside .scssmedia/templates/site/[name] and place our
A typical setup involves a main.scss. We then run the Sass compiler in watch mode: that imports partials such as _components.scss_variables.scss, _layout.scss, and
sass --watch media/templates/site/mycustom/scss:media/templates/site/mycustom/cssThe command watches the source folder for changes and automatically writes compiled CSS to the css folder. This workflow enables rapid styling iterations while keeping the final CSS clean and optimized.
When we need to add a new color or spacing value, we edit the variable in _variables.scss and the change propagates throughout the stylesheet. This approach reduces duplication and makes it easy to maintain a consistent visual language across the entire site.
Cassiopeia, Joomla’s default template, serves as a solid reference point for modern template development. Its file structure follows the same conventions we have discussed, with a templateDetails.xml. , an joomla.asset.jsonindex.php, and a
The template’s index.php. uses a clean, semantic markup that relies heavily on Bootstrap 5 classes, demonstrating best practices for accessibility and responsiveness. It also includes a set of predefined module positions such as footertop, sidebar, and
Cassiopeia’s CSS is organized into several SCSS files that are compiled into a single template.css. The template also ships with a set of JavaScript utilities that enhance navigation and form handling. Studying its code gives us insight into how Joomla’s core team balances performance with flexibility.
Cassiopeia’s file tree is organized around a templates/cassiopeia file, and the template includes a dark‑mode stylesheet that toggles based on a user preference stored in the session. directory that contains subfolders for templateDetails.xmlcss, js, html, and layouts. The html folder holds overrides for core components, while the layouts folder stores reusable pieces like the navigation bar and footer. Positions such as top, sidebar, and footer are defined in the
Accessibility is baked into the template through ARIA attributes and proper heading hierarchy. The navigation menu uses role="navigation" and includes skip‑to‑content links for screen‑reader users. Additionally, the template’s CSS includes high‑contrast color variables that can be activated via a user setting, ensuring that the site remains usable for visitors with visual impairments.
One pattern we can adopt is the use of a “wrapper†<div> that applies a global class based on the current menu item. This technique lets us target specific pages with custom styles without creating separate templates.
Another best practice is the separation of concerns: Cassiopeia keeps its PHP logic minimal, delegating most visual decisions to CSS and Bootstrap utilities. This separation makes the template easier to maintain and reduces the risk of PHP errors.
Finally, Cassiopeia demonstrates how to expose template parameters in the administrator UI, allowing end‑users to change colors, fonts, or layout options without editing code. Adding similar parameters to our own template improves usability and encourages adoption.
If a project requires only minor visual tweaks—such as a different logo, a custom color palette, or a few additional module positions—extending Cassiopeia via a child template is often the quickest path. This method leverages the solid foundation of the default template while preserving the ability to upgrade Joomla safely.
Conversely, when a site demands a radically different layout, unique JavaScript interactions, or a bespoke design system, building a template from scratch gives us full control. Starting from a clean slate lets us avoid unnecessary code and tailor the asset pipeline to the project’s exact needs.
In practice, many developers begin with a child template, then gradually replace parts of the parent with custom files as the design evolves. This incremental approach balances speed with creativity, much like a painter adds layers to a canvas until the masterpiece emerges.
If the project’s design aligns closely with Cassiopeia’s default layout, creating a child template is usually the fastest path. The child inherits all the modern markup and accessibility features, and we only need to add custom CSS or a few module positions to meet the brand’s requirements. This approach also benefits from future updates to Cassiopeia, as security patches and performance improvements flow automatically into the child.
We opt for a full‑ from build when the site demands a radically different structure, such as a single‑page application or a highly animated landing page. Starting from scratch gives us total control over the HTML skeleton, asset loading strategy, and naming conventions. In those cases we still reference Joomla’s core functions, but we write our own index.php and asset manifests to match the unique design goals. This separation ensures that the site’s performance and maintainability are not constrained by the parent template’s assumptions.
To share a template with other Joomla sites we bundle the templates/[name] manifest at its root, as Joomla reads this file to install the template. folder and the templateDetails.xmlmedia/templates/site/[name] folder into a ZIP archive. The archive must contain the
Before packaging, we verify that all required files—index.php—are present. We also run a quick validation using Joomla’s extension manager to catch any missing tags or syntax errors. , joomla.asset.jsontemplateDetails.xml, css/template.css, and
Once the ZIP is ready, we can upload it via the Joomla administrator’s Extension Manager, or distribute it on a marketplace. The installation process copies the files to the appropriate directories and registers the template in the system, making it selectable in the site’s template manager.
Template parameters give site administrators control over visual aspects without editing code. We define these parameters in the templateDetails.xml section. file using <config><field> tags inside a
<config>
    <fields name="params">
        <fieldset name="basic">
            <field name="brandColor" type="color" default="#0066cc" label="Brand Color" description="Primary color used throughout the site." />
            <field name="logo" type="media" label="Logo Image" description="Upload a logo for the header." />
        </fieldset>
    </fields>
</config>
When the template is selected, Joomla renders a form where the administrator can pick a color or upload a logo. The values are stored in the database and can be accessed in index.php. via $this->params->get('brandColor')
By exposing these options we empower non‑technical users to personalize the site, turning a static template into a dynamic, user‑friendly product.
To make a template usable on multilingual sites, we create language files in the language/en-GB folders (or any other language). These files contain key‑value pairs that Joomla substitutes at runtime. and language/fr-FR
; language/en-GB/en-GB.tpl_mycustom.ini
TPL_MYCUSTOM_LOGO="Logo"
TPL_MYCUSTOM_BRANDCOLOR="Brand Color"
In the XML manifest we reference these files with <languages> tags, ensuring Joomla loads the correct language file based on the site’s current language.
<languages>
    <language tag="en-GB">language/en-GB/en-GB.tpl_mycustom.ini</language>
    <language tag="fr-FR">language/fr-FR/fr-FR.tpl_mycustom.ini</language>
</languages>
With language files in place, the template’s admin UI and any front‑end text become translatable, allowing us to reach a global audience without duplicating code.
A functional template must contain at least templateDetails.xml). These files provide the manifest, layout, and styling needed for Joomla to render the site. , css/template.cssindex.php, and a CSS file (commonly
Edit the templateDetails.xml tag, then re‑package and reinstall the template or use the “Discover†button in the Extension Manager to update the manifest. The new position will appear in the module assignment UI. file to include the new <position>
Yes, you can replace Bootstrap with another framework by adjusting the joomla.asset.json file to load the desired CSS and JavaScript. However, you must ensure that your layout markup matches the new framework’s grid and utility classes.
A child template inherits the parent’s core files, allowing you to update the parent without losing customizations. This inheritance reduces maintenance effort and keeps the codebase lean.
Add a CSS file that contains RTL overrides and declare it in joomla.asset.json attribute set to rtl`. Joomla will automatically load this file when the site language is an RTL language such as Arabic or Hebrew. with a direction
The official Joomla documentation is available at docs.joomla.org/Template_Development. Additional tutorials and best‑practice guides can be found on manual.joomla.org and Kevin’s Guides.
—
We hope this extensive guide equips you with the knowledge to craft beautiful, performant Joomla templates that stand the test of time.