Physical Address
304 North Cardinal St.
Dorchester Center, MA 02124
Physical Address
304 North Cardinal St.
Dorchester Center, MA 02124
Joomla’s plugin system is the engine that lets us extend the core without touching core files. Because Joomla follows an event‑driven architecture, a plugin can react to a specific moment in the page life‑cycle, modify data, or inject new output. In this article we walk through joomla plugin development from the ground up, showing how to set up the environment, write a fully namespaced plugin, and test it on a local site. By the end you will have a working “shortcode replacer” plugin and a clear picture of the steps needed for any future joomla plugin project.
Joomla plugins belong to a family of extensions that differ from components and modules. While a component controls a full page and a module renders a block in a position, a plugin lives in the background and listens for events. Joomla implements the observer pattern: when a certain point in the execution is reached, the core fires an event name, and every plugin that has subscribed to that name receives a call.
When Joomla reaches a hook such as onContentPrepare, it creates an event object and passes it through the dispatcher. All plugins that belong to the relevant group (for example content) and have declared interest in that event receive the object. The plugin can read or modify the data, then return a result. This design keeps the core clean and lets us add functionality without rewriting core code.
| Extension Type | Primary Role | Typical Location |
|---|---|---|
| Component | Handles a complete request (e.g., com_content) | `administrator/components/` and `components/` |
| Module | Renders a block in a template position | `modules/` |
| Plugin | Reacts to events, can modify data or output | `plugins/ |
Plugins are the most flexible because they can work across the whole site, not just a single page or position.
Joomla ships with several predefined groups:
onContentPrepare, onContentAfterTitle, …)onAfterInitialise, onBeforeRender, …)onUserLogin, onUserLogout, …)Choosing the correct group is the first step in any joomla plugin development project. Once you understand groups, the rest of joomla plugin development follows a predictable pattern.
A reliable environment speeds up joomla plugin development and reduces friction when testing changes.
We recommend a stack that mirrors the production PHP version. XAMPP works well on Windows and macOS, while Docker gives us a clean, reproducible setup.
docker run -d -p 8080:80 \
  -v $(pwd)/joomla:/var/www/html \
  --name joomla-dev \
  joomla:4-apache
After the container starts, navigate to http://localhost:8080 and follow the Joomla installer. Make sure the database user has full privileges; you can read more about permissions in our Joomla File Permissions guide.
A modern IDE helps us keep the code tidy. VS Code with the PHP Intelephense extension provides autocomplete, while PhpStorm offers deeper integration with Joomla’s XML schema validation.
Enable Joomla’s debug mode from System → Global Configuration → System → Debug System. Set Error Reporting to “Maximum”. This shows stack traces for any exception thrown by a plugin, which is invaluable when we are learning the event flow.
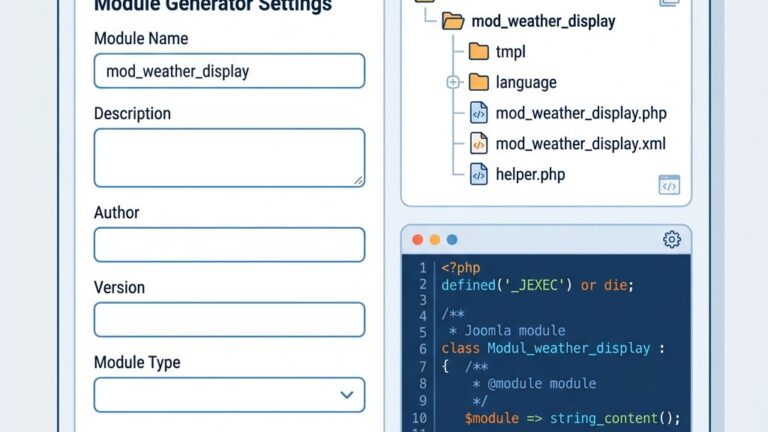
A namespaced plugin lives under plugins/. For our example we will use:
plugins/
└─ content/
   └─ shortcode/
      ├─ src/
      │  └─ Plugin/
      │     └─ Shortcode.php
      ├─ language/
      │  ├─ en-GB/
      │  │  ├─ en-GB.plg_content_shortcode.ini
      │  │  └─ en-GB.plg_content_shortcode.sys.ini
      ├─ shortcode.xml
      └─ services/
         └─ provider.php
The src/ folder holds the PHP classes, language/ contains translation files, services/ hosts the service provider, and the root XML file is the manifest.
The manifest tells Joomla how to install the plugin and which files belong to it. Below is a minimal but complete example for our shortcode plugin.
<?xml version="1.0" encoding="utf-8"?>
<extension type="plugin" version="4.0" client="site" method="upgrade">
    <name>plg_content_shortcode</name>
    <author>Your Name</author>
    <creationDate>2026-03-15</creationDate>
    <license>GPLv2</license>
    <version>1.0.0</version>
    <description>Replaces custom shortcodes in article content.</description>

    <files>
        <filename>shortcode.xml</filename>
        <folder>src</folder>
        <folder>language</folder>
        <folder>services</folder>
    </files>

    <languages>
        <language tag="en-GB">language/en-GB/en-GB.plg_content_shortcode.ini</language>
        <language tag="en-GB">language/en-GB/en-GB.plg_content_shortcode.sys.ini</language>
    </languages>

    <config>
        <fields name="params">
            <fieldset name="basic">
                <field name="delimiter" type="text" default="[["
                       label="PLG_CONTENT_SHORTCODE_DELIMITER_LABEL"
                       description="PLG_CONTENT_SHORTCODE_DELIMITER_DESC" />
                <field name="end_delimiter" type="text" default="]]"
                       label="PLG_CONTENT_SHORTCODE_END_LABEL"
                       description="PLG_CONTENT_SHORTCODE_END_DESC" />
            </fieldset>
        </fields>
    </config>
</extension>
Key points:
type="plugin" tells Joomla this is a plugin.client="site" limits it to the front‑end; use administrator for back‑end only.Since Joomla 4, plugins can register a service provider to inject dependencies. The provider lives in services/provider.php.
<?php
declare(strict_types=1);

namespace My\Plugin\Content;

use Joomla\DI\Container;
use Joomla\DI\ServiceProviderInterface;

class Provider implements ServiceProviderInterface
{
    public function register(Container $container): void
    {
        // Register the plugin class as a service.
        $container->set(
            Shortcode::class,
            fn (Container $c) => new Shortcode($c->get('config'), $c->get('dispatcher'))
        );
    }
}
The provider is referenced in the manifest via the
The core of the plugin lives in src/Plugin/Shortcode.php. It implements EventSubscriberInterface and, for Joomla 5 compatibility, ResultAwareInterface.
<?php
declare(strict_types=1);

namespace My\Plugin\Content;

use Joomla\Event\Event;
use Joomla\Event\SubscriberInterface;
use Joomla\Event\ResultAwareInterface;
use Joomla\CMS\Plugin\CMSPlugin;
use Joomla\CMS\Factory;

class Shortcode extends CMSPlugin implements SubscriberInterface, ResultAwareInterface
{
    protected $app;

    public function __construct($subject, array $config = [])
    {
        $this->app = Factory::getApplication();
        parent::__construct($subject, $config);
    }

    public static function getSubscribedEvents(): array
    {
        return [
            'onContentPrepare' => 'onContentPrepare',
        ];
    }

    public function onContentPrepare(Event $event): void
    {
        /** @var \Joomla\CMS\Table\Content $article */
        $article = $event->getArgument('article');
        $context = $event->getArgument('context');

        // Only process articles in the front‑end.
        if ($this->app->isClient('administrator')) {
            return;
        }

        $delimiter = $this->params->get('delimiter', '[[');
        $endDelimiter = $this->params->get('end_delimiter', ']]');

        $article->text = $this->replaceShortcodes($article->text, $delimiter, $endDelimiter);
    }

    private function replaceShortcodes(string $text, string $start, string $end): string
    {
        $pattern = '/' . preg_quote($start, '/') . '(.*?)' . preg_quote($end, '/') . '/';
        return preg_replace_callback($pattern, fn($matches) => $this->renderShortcode($matches[1]), $text);
    }

    private function renderShortcode(string $code): string
    {
        // Simple example: [year] → current year.
        if (trim($code) === 'year') {
            return (string) date('Y');
        }

        // Unknown code – return unchanged.
        return $code;
    }
}
Explanation of key sections:
getSubscribedEvents() tells Joomla that this class wants to listen to onContentPrepare.onContentPrepare() receives an Event object; we extract the article, check the client, then run our replacement logic.ResultAwareInterface allows the plugin to return a result object if needed in Joomla 5; we keep it simple here.Translation files follow the naming pattern en-GB.plg_content_shortcode.ini for front‑end strings and en-GB.plg_content_shortcode.sys.ini for system strings (shown in the plugin manager). Example en-GB.plg_content_shortcode.ini:
PLG_CONTENT_SHORTCODE="Shortcode Replacer"
PLG_CONTENT_SHORTCODE_DELIMITER_LABEL="Opening delimiter"
PLG_CONTENT_SHORTCODE_DELIMITER_DESC="Characters that start a shortcode, e.g. [["
PLG_CONTENT_SHORTCODE_END_LABEL="Closing delimiter"
PLG_CONTENT_SHORTCODE_END_DESC="Characters that end a shortcode, e.g. ]]"
The sys.ini file contains only the plugin name and description, which appear in the extensions list.
Below we walk through creating a “shortcode replacer” plugin that turns [[year]] into the current year. The steps match the file structure shown earlier.
mkdir -p plugins/content/shortcode/src/Plugin
mkdir -p plugins/content/shortcode/language/en-GB
mkdir -p plugins/content/shortcode/servicesshortcode.xml)Copy the XML example from the previous section, adjusting the
services/provider.php)Create the file with the code shown earlier. Ensure the namespace matches the folder path.
src/Plugin/Shortcode.php)Paste the class code. Remember to run the namespace My\Plugin\Content and to import the required Joomla classes.
Create language/en-GB/en-GB.plg_content_shortcode.ini and language/en-GB/en-GB.plg_content_shortcode.sys.ini. The sys.ini can be a copy of the front‑end file with only the name and description.
Compress the shortcode folder into a ZIP archive. In the Joomla admin panel, go to Extensions → Manage → Install, upload the ZIP, and enable the plugin. For a quick walkthrough of the installation process, see our How to Install Joomla Extensions article.
Create a new article with the text:
Welcome! The current year is [[year]].Save and view the article on the front‑end. The placeholder should be replaced by the actual year, e.g., “2026”. If the output does not change, enable Debug System and check the Error Log for any exceptions.
Joomla fires many events across its life‑cycle. Knowing which one to use saves time and prevents unexpected side effects.
| Group | Event | When it fires | Typical use case |
|---|---|---|---|
| content | `onContentPrepare` | Before article text is displayed | Modify article body, replace placeholders |
| content | `onContentAfterTitle` | After the title is rendered | Insert custom HTML after the title |
| system | `onAfterInitialise` | Early in request, before routing | Initialise global resources |
| system | `onBeforeRender` | Just before the final HTML is sent | Inject scripts or CSS globally |
| user | `onUserLogin` | After a user logs in | Log activity, set custom session data |
| user | `onUserLogout` | After a user logs out | Clean up temporary data |
| authentication | `onUserAuthenticate` | During login verification | Add external authentication sources |
| search | `onSearch` | When a search query is processed | Extend the search index with custom data |
onContentPrepare (most common for article text) or onContentAfterTitle if you need to work with the title only.onBeforeRender or onAfterInitialise in the system group.onUserLogin / onUserLogout in the user group.When you subscribe to an event, Joomla passes an Event object that contains arguments. The argument names are documented in the official API; you can also inspect them by dumping the event with var_dump($event->getArguments()).
For a full list, refer to the Joomla Official Plugin Documentation.
Writing maintainable plugins helps the community and reduces future bugs.
All Joomla 4/5 plugins should use a PHP namespace that mirrors the folder structure. For our example the namespace is My\Plugin\Content. Avoid the old global class names like plgContentShortcode.
ResultAwareInterface if you plan to return a result object in Joomla 5.JFactory::getApplication() is still available but DI is preferred).$this->app->input->getString('param') or the filter classes to sanitize user data.HTMLHelper::_('string.escape', $html).$this->app->getIdentity()->authorise('core.edit', 'com_content') before altering content.Inject services such as the database, logger, or configuration through the service provider. This makes unit testing straightforward because you can replace the real service with a mock.
Even seasoned developers stumble over a few pitfalls when starting with joomla plugin development.
| Mistake | Why it hurts | How to avoid |
|---|---|---|
| Selecting the wrong plugin group | Event never fires because the group doesn’t match | Verify the group in the manifest (` |
| Forgetting the namespace | Joomla cannot autoload the class, leading to “class not found” errors | Follow the `My\Plugin\Content` pattern and run `composer dump-autoload` if you use Composer |
| Ignoring client context | Plugin runs in the administrator area and may cause duplicate output | Check `$this->app->isClient(‘site’)` before processing |
| Missing language files | Text strings appear as keys in the plugin manager | Provide both front‑end and system language files, even if they contain only the name |
| Not registering the service provider | DI container does not know about the plugin class | Add ` |
Now that we have completed our first joomla plugin development project, we can explore more advanced topics.
A plugin reacts to events and can modify data anywhere in the site, while a module is a visual block placed in a template position. Plugins have no direct output unless they inject HTML into an event; modules always render a layout file.
Joomla plugin development has a learning curve, but it is possible to start with a simple “Hello World” plugin using the Joomla Extension Builder, but most useful plugins require PHP knowledge. The steps outlined in this guide assume a basic familiarity with PHP and Joomla’s file structure.
Enable Debug System and set Error Reporting to “Maximum”. Use JLog::add('Message', JLog::INFO, 'myplugin'); to write to the log, or insert var_dump() statements and view the output in the Debug Console. For deeper inspection, use Xdebug with your IDE.
onContentPrepare – modify article text.onAfterInitialise – set up global resources.onBeforeRender – inject scripts or CSS.onUserLogin / onUserLogout – handle user session changes.These events cover the majority of use cases for site‑wide extensions.