Physical Address
304 North Cardinal St.
Dorchester Center, MA 02124
Physical Address
304 North Cardinal St.
Dorchester Center, MA 02124
In Joomla we treat plugins as listeners that react to specific moments during the request life‑cycle. Each moment is represented by an event. When the core or another extension fires an event, Joomla looks for every enabled plugin that has subscribed to that name and calls the appropriate method. This pattern lets us keep business logic separate from the core, which is why the Joomla Plugin Development guide stresses the importance of understanding the event flow.
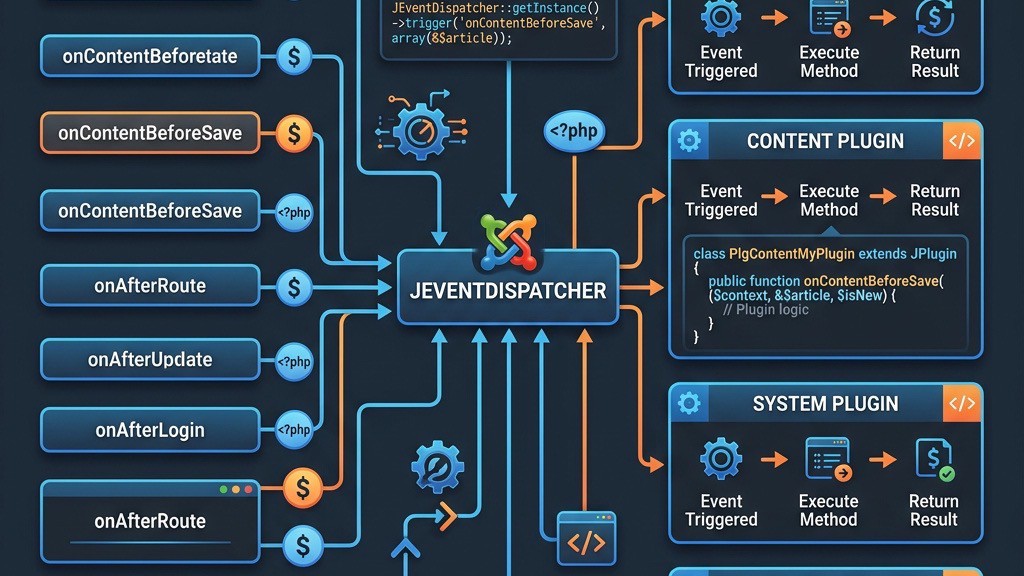
The dispatcher is a singleton that lives in Joomla\CMS\Event\Dispatcher. When an event is triggered, the dispatcher creates an Event object that carries the name, arguments, and a flag that can stop further propagation. All plugins that implement SubscriberInterface (Joomla 4/5) or define legacy onEventName methods are registered with the dispatcher. The dispatcher then iterates over the subscriber list in the order defined by the plugin ordering in the administrator.
Joomla 4 introduced the SubscriberInterface which returns an associative array of event names and the corresponding handler methods. Legacy plugins still rely on the onEventName convention, but the new interface gives us more control over priority and allows dependency injection through the service provider. The difference between action events (which simply inform) and data‑modifying events (which can alter arguments) is crucial when we decide whether to return a value or modify the event payload.
<?php
namespace Joomla\Plugin\System\Myexample;

use Joomla\CMS\Event\SubscriberInterface;
use Joomla\CMS\Plugin\CMSPlugin;

class Myexample extends CMSPlugin implements SubscriberInterface
{
    public static function getSubscribedEvents()
    {
        return [
            \'onBeforeCompileHead\' => \'addMeta\',
            \'onContentPrepare\'    => [\'prepareContent\', 10],
        ];
    }

    public function addMeta(&)
    {
        ->addCustomTag(\'<meta name="author" content="Our Team" />\');
    }

    public function prepareContent(&, &, )
    {
        ->introtext = str_replace(\'{year}\', date(\'Y\'), ->introtext);
    }
}
?>
The example above shows a complete plugin class that registers two events via getSubscribedEvents(). The services/provider.php file can be used to inject services such as the logger or database. By keeping the logic inside methods that receive references, we can modify the article object before Joomla stores it, which is a typical use case for data‑modifying events. For a deeper look at the service provider pattern, see the Joomla development guide.
System events fire on every request, regardless of the component that handles the output. They give us a chance to intervene at the earliest possible stage (for example, to set a custom error handler) or at the very end (to log the response). The most common events are onAfterInitialise, onAfterRoute, onAfterDispatch, onBeforeRender, onBeforeCompileHead, onAfterRender, onBeforeRespond, and onAfterRespond. Understanding the order in which they fire is essential for reliable plugin development.
Below is a table that lists the key system events, when they fire, and a practical use case for each. This reference helps us decide which hook to use when we need to inject scripts, modify the document, or perform cleanup tasks.
| Event Name | When It Fires | Common Use Case |
|---|---|---|
| onAfterInitialise | Immediately after the application object is created | Set custom error handling or load early libraries |
| onAfterRoute | After the router has resolved the URL | Redirect based on custom URL patterns |
| onBeforeCompileHead | Just before the HTML head is compiled | Inject meta tags, CSS, or JavaScript |
| onBeforeRender | Before the main component view is rendered | Modify the document object or add global variables |
| onAfterRender | After the component has rendered its output | Post‑process HTML, minify or add analytics scripts |
| onBeforeRespond | Right before the response is sent to the browser | Set custom headers or compress output |
| onAfterRespond | After the response has been sent | Log request details or clean up temporary files |
One of the most useful system events is onBeforeCompileHead. In the following code block we add a custom stylesheet and a meta description without touching the template files. This approach works whether the site uses a custom or or the default Joomla template.
<?php
namespace Joomla\Plugin\System\MetaInjector;

use Joomla\CMS\Event\SubscriberInterface;
use Joomla\CMS\Plugin\CMSPlugin;

class MetaInjector extends CMSPlugin implements SubscriberInterface
{
    public static function getSubscribedEvents()
    {
        return [\'onBeforeCompileHead\' => \'injectMeta\'];
    }

    public function injectMeta(&)
    {
        // Add a custom stylesheet
        ->addStyleSheet(Uri::root() . \'media/com_myextension/css/custom.css\');

        // Add a meta description if none exists
        if (!->getMetaData(\'description\')) {
            ->setDescription(\'Our site provides the latest news and resources.\');
        }
    }
}
?>
The order of system events mirrors the Joomla application life‑cycle: initialise → route → dispatch → render → response. If we attach a plugin to onBeforeRender but set its ordering after a plugin that modifies the document in onBeforeCompileHead, our changes may be overwritten. Therefore we always check the plugin ordering in the administrator and adjust the priority in the getSubscribedEvents() array when needed.
Content events are the most frequently used group because they give us direct access to articles, categories, and other content types. They are triggered at various points while Joomla prepares, displays, validates, saves, or deletes content. By hooking into these events we can implement short‑code processing, custom validation, automatic tagging, or even integrate third‑party services such as translation APIs.
The table below summarizes the main content events, the point at which they fire, and a practical example for each. This reference helps us pick the right event for a given requirement, whether we need to alter the article before it is saved or modify the HTML after it is rendered.
| Event Name | Trigger Point | Practical Use Case |
|---|---|---|
| onContentPrepare | Before Joomla renders the article | Replace custom shortcodes with HTML |
| onContentBeforeSave | When an article is about to be stored | Validate custom fields or sanitize input |
| onContentAfterSave | After the article has been written to the database | Log the change or send a notification |
| onContentBeforeDelete | Before the article is removed | Remove associated files or clear cache |
| onContentAfterDelete | After the article has been deleted | Update search index or analytics |
| onCategoryChangeState | When a category is published/unpublished | Adjust permissions for child items |
Below we implement onContentBeforeSave to ensure that every article has a non‑empty meta description. If the author leaves the field blank, we generate a short excerpt from the article body. This logic runs only when the article is saved, keeping the front‑end rendering fast.
<?php
namespace Joomla\Plugin\Content\MetaGuard;

use Joomla\CMS\Event\SubscriberInterface;
use Joomla\CMS\Plugin\CMSPlugin;

class MetaGuard extends CMSPlugin implements SubscriberInterface
{
    public static function getSubscribedEvents()
    {
        return [\'onContentBeforeSave\' => \'ensureMeta\'];
    }

    public function ensureMeta(, &, )
    {
        // Only act on articles
        if ( !== \'com_content.article\') {
            return true;
        }

        // If description is empty, create one from introtext
        if (empty(->metadesc)) {
             = strip_tags(->introtext);
            ->metadesc = substr(, 0, 160);
        }

        return true; // Continue processing
    }
}
?>
Another common need is to replace custom placeholders inside the article body. The onContentPrepare event gives us the article object before Joomla renders it, allowing us to run a simple string replacement or a more complex parser. The example that follows shows how we turn a {year} placeholder into the current year, which is useful for copyright notices.
<?php
namespace Joomla\Plugin\Content\Shortcode;

use Joomla\CMS\Event\SubscriberInterface;
use Joomla\CMS\Plugin\CMSPlugin;

class Shortcode extends CMSPlugin implements SubscriberInterface
{
    public static function getSubscribedEvents()
    {
        return [\'onContentPrepare\' => \'replacePlaceholders\'];
    }

    public function replacePlaceholders(, &, &, )
    {
        if ( !== \'com_content.article\') {
            return true;
        }

        ->introtext = str_replace(\'{year}\', date(\'Y\'), ->introtext);
        ->fulltext  = str_replace(\'{year}\', date(\'Y\'), ->fulltext);

        return true;
    }
}
?>
Both examples demonstrate how content events let us manipulate data at the right moment. When we need to affect the database directly, we choose a data‑modifying event like onContentBeforeSave. When we only need to change the output, onContentPrepare or onContentAfterDisplay are more appropriate. For a broader view of Joomla’s MVC flow, refer to the Joomla MVC architecture article.
User‑related events fire whenever Joomla creates, updates, authenticates, or logs out a user. They are essential for integrating third‑party identity providers, logging activity, or enforcing additional security checks. The event names follow a clear pattern: onUserBeforeSave, onUserAfterLogin, onUserAuthenticate, and so on.
The table below lists the most important user events, the moment they trigger, and a typical scenario where they are used. This helps us decide where to place custom code without breaking the core authentication flow.
| Event Name | Trigger Point | Typical Scenario |
|---|---|---|
| onUserBeforeSave | Before a user record is written | Validate custom profile fields |
| onUserAfterSave | After a user record is stored | Send a welcome email |
| onUserLogin | When a login attempt is made | Log the attempt or apply rate limiting |
| onUserAfterLogin | After successful authentication | Redirect to a dashboard or record activity |
| onUserLogout | When a logout request is processed | Clear custom session data |
| onUserAuthenticate | During the authentication process | Integrate LDAP or OAuth |
One practical implementation is to log every successful login and redirect the user to a custom landing page. The onUserAfterLogin event receives the user object and the response array, which we can modify to set a new URL. This technique works well with the user management utilities provided by Joomla.
<?php
namespace Joomla\Plugin\System\LoginLogger;

use Joomla\CMS\Event\SubscriberInterface;
use Joomla\CMS\Plugin\CMSPlugin;

class LoginLogger extends CMSPlugin implements SubscriberInterface
{
    public static function getSubscribedEvents()
    {
        return [\'onUserAfterLogin\' => \'logAndRedirect\'];
    }

    public function logAndRedirect(,  = [])
    {
        // Log the login event
         = ->app->getLogger();
        ->info(\'User logged in\', [\'user\' => ->id]);

        // Change the redirect URL
        [\'return\'] = \'index.php?option=com_mycomponent&view=dashboard\';

        return true;
    }
}
?>
When we need to intervene before authentication, the onUserAuthenticate event is the right place. It receives a credentials array and can modify the authentication result. For example, we might check a two‑factor token stored in a custom table. If the check fails, we set ->status to JAuthentication::STATUS_FAILURE and provide a custom error message.
All user events respect the plugin ordering, so a plugin that blocks a login attempt must be placed before any plugin that logs the event. The Joomla debug mode can help us verify the order and see which plugins are actually executed. For more security‑focused tips, see the admin security article.
Installer events fire during the installation, update, and removal of extensions. They give us a hook to add custom tables, copy assets, or clean up after an extension is removed. Because the installer runs with elevated privileges, we must be careful to validate any data we write to the filesystem or database.
The table below outlines the most useful installer events, the stage at which they occur, and a typical action that a developer might perform.
| Event Name | Stage | Typical Action |
|---|---|---|
| onInstallerBeforePackageDownload | Before a package is downloaded | Validate the source URL |
| onInstallerBeforeInstallation | Before the installer extracts files | Check PHP version requirements |
| onExtensionAfterInstall | After the extension files are placed | Run database migrations |
| onExtensionAfterUpdate | After an update is applied | Refresh caches or rebuild assets |
| onExtensionAfterUninstall | After the extension files are removed | Delete custom tables or configuration files |
When we need to create a new database table during installation, we hook into onExtensionAfterInstall. The example below shows a minimal installer plugin that runs a SQL script located in the extension’s sql folder. This approach works for both components and plugins, and it follows the best practices described in the component development guide.
<?php
namespace Joomla\Plugin\System\InstallerHelper;

use Joomla\CMS\Event\SubscriberInterface;
use Joomla\CMS\Plugin\CMSPlugin;
use Joomla\CMS\Factory;

class InstallerHelper extends CMSPlugin implements SubscriberInterface
{
    public static function getSubscribedEvents()
    {
        return [\'onExtensionAfterInstall\' => \'runSql\'];
    }

    public function runSql(, , )
    {
        // Only act on our component
        if ( !== \'com_mycomponent\') {
            return true;
        }

            = Factory::getDbo();
           = file_get_contents(JPATH_SITE . \'/administrator/components/com_mycomponent/sql/install.mysql.utf8.sql\');

        // Execute the script
        ->setQuery();
        ->execute();

        return true;
    }
}
?>
During an update we may need to add new columns or modify existing data. The onExtensionAfterUpdate event lets us run a migration script that checks the current schema version and applies incremental changes. By keeping migration logic inside a plugin, we avoid cluttering the component’s core code and keep the update process modular.
Finally, after an extension is uninstalled we often want to remove any orphaned files or database entries. The onExtensionAfterUninstall event provides a clean place to perform this cleanup. Remember to respect the user’s data; if the extension stores user‑generated content, consider offering an option to retain it.
Modules and editors have their own set of events that allow developers to influence the rendering pipeline. Module events such as onPrepareModuleList and onRenderModule give us control over which modules appear on a page and how their output is wrapped. Editor events like onEditorSetup let us add custom buttons or configure the editor’s toolbar.
The following table captures the most relevant module and editor events, the moment they fire, and a practical example.
| Event Name | Trigger Point | Practical Example |
|---|---|---|
| onPrepareModuleList | Before the module list is built | Filter out modules based on user role |
| onRenderModule | When a single module is rendered | Wrap output in a custom div |
| onEditorSetup | When the editor is initialized | Add a custom button for shortcodes |
| onAfterRenderModules | After all modules have been rendered | Inject a lazy‑load script |
Below we create a plugin that intercepts the rendering of a module and adds a wrapper with a CSS class. This technique is useful when we want to apply a consistent design without editing each module’s layout file.
<?php
namespace Joomla\Plugin\System\ModuleWrapper;

use Joomla\CMS\Event\SubscriberInterface;
use Joomla\CMS\Plugin\CMSPlugin;

class ModuleWrapper extends CMSPlugin implements SubscriberInterface
{
    public static function getSubscribedEvents()
    {
        return [\'onRenderModule\' => \'wrapModule\'];
    }

    public function wrapModule(&, &, &)
    {
        // Only wrap modules of type "mod_custom"
        if (->module !== \'mod_custom\') {
            return true;
        }

        ->content = \'<div class="my-custom-wrapper">\' . ->content . \'</div>\';
        return true;
    }
}
?>
For editors, the onEditorSetup event can be used to inject JavaScript that registers a new toolbar button. The example below adds a button that inserts a predefined shortcode into the article body. This approach works for both TinyMCE and JCE editors, as Joomla passes the editor instance to the event.
<?php
namespace Joomla\Plugin\System\ShortcodeButton;

use Joomla\CMS\Event\SubscriberInterface;
use Joomla\CMS\Plugin\CMSPlugin;

class ShortcodeButton extends CMSPlugin implements SubscriberInterface
{
    public static function getSubscribedEvents()
    {
        return [\'onEditorSetup\' => \'addButton\'];
    }

    public function addButton(, , )
    {
        // Only act on TinyMCE
        if ( !== \'tinymce\') {
            return true;
        }

         = "
            Joomla.submitbutton = function(task) {
                if (task == \'insertShortcode\') {
                    editor.execCommand(\'mceInsertContent\', false, \'{myshortcode}\');
                } else {
                    Joomla.submitform(task);
                }
            };
        ";
        ->addScriptDeclaration();
        ->addButton(\'insertShortcode\', \'Insert Shortcode\');

        return true;
    }
}
?>
These module and editor events illustrate how we can influence both the back‑end and front‑end without touching core files. For a broader view of Joomla’s MVC pattern, see the Joomla MVC architecture article.
Joomla’s Finder (search) component, workflow system, and mailer each expose a set of events that let us extend their behavior. Finder events are useful for keeping the search index in sync with custom data. Workflow events let us react to state transitions in content approval processes. Mail events give us a chance to modify the message before it is sent.
The combined table below lists the most common events in these three areas, the moment they fire, and a short description of a typical use case.
| Event | When It Fires | Typical Use |
|---|---|---|
| onFinderAfterSave | After an item is indexed | Update a custom field in the index |
| onFinderBeforeIndex | Before an item is added to the index | Exclude certain categories from search |
| onWorkflowBeforeTransition | Before a workflow step changes | Validate that required fields are filled |
| onWorkflowAfterTransition | After a workflow step changes | Send a notification to the next reviewer |
| onMailBeforeSend | Right before Joomla sends an email | Append a tracking pixel or custom footer |
To keep the search index accurate, we might use onFinderBeforeIndex to skip items that belong to a “private” category. The plugin receives the content object and can set the flag to true. This prevents the item from being indexed without affecting its visibility on the front end.
<?php
namespace Joomla\Plugin\Finder\PrivateSkip;

use Joomla\CMS\Event\SubscriberInterface;
use Joomla\CMS\Plugin\CMSPlugin;

class PrivateSkip extends CMSPlugin implements SubscriberInterface
{
    public static function getSubscribedEvents()
    {
        return [\'onFinderBeforeIndex\' => \'skipPrivate\'];
    }

    public function skipPrivate(&, &)
    {
        // Assume ->catid holds the category ID
         = [7, 12, 19];
        if (in_array(->catid, )) {
             = true;
        }

        return true;
    }
}
?>
Workflow events are especially handy when we need to enforce business rules. In the onWorkflowBeforeTransition handler we can inspect the current state and the target state, then return false to abort the transition if a condition is not met. This approach integrates cleanly with Joomla’s built‑in workflow engine and does not require modifying the core tables.
Finally, the onMailBeforeSend event lets us alter the email body or headers just before Joomla hands the message to the mailer. A common pattern is to add a custom header that identifies the site, or to embed a tracking pixel for marketing analytics. Because the event receives a JMail object, we have full control over the message.
Joomla 5 continues to use the SubscriberInterface pattern, but it also encourages the use of a service provider for dependency injection. Registering a plugin involves three main files: the manifest XML, the services/provider.php file, and the plugin class itself. Below we walk through a minimal yet complete example that registers a system plugin listening to onBeforeRender and onUserAfterLogin.
First, the manifest XML defines the plugin’s metadata, the files that belong to it, and the service provider location. The group attribute is set to system because we want the plugin to be available globally. The ordering element determines the default position in the plugin list.
<?xml version="1.0" encoding="utf-8"?>
<extension type="plugin" version="5.0" client="site" method="upgrade">
    <name>plg_system_myexample</name>
    <author>Our Team</author>
    <creationDate>2026-03-15</creationDate>
    <license>GPL-2.0-or-later</license>
    <version>1.0.0</version>
    <description>A demo plugin showing event registration</description>
    <files>
        <filename>myexample.php</filename>
        <folder>src</folder>
        <filename>services/provider.php</filename>
    </files>
    <config>
        <fields name="params">
            <fieldset name="basic">
                <field name="custom_message" type="text" label="Custom Message" description="Message shown on login"/>
            </fieldset>
        </fields>
    </config>
</extension>
Second, the service provider registers the plugin class with Joomla’s DI container. By declaring the plugin as a service, we can inject other services such as the logger or the user manager. The provider file lives under src/Services/provider.php and follows PSR‑4 naming conventions.
<?php
namespace Joomla\Plugin\System\Myexample\Provider;

use Joomla\CMS\DI\Container;
use Joomla\CMS\DI\ServiceProviderInterface;

class MyexampleProvider implements ServiceProviderInterface
{
    public function register(Container )
    {
        ->registerServiceProvider(
            \'Joomla\Plugin\System\Myexample\Myexample\',
            function (Container ) {
                return new \Joomla\Plugin\System\Myexample\Myexample(
                    ->get(\'application\'),
                    ->get(\'dispatcher\'),
                    ->get(\'config\')
                );
            }
        );
    }
}
?>
Third, the plugin class implements SubscriberInterface and defines the events it wants to listen to. In this example we handle onBeforeRender to add a custom comment to the HTML source, and onUserAfterLogin to log a message using the injected logger.
<?php
namespace Joomla\Plugin\System\Myexample;

use Joomla\CMS\Event\SubscriberInterface;
use Joomla\CMS\Log\Log;
use Joomla\CMS\Plugin\CMSPlugin;

class Myexample extends CMSPlugin implements SubscriberInterface
{
    protected ;

    public function __construct(, )
    {
        parent::__construct(, );
        ->logger = Log::getInstance(\'myexample\');
    }

    public static function getSubscribedEvents()
    {
        return [
            \'onBeforeRender\'   => \'addComment\',
            \'onUserAfterLogin\' => \'logLogin\',
        ];
    }

    public function addComment()
    {
         = ->app->getDocument();
        ->addCustomTag(\'\');
        return true;
    }

    public function logLogin(,  = [])
    {
         = ->params->get(\'custom_message\', \'User logged in\');
        ->logger->info(, [\'user\' => ->id]);
        return true;
    }
}
?>
After uploading the plugin folder to plugins/system/myexample, we install it through the Joomla administrator. The plugin appears in the list of system plugins, where we can set its ordering and configure the custom message. The ordering determines when our onBeforeRender handler runs relative to other plugins that also modify the document.
For more guidance on creating plugins that follow Joomla’s modern architecture, see the Joomla 4 tutorial which still applies to Joomla 5 because the core event system has not changed dramatically.
Sometimes the built‑in events do not cover a very specific workflow in a component we are developing. In those cases we can create a custom event and let other plugins subscribe to it. Joomla’s event dispatcher makes this process straightforward: we instantiate an Event object, set its name and arguments, and then call dispatch().
Below is a minimal example of a component that dispatches a custom event named onMyComponentProcess. The event passes a reference to a data array, which listeners can modify. This pattern is useful for allowing third‑party extensions to augment the component’s processing without hard‑coding dependencies.
<?php
defined(\'_JEXEC\') or die;

use Joomla\CMS\Event\Dispatcher;
use Joomla\CMS\Event\Event;

class MyComponentHelper
{
    public static function processData(array &)
    {
        // Create the event
         = new Event(\'onMyComponentProcess\', [&]);

        // Dispatch to all listeners
         = Dispatcher::getInstance();
        ->dispatch(->getName(), );

        // Continue processing with possibly modified
        // ...
    }
}
?>
To react to this custom event, a plugin simply registers the event name in its getSubscribedEvents() method. The following plugin adds a timestamp to the data array whenever the custom event is fired.
<?php
namespace Joomla\Plugin\System\Timestamp;

use Joomla\CMS\Event\SubscriberInterface;
use Joomla\CMS\Plugin\CMSPlugin;

class Timestamp extends CMSPlugin implements SubscriberInterface
{
    public static function getSubscribedEvents()
    {
        return [\'onMyComponentProcess\' => \'addTimestamp\'];
    }

    public function addTimestamp(&)
    {
        [\'processed_at\'] = date(\'c\');
        return true;
    }
}
?>
When deciding whether to create a custom event, we should ask: does the functionality belong to the component itself, or should it be extensible? If the answer is the latter, a custom event is the cleanest solution. However, we must document the event clearly and provide a stable signature, because other developers will rely on it.
Custom events also benefit from Joomla’s debugging tools. When debug mode is enabled, the event dispatcher logs every dispatched event, which helps us verify that our custom event is being called and that listeners are executing in the expected order.
Debugging plugin events can be tricky because the dispatcher runs silently unless we enable Joomla’s debug mode. By turning on System > Global Configuration > Debug Settings > Debug System, Joomla writes a detailed log of every event that is fired, including the list of plugins that responded.
Common pitfalls include misspelling the event name, forgetting to return true from the handler, or setting the wrong plugin ordering. When a plugin does not fire, the first step is to check the debug log for the event name and verify that the plugin is enabled and ordered correctly.
Another useful tool is the Joomla Debug Bar, which appears at the bottom of the page when debug mode is active. It shows a timeline of events, the execution time for each plugin, and any errors that occurred. This visual aid helps us spot performance bottlenecks caused by heavy plugins.
For isolated testing, we can create a simple test component that dispatches a known event and then enable only the plugin we want to examine. This approach eliminates interference from other plugins and makes it easier to reproduce the issue. Remember to clear the cache after each test, as Joomla may cache the plugin list.
Finally, always keep an eye on the PHP error log. If a plugin throws an exception, the dispatcher will catch it and continue, but the error will be recorded in the server log. Using try / catch blocks inside the plugin can help us log more detailed information, especially when we are working with external APIs.
What is the difference between Joomla plugin events and WordPress hooks? Joomla events are objects that can carry data and be stopped, while WordPress hooks are simple function calls. Joomla’s SubscriberInterface provides a clear mapping of events to methods, whereas WordPress relies on add_action and add_filter with priority numbers. Additionally, Joomla events are part of a larger MVC framework, which means they integrate with the component‑model‑view architecture, while WordPress hooks are more procedural.
How many plugin event groups does Joomla have? Joomla categorises events into several groups: system/application, content, user/authentication, installer/extension, module/editor, finder, workflow, and mail. Each group contains dozens of specific events, giving developers fine‑grained control over almost every stage of the request life‑cycle.
Can we create custom plugin events in Joomla? Yes. By using the dispatcher’s dispatch() method we can fire any event name we choose. Other plugins can then subscribe to that name via SubscriberInterface. This extensibility is one of Joomla’s strengths and allows third‑party extensions to augment core or custom components without modifying their source code.
Which events fire on every page load? The core system events such as onAfterInitialise, onAfterRoute, onBeforeRender, onBeforeCompileHead, onAfterRender, and onBeforeRespond are triggered on every request, regardless of the component that handles the output.
What is the correct way to stop event propagation? Inside an event handler we can call ->stopPropagation();. After this call, the dispatcher will not invoke any further listeners for that event. This technique is useful when a plugin determines that the request should be aborted or when a later plugin would produce duplicate output.
By mastering the full set of Joomla plugin events we can build extensions that are both powerful and maintainable. The examples, tables, and debugging tips above give us a solid foundation for creating reliable plugins that work across Joomla 4 and Joomla 5. For more in‑depth tutorials, explore the Joomla 4 tutorial and the security scanner resources.