Physical Address
304 North Cardinal St.
Dorchester Center, MA 02124
Physical Address
304 North Cardinal St.
Dorchester Center, MA 02124
Joomla language packs are compressed archives that contain a collection of .ini files. These files map constant identifiers to translated strings for a specific language. The pack includes separate folders for the site (language) and the administrator (administrator/language) so that both front‑end and back‑end interfaces can be localized.
Each language pack follows the naming convention xx-XX (for example, fr-FR for French). Inside the archive you will find files such as fr-FR.ini and fr-FR.sys.ini. The .sys.ini file contains system messages, while the regular .ini file holds most of the user‑facing text.
Because Joomla is built on a language‑agnostic core, the same pack works across all Joomla versions, provided the version of the pack matches the Joomla release. Joomla 5 introduces a few new core strings, so we recommend using the latest Joomla 5 language packs for optimal coverage.
Joomla stores content in a single database but tags each article, category, and menu item with a language code. When a visitor accesses the site, Joomla reads the language code from the URL or the browser’s Accept‑Language header and serves the matching content.
The Language Filter plugin intercepts the request, determines the appropriate language, and rewrites URLs to include the language prefix (e.g., /en/ or /de/). This plugin also activates language fallback, which displays the default language when a translation is missing.
Behind the scenes Joomla uses the JLanguage class to load the appropriate .ini files. The class caches the loaded strings, which means that after the first request the language files are read from the cache, improving performance.
Joomla’s official translation team maintains packs for more than 70 languages, ranging from widely spoken languages like Spanish and Chinese to regional languages such as Basque and Catalan. The translation status for each language is displayed on the official Joomla 5 language pack downloads, indicating the percentage of core strings that have been translated.
Some languages may be marked as “complete,” meaning 100 % of core strings are translated, while others are “partial” and rely on fallback to the default English strings. Third‑party extensions often ship their own language packs (see our roundup of the best Joomla multilingual extensions), which may have a different coverage level.
When selecting a language pack, verify that the version matches your Joomla core (e.g., Joomla 5.0) and that the translation status meets your site’s quality requirements. In many cases you can improve a partial pack by creating overrides for the missing strings.
From the administrator dashboard, navigate to Extensions → Manage → Install. In the Upload Package File tab, drag the language pack ZIP file or click Choose File to select it from your computer. Joomla validates the package and, if it contains a valid language folder, it copies the files to language/xx-XX and administrator/language/xx-XX.
After the upload completes, go to Extensions → Language(s) → Installed. You will see the newly installed language listed under both “Site” and “Administrator.” Click the green check‑mark to enable the language if it is not already active.
Finally, clear the cache via System → Clear Cache to ensure the new strings are loaded immediately. This method works for single‑language installations and is the quickest way to add a new language to a live site.
Download the language pack from the official Joomla website. The file will be named something like joomla_5.0.0_XX-XX.zip. Extract the archive on your local machine; you will see two folders: language/XX-XX and administrator/language/XX-XX.
Using FTP or SFTP, upload the XX-XX folder to the Joomla root’s language directory, preserving the folder name. Then upload the administrator folder to administrator/language. Ensure the file permissions are set to 644 for files and 755 for directories.
Log into the Joomla backend, go to Extensions → Language(s) → Installed, and verify that the language appears in the list. If it does not, click the Refresh button in the top‑right corner to force Joomla to rescan the language directories.
The Joomla command‑line interface (CLI) provides a fast, scriptable way to install language packs, especially on staging or automated deployment environments. First, place the ZIP file on the server, for example /var/www/html/tmp/ja-JP.zip.
Run the following command from the Joomla root directory:
php cli/extension.php install /tmp/ja-JP.zipThe CLI will unpack the archive, copy the files to the appropriate language directories, and register the language in the database. After the command finishes, you can verify the installation with:
php cli/language.php listUsing the CLI eliminates the need for a browser session and is ideal for continuous‑integration pipelines.
To change the default language that visitors see, go to System → Global Configuration and click the Site tab. Locate the Default Language dropdown and select the language you installed, for example ja-JP – Japanese. Save the configuration.
Joomla will now use this language for all pages that do not have a specific language association. The language prefix will be added to URLs automatically if the Language Filter plugin is enabled.
Remember to clear the site cache after changing the default language, otherwise cached pages may still display the previous language strings.
In the same Global Configuration window, switch to the Administrator tab. Choose the desired language from the Default Administrator Language dropdown. This setting controls the language of the backend interface for all users who have not set a personal language preference.
Individual users can override this setting by editing their profile under Users → Manage → [Your User] → Edit and selecting a personal language. The system will store the preference in the #__users table.
After saving, log out and back in to see the backend interface rendered in the new language.
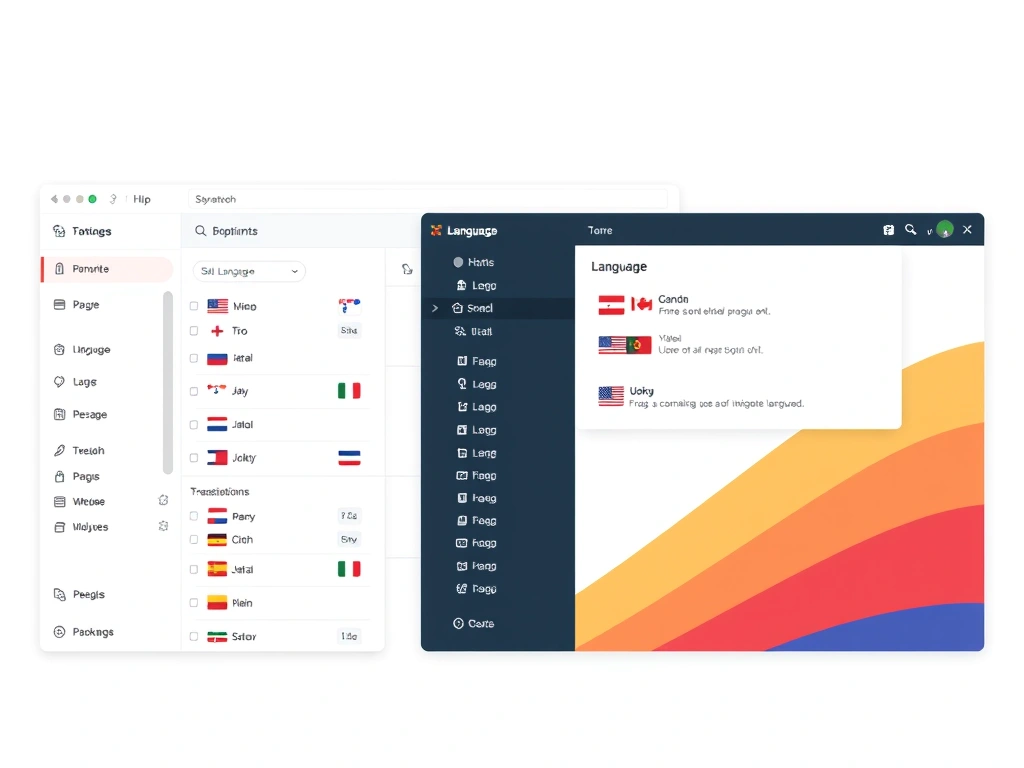
Joomla provides several options for how languages are displayed to visitors. In Extensions → Plugins → System – Language Filter, you can enable Automatic Language Change based on the browser’s language header, or you can force users to select a language manually via a language switcher module.
The Debug option in the same plugin displays the current language code on the front‑end, which is useful for testing. You can also enable Content Language Fallback so that when a translation is missing, Joomla shows the default language instead of a blank page.
Finally, adjust the Site Language Switcher module position and style to match your template. The module automatically lists all enabled site languages and links to the appropriate language‑prefixed URLs.

The Language Filter plugin is the core of Joomla’s multilingual functionality. Navigate to Extensions → Plugins and search for “Language Filter.” Click the plugin name, set Enabled to Yes, and save.
In the plugin settings, enable Automatic Language Change if you want Joomla to detect the visitor’s language automatically. You may also enable SEO Friendly URLs to prepend the language code to the URL structure.
After enabling the plugin, test the front‑end by appending a language prefix (e.g., /en/) to the URL. The site should display the content in the corresponding language, provided that language has been created and associated.
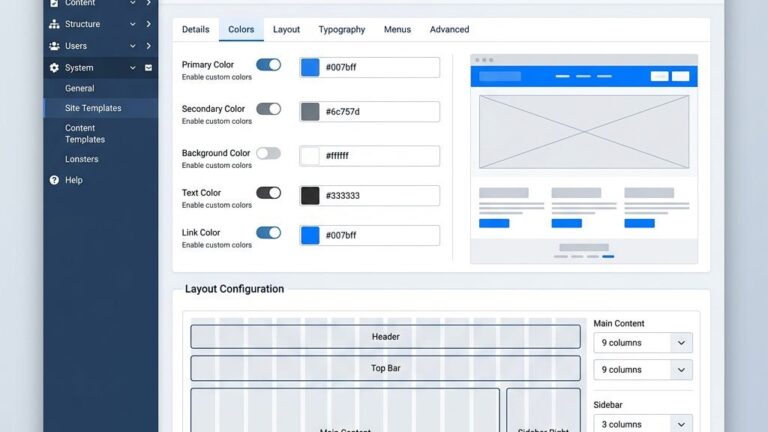
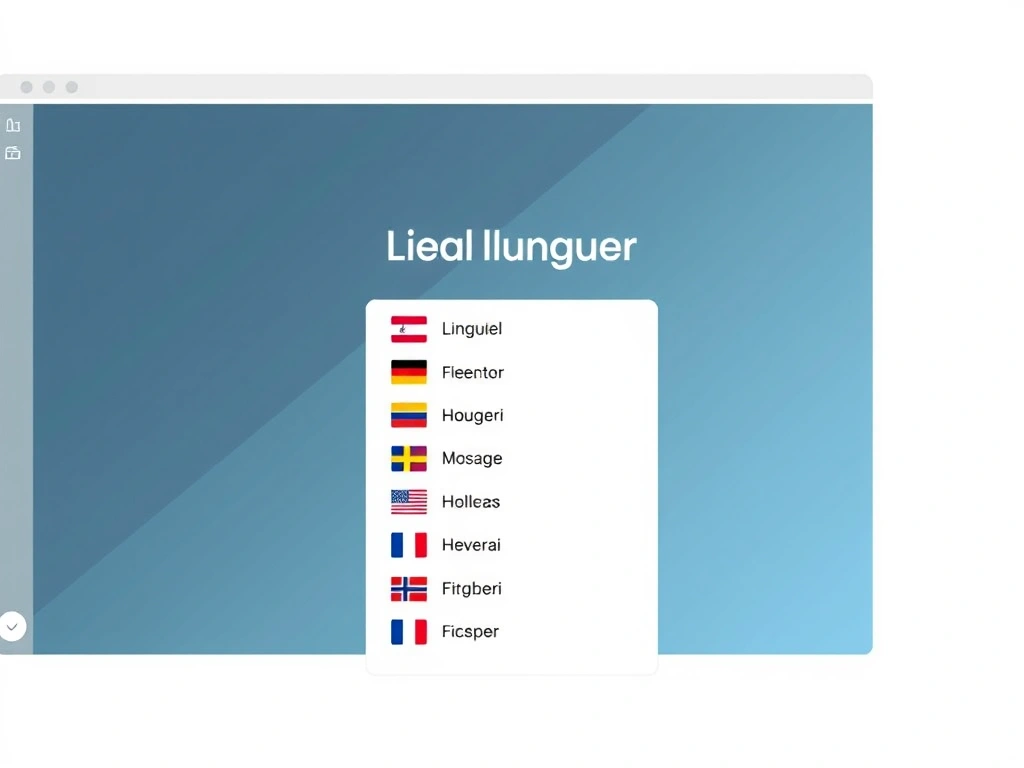
Content languages define which languages are available for articles, categories, and menus. Go to Extensions → Language(s) → Content Languages and click New. Fill in the fields: Title, Title Native, Language Tag (e.g., ja-JP), and Image (a flag icon).
Set the Published status to Yes and choose the Direction (LTR or RTL). Save the record. Repeat this process for each language you plan to support.
These content language entries are used when creating multilingual menus and when assigning a language to an article. Without a corresponding content language, Joomla will not allow you to assign that language to content.
Each language needs its own main menu. Create a new menu for each language via Menus → Manage → New. Name the menu appropriately (e.g., “Main Menu – Japanese”). Then, create a menu item of type Home and set its Language to the corresponding language tag.
After creating the home menu items, go to Menus → Menu Manager → [Your Menu] → New to add additional items such as “About,” “Contact,” and “Blog.” Assign each item the appropriate language and link it to the correct article or category.
For modules, use the Module Assignment dropdown to select the language(s) where the module should appear. For example, a language switcher module should be assigned to “All” languages, while a promotional banner may be assigned only to the English menu.
Language associations link equivalent content across different languages. When editing an article, click the Associations tab and select the corresponding article in each other language. This creates a bidirectional link stored in the #__associations table.
Associations are also available for categories, menu items, and modules. By establishing associations, Joomla can automatically redirect users to the appropriate language version when they switch languages using the language switcher.
After creating associations, test the switcher on the front‑end. When you click a flag, Joomla should load the associated article or menu item in the selected language, preserving the page context.
If Joomla reports “Package could not be installed,” first verify that the ZIP file is not corrupted. Re‑download the pack from the official site and compare the file size with the listed size. Also, ensure the server’s PHP upload_max_filesize and post_max_size settings are large enough to accept the file.
Another frequent cause is insufficient file permissions. The language and administrator/language directories must be writable by the web server user (typically www-data or apache). Set the permissions to 755 for directories and 644 for files, then retry the installation.
Finally, check the Joomla error log (logs/error.php) for any PHP warnings that may indicate a missing dependency or a conflict with a third‑party extension. Resolving the underlying issue often allows the language pack to install successfully.
When a language pack does not contain a translation for a specific string, Joomla falls back to the default language (usually English). This can result in a mixed‑language page where most text is localized but a few labels remain in English.
To address missing translations, create a language override. Go to Extensions → Language(s) → Overrides, select the appropriate language, and click New. Enter the constant name (e.g., COM_CONTENT_READ_MORE) and provide the translated text.
Overrides are stored in the language/xx-XX/xx-XX.override.ini file, which takes precedence over the core language files. This method lets you fill gaps without modifying the original language pack, preserving upgrade compatibility.
Right‑to‑left (RTL) languages such as Arabic and Hebrew require additional CSS handling. Joomla automatically sets the dir attribute on the html tag based on the language’s direction, but your template must support RTL styles (see our guide on Joomla template overrides).
If the layout appears broken, add a custom stylesheet that overrides the default left‑to‑right rules. For example, create templates/your_template/css/rtl.css and include it in the template’s index.php file with a conditional check:
<?php
if ($this->language->isRTL()) {
    $this->addStyleSheet($this->baseurl . '/templates/your_template/css/rtl.css');
}
?>
After adding the RTL stylesheet, clear the cache and reload the site. The layout should now align correctly for RTL languages.
Overrides are a powerful way to customize translations without altering the core language files. In the backend, navigate to Extensions → Language(s) → Overrides and select the language you want to edit. Use the Search field to locate a constant, then click New to create a custom entry.
The override file is stored in language/xx-XX/xx-XX.override.ini. Joomla merges this file with the original language file at runtime, giving priority to the override. This approach ensures that future language pack updates will not overwrite your custom translations.
For large‑scale customizations, you can create a separate override folder and include it via the JLanguage class. Place your custom .ini files in language/overrides/xx-XX and add the following line to templates/your_template/index.php:
$this->language->load('overrides', JPATH_SITE, null, true);This method is useful for site‑wide branding changes that affect many strings.
Many extensions ship their own language packs, typically located in administrator/components/com_example/language/xx-XX. To install these packs, use the same process as core language packs: upload the ZIP via the Extension Manager or copy the files manually to the appropriate language directories.
After installation, verify that the extension’s language files are loaded by checking the front‑end or back‑end interface. If you notice missing strings, create overrides for the extension’s constants using the same method described earlier.
When updating a third‑party extension, remember to also update its language pack. Some developers provide a combined update package that includes both the component and its translations. If not, download the latest language pack from the developer’s website and repeat the installation steps.

Joomla’s translation effort is community‑driven and coordinated through the Joomla! Translation Platform. To contribute, create an account, select the language you wish to improve, and start translating missing strings directly in the web interface.
When you submit translations, they are reviewed by language coordinators before being merged into the official language pack. Once approved, the updated pack becomes available for download and can be installed on any Joomla site.
Contributing not only improves the experience for users of your language but also ensures that future Joomla releases include up‑to‑date translations. It’s a straightforward way to give back to the community while keeping your own site’s language files current.
To install a language pack, first download the appropriate ZIP file from the Joomla website. In the administrator backend, go to Extensions → Manage → Install, upload the ZIP, and click Upload & Install. Joomla will extract the files and place them in the language and administrator/language directories. After installation, enable the language under Extensions → Language(s) → Installed and clear the cache to make the new strings available.
Joomla’s official translation team maintains language packs for more than 70 languages. These include major world languages such as English, Spanish, French, Chinese, and Arabic, as well as regional languages like Basque, Catalan, and Welsh. The exact number varies as new translations are added and existing ones are updated. Each language pack indicates its translation completeness, ranging from partial to 100 % coverage of core strings.
Yes, you can install several language packs in a single session. In the Extension Manager, use the Upload Multiple Files option to select several ZIP files, then click Upload & Install. Joomla will process each package sequentially. After the installations finish, verify that each language appears in the Installed Languages list and enable them as needed. This approach is useful when setting up a multilingual site with many languages.
Manual installation involves extracting the language pack ZIP on your computer. You will find two folders: language/xx-XX and administrator/language/xx-XX. Using FTP or SFTP, upload the xx-XX folder to the Joomla root’s language directory and the administrator folder to administrator/language. Ensure file permissions are set correctly (755 for directories, 644 for files). Finally, log into the backend, go to Extensions → Language(s) → Installed, and confirm the language is listed and enabled.
The site language controls the text displayed to visitors on the front‑end of the website, while the administrator language governs the back‑end interface used by site managers. Each language pack contains separate files for the site (language/xx-XX) and the administrator (administrator/language/xx-XX). You can set different default languages for each area in Global Configuration, allowing, for example, an English backend with a multilingual front‑end.
Language overrides are created from the backend by navigating to Extensions → Language(s) → Overrides. Choose the language you wish to edit, click New, and enter the constant name (e.g., COM_CONTACT_CONTACT_EMAIL_LABEL) and the translated text. Save the override, and Joomla will store it in language/xx-XX/xx-XX.override.ini. Overrides take precedence over the original language files, allowing you to customize or fill gaps without modifying core packs.