Physical Address
304 North Cardinal St.
Dorchester Center, MA 02124
Physical Address
304 North Cardinal St.
Dorchester Center, MA 02124
Migrating a Joomla website can feel like a daunting project, but with a clear plan and the right tools we can complete the process without losing data or hurting SEO. In this guide we walk through every stage—from preparing the current environment to testing the live site after the move. Whether you prefer the one‑click power of Akeeba Backup or a hands‑on manual approach, the steps are laid out in plain language and include the exact file paths, database settings, and server configurations you’ll need.
Performance, cost, support, security, and scaling are the most common drivers behind a hosting change. If your current provider is delivering slow page‑load times, you may notice higher bounce rates and lower search‑engine rankings. Upgrading to a server with more CPU cores, SSD storage, or a newer PHP version can give the site the speed boost it needs.
Budget constraints also push owners to look for alternatives. Many shared‑hosting plans charge per‑resource usage, and as traffic grows the monthly bill can become unsustainable. Switching to a provider that offers a more predictable pricing model—or a managed Joomla service—helps keep expenses under control.
Finally, security and technical support are essential for any live site. If your host does not provide timely updates, firewalls, or a reliable backup solution, you expose your Joomla installation to potential exploits. A host that specializes in Joomla often offers built‑in security patches and a support team that understands the CMS’s quirks, making the migration a worthwhile investment.
Before we touch a single file, we record the exact configuration of the existing server. Log into the Joomla administrator panel, navigate to System → System Information → PHP Information, and note the PHP version, memory limit, and enabled extensions (e.g., mysqli, gd, curl). Open phpMyAdmin on the current host, select the Joomla database, and capture the MySQL version.
Next, list the server specifications: CPU cores, RAM, disk type (HDD vs SSD), and any special modules such as mod_security or mod_rewrite. Take screenshots of the configuration.php file located in the Joomla root (typically /public_html/configuration.php). This file contains the $host, $user, $password, and $db variables that we will need to adjust on the new server.
Finally, create a simple spreadsheet that includes the list of installed extensions, their versions, and any custom plugins. This inventory helps us verify that every component is present after the migration and makes it easier to troubleshoot missing functionality later.
The new host must meet Joomla’s minimum requirements for the version you are running. If you are on Joomla 4.x, the server should support PHP 7.4 or later and MySQL 5.6+ (or MariaDB 10.2+). Check the host’s control panel or contact support to confirm the PHP version, MySQL version, and whether the mod_rewrite module is enabled for clean URLs.
In addition, verify that the new environment provides the same directory structure. Joomla expects a writable tmp/ folder (e.g., /public_html/tmp/) and a logs/ folder for error logging. Ensure that file permissions can be set to 755 for directories and 644 for files, and that the user under which the web server runs has write access to these locations.
If you plan to use a CDN or SSL certificate, confirm that the host supports Let’s Encrypt or allows you to upload your own certificate. Having these pieces in place before the migration prevents last‑minute roadblocks.
DNS TTL (Time‑to‑Live) determines how long resolvers cache your domain’s IP address. To minimize downtime, we lower the TTL to a short interval—typically 300 seconds (5 minutes)—at least 24 hours before the switch. In your current DNS manager, edit the A record for @ and www and set the TTL field to 300.
The reduced TTL ensures that when we point the domain to the new server’s IP address, most visitors will receive the updated address quickly. Keep the short TTL in place until you have confirmed that the new site is functioning correctly, then raise it back to a longer value (e.g., 86400 seconds) to reduce DNS query load.
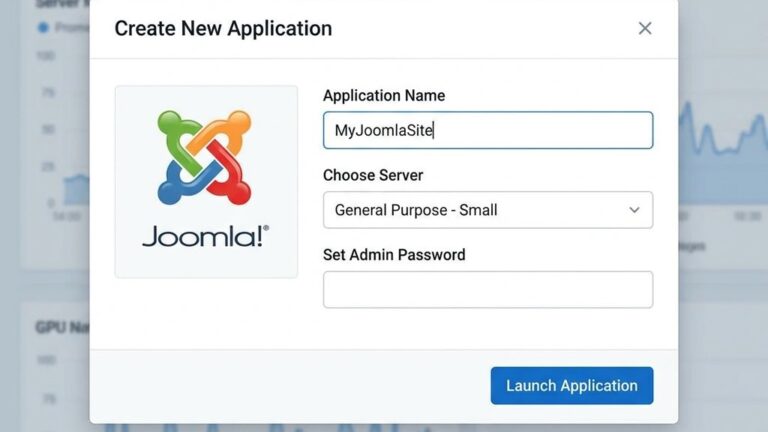
We start by installing the Akeeba Backup extension from the Joomla Extension Directory. In the administrator backend, go to Extensions → Manage → Install, upload the Akeeba package, and click Install. Once installed, open Components → Akeeba Backup and run the Configuration Wizard.
During configuration, set the Backup Profile to “Full Site” and enable the Auto‑Delete Old Backups option to keep the server tidy. In the Engine Settings, choose “DirectFTP” as the storage method if you want the backup to be stored on the new host directly; otherwise, select “Local” and download the archive later.
Make sure the Temporary Directory points to the writable tmp/ folder (/public_html/tmp/). Verify that the Maximum Execution Time is high enough (e.g., 1800 seconds) to avoid timeouts on large sites. Save the configuration and proceed to the next step.
From the Akeeba Dashboard, click Backup Now. In the dialog, confirm that Database and Site Files are both selected. Choose the Backup Format as “JPA” (Akeeba’s native archive) and enable Compression (ZIP) to reduce download size.
Click Start Backup and monitor the progress bar. Akeeba will archive the entire Joomla root, including configuration.php, administrator/, templates/, media/, and the tmp/ folder. When the process finishes, a backup entry appears in the Manage Backups list with a filename like site_2024-03-15_01.jpa.
If you opted for DirectFTP, the backup will be uploaded automatically to a folder you specify on the new host. Otherwise, click the Download button to retrieve the .jpa file and the accompanying Kickstart script (kickstart.php).
Assuming we used the local storage option, we now have two files: site_2024-03-15_01.jpa and kickstart.php. Open an FTP client such as FileZilla, connect to the new host using the credentials provided by the hosting provider, and navigate to the web root (often /public_html/).
Upload both files to the root directory. Ensure that the upload completes without errors; you can verify the file sizes in the FTP client’s transfer queue. After the upload, set the permissions of kickstart.php to 644 and the .jpa file to 644 as well, allowing the web server to read them.
Open a web browser and navigate to https://yournewdomain.com/kickstart.php. The Kickstart wizard loads and detects the uploaded .jpa archive. Click Next to begin the extraction process.
During extraction, Kickstart asks where to extract the files. Choose the current directory (/public_html/) and confirm that the Overwrite Existing Files option is enabled. The script will unpack the archive, recreating the exact folder structure of the original site, including administrator/, templates/, media/, and tmp/.
When extraction finishes, Kickstart presents a Post‑Extraction screen with a link to the Installation Wizard (installation/index.php). Click the link to continue.
The Akeeba Restoration Wizard asks for database connection details. Enter the MySQL host, database name, username, and password that you created on the new server (these are the values you will later place in configuration.php).
After testing the connection, click Next. The wizard will import the database dump, recreate tables, and adjust any configuration values automatically. When the process completes, you will see a success message and a button to Remove Installation Folder. Click it to delete the installation/ directory, which is a security requirement.
Finally, open configuration.php in a text editor (or via the host’s file manager) and verify that the $log_path and $tmp_path variables point to the correct locations on the new server (e.g., $log_path = '/home/username/public_html/logs';). Save any changes, and the site should be ready to serve traffic.
Log into phpMyAdmin on the current host, select the Joomla database, and click the Export tab. Choose the Custom export method to gain full control. In the Tables section, ensure all tables are selected. Set Output to “Save output to a file” and Compression to “gzipped”.
Scroll down to Object Creation Options and enable Add DROP TABLE / VIEW / PROCEDURE / FUNCTION / EVENT statement. This ensures that existing tables on the new server are removed before the import. In the SQL compatibility mode, select “None” to keep the dump as close to the original as possible.
Click Go to download a file named something like joomla_2024_03_15.sql.gz. Keep this file handy; we will import it on the new server later.
Open an FTP client (FileZilla, WinSCP, or Cyberduck) and connect to the current host. Navigate to the web root—usually public_html or www. Select all files and folders, including hidden files such as .htaccess, and drag them to a local folder on your computer.
The download may take several minutes for large sites. Verify that the local copy contains the core Joomla directories: administrator/, cache/, components/, images/, language/, libraries/, modules/, plugins/, templates/, tmp/, and the root file configuration.php.
If you encounter permission errors, switch the FTP client to Passive Mode or request the host’s support to grant read access to the entire directory tree.
On the new host, create a new MySQL database via the control panel (cPanel, Plesk, or a custom interface). Note the database name, username, password, and host (often localhost).
Next, configure the web root. If the host uses public_html, ensure that the folder is empty before uploading. Set the correct permissions: directories to 755 and files to 644. Create a writable tmp/ folder (/public_html/tmp/) and a logs/ folder (/public_html/logs/).
If the host provides a phpMyAdmin instance, open it and confirm that you can create tables in the newly created database.
Return to phpMyAdmin on the new host, select the empty database, and click Import. Click Choose File, locate the joomla_2024_03_15.sql.gz file you exported earlier, and leave the Compression option set to “gzip”.
Scroll to Partial Import and leave the default values unless the file exceeds the maximum upload size; in that case, split the dump using a tool like SQL Dump Splitter. Click Go. The import process may take several minutes, depending on the size of the database.
When the import finishes, you should see a “Your SQL query has been executed successfully” message. Verify that the tables are present and that the row count matches the source site.
Using the FTP client, connect to the new host and upload the entire Joomla file set you downloaded earlier into the web root (/public_html/). Overwrite any existing files.
After the upload, edit the configuration.php file on the new server. Update the following variables to match the new environment:
public $host = 'localhost';
public $user = 'newdbuser';
public $password = 'newdbpassword';
public $db = 'newdbname';
public $log_path = '/home/username/public_html/logs';
public $tmp_path = '/home/username/public_html/tmp';
If the new host uses a different directory structure, adjust the paths accordingly. Save the file and set its permission to 644.
Now you can visit https://yournewdomain.com in a browser. If the site loads correctly, the manual migration is complete. If you encounter errors, refer to the troubleshooting section below.
When the site files and database are verified on the new server, we point the domain to the new IP address. If your registrar allows direct A‑record editing, replace the existing A record for @ and www with the IP address provided by the new host.
If the host supplies its own nameservers, change the domain’s nameserver records to those values (e.g., ns1.newhost.com and ns2.newhost.com). Remember to keep the TTL low (as set earlier) so the change propagates quickly.
After updating, use a DNS lookup tool (e.g., dig or an online checker) to confirm that the domain resolves to the new IP.
Even with a low TTL, some resolvers may cache the old address for a few minutes. To verify that the new server is serving traffic, edit the hosts file on your local machine:
Add a line such as:
123.45.67.89 yourdomain.com www.yourdomain.comSave the file and clear your browser cache. Visiting the domain now forces your computer to use the new IP, letting you test the site before the global DNS update completes.
Once you have confirmed that the front‑end and back‑end work as expected, you can revert the hosts file and let the public DNS propagate. The process typically finishes within an hour, but in rare cases it may take up to 24 hours.
We start by logging into the Joomla administrator (https://yournewdomain.com/administrator). Verify that the login works and that the System → Clear Cache button functions. Browse the front‑end, checking the home page, article pages, and any custom components.
Test all forms—contact, newsletter sign‑up, and any e‑commerce checkout flows. Submit a test entry and confirm that the data appears in the database and that any email notifications are sent.
Check the Global Configuration panel for correct settings: SEO URLs, caching, and error reporting. Ensure that the System → Info page shows the expected PHP and MySQL versions.
Run a site crawl with a tool like Screaming Frog or Sitebulb to detect broken links, missing images, or duplicate content. Pay special attention to URLs that contain the old host’s subdirectory (e.g., /oldhost/) and set up 301 redirects if needed via the .htaccess file.
Log into Google Search Console, add the new property if it does not already exist, and submit an updated sitemap (sitemap.xml). Use the URL Inspection tool to request indexing of the homepage and a few key pages.
For performance, enable Joomla’s built‑in caching (System → Global Configuration → Cache) and test page load times with GTmetrix or WebPageTest. Compare the results with the pre‑migration benchmarks to confirm that the new host delivers the expected speed improvements.
A blank page often indicates a PHP fatal error. Enable error reporting temporarily by editing configuration.php and setting public $error_reporting = 'maximum';. Reload the site; the error message will reveal the problematic file or missing extension.
Common causes include mismatched PHP versions (e.g., a plugin requiring php_intl). If the error references an undefined function, install the missing PHP extension via the host’s control panel or contact support.
After fixing the issue, revert error_reporting to its original value (none or simple).
If the site shows “Database connection error”, double‑check the $host, $user, $password, and $db values in configuration.php. Ensure that the MySQL user has the GRANT ALL PRIVILEGES permission on the database.
Also verify that the MySQL server is reachable from the web server. Some hosts require the hostname to be a fully qualified domain name (e.g., mysql.newhost.com) instead of localhost. Test the connection with a simple PHP script:
connect_error ? $mysqli->connect_error : 'Connected';
?>
If the script reports an error, adjust the credentials accordingly.
When images appear as broken icons, the file paths stored in the database may still point to the old host or an outdated folder structure. Use phpMyAdmin to run a query that replaces the old URL with the new one:
UPDATE #__content SET introtext = REPLACE(introtext, 'http://oldhost.com/', 'https://newhost.com/');Also confirm that the images/ and media/ directories were fully transferred and retain the correct permissions (755). If a third‑party extension stores files outside the Joomla root, copy those directories manually.
Some extensions rely on specific PHP extensions or server settings. After migration, check the Extensions → Manage → Installed list for any items marked “Disabled”. Open the extension’s documentation to see required PHP modules (e.g., imagick for image manipulation).
If an extension fails to load, enable the needed PHP module via the host’s Select PHP Version or PHP Settings page. In cases where the extension is incompatible with the new PHP version, consider upgrading the extension to a newer release or contacting the developer for a patch.
The duration depends on site size, server speed, and the migration method. A small site (under 50 MB) can be moved in under an hour using Akeeba Backup. Larger sites (several gigabytes) may require several hours for database export, file transfer, and DNS propagation. Planning the steps and performing a test migration on a staging subdomain can help you estimate the exact timeline.
If you follow the checklist—creating a full backup, exporting the complete database, and verifying file integrity—no data should be lost. The only risk is accidental overwriting of files or truncating the database during import. Keeping a copy of the original backup on a local drive provides a safety net in case you need to roll back.
Yes, you can combine migration with an upgrade, but it adds complexity. The safest approach is to first migrate the site using the same Joomla version, verify that everything works, and then run the Joomla update process on the new host. This way you can isolate migration issues from upgrade issues.
No, extensions are part of the file set you copy to the new server. However, if an extension depends on a specific PHP module that is not enabled on the new host, you must install or enable that module. In rare cases, a proprietary extension may require re‑licensing on a new server; check the vendor’s policy.
Lower the DNS TTL ahead of time, perform the file and database copy while the old site remains live, and test the new installation on a temporary subdomain (e.g., test.yourdomain.com). When you are confident the new site works, switch the DNS records. Because the TTL is low, most visitors will be directed to the new server within minutes, resulting in minimal interruption.
Joomla 4.x runs on PHP 7.4‑8.2, but some extensions may only support a narrower range. After migration, enable the PHP version that matches the majority of your extensions. If a required extension is incompatible with the host’s default PHP, you can often select a different version in the control panel or request a custom PHP build from the host’s support team.
We hope this guide equips you with everything you need to migrate Joomla to a new host confidently. By following each step methodically, you’ll keep your site’s content, SEO equity, and visitor experience intact while enjoying the benefits of a better hosting environment.