Physical Address
304 North Cardinal St.
Dorchester Center, MA 02124
Physical Address
304 North Cardinal St.
Dorchester Center, MA 02124
Joomla Media Manager is the heart of our content workflow when we need to handle images, documents, and other assets. We rely on it daily to keep our site tidy and our pages visually appealing. In this guide we walk through every step, from uploading to organizing and editing, so that we can master the tool without hesitation.

The Media Manager serves as a centralized file browser inside the Joomla backend, allowing us to store and retrieve assets with ease. It acts like a digital filing cabinet, where each drawer represents a folder and each file is a document we can pull out when needed. By keeping everything in one place, we avoid the chaos of scattered uploads and broken links.
Beyond simple storage, the component offers thumbnail previews, MIME type detection, and quick access to image editing tools. These features let us verify that the right file is selected before we embed it in an article. The result is a smoother publishing experience and fewer surprises for our visitors.
When we think of the Media Manager, we can compare it to a well‑organized kitchen pantry: ingredients are sorted, labeled, and ready for use whenever a recipe calls for them. This analogy highlights how the tool reduces the time spent searching for the perfect image or document. Ultimately, it supports our goal of delivering high‑quality content efficiently.
Within the Joomla administrator interface, the Media Manager appears as a distinct component under the “Content” menu. We can launch it directly from the toolbar or via the article editor, making it a smooth part of our workflow. Its placement ensures that we never have to leave the backend to manage media files.
The component integrates with the global configuration, so any changes to upload limits or allowed extensions are reflected instantly. This tight coupling means that we maintain consistent rules across all extensions and modules that rely on media. It also simplifies troubleshooting because a single setting governs the entire system.
Contrast this with external file‑hosting services, where we must copy URLs and manage permissions separately. The Media Manager keeps everything under Joomla’s own access control, giving us a unified security model. This uniformity is especially valuable when multiple editors collaborate on the same site.
Joomla 4 introduced a modern, responsive layout for the Media Manager, featuring a grid view and improved drag‑and‑drop support. We appreciated the cleaner design, which made it easier to spot files on high‑resolution screens. The component also added native support for responsive images, a step forward for mobile optimization.
Joomla 5 builds on that foundation by adding bulk‑rename capabilities and a more powerful file‑type filter. The new version also includes a preview pane that shows image metadata such as dimensions and file size. These enhancements allow us to work faster and make more informed decisions about which assets to use.
While both versions share the same core concepts, Joomla 5’s interface feels more like a file explorer you would find on a desktop computer. This contrast helps us transition smoothly from local file management to web‑based handling. The upgrade path is straightforward, and the learning curve remains gentle for existing users.
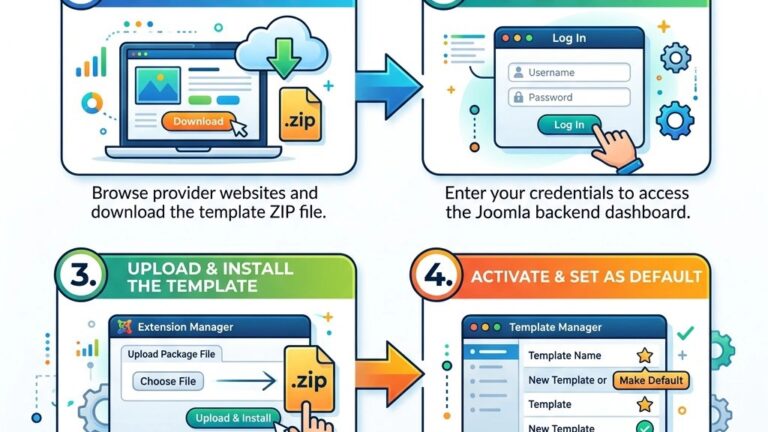
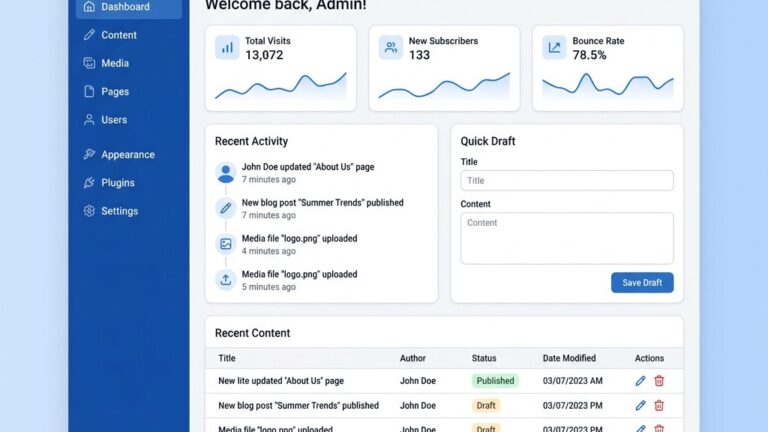
We begin by logging into the Joomla administrator dashboard, where the top menu structure bar guides us to every major area. From the “Content” dropdown we select “Media” to open the Media Manager component. The interface loads within the same window, preserving our session and menu structure history.
The sidebar on the left displays the folder tree, starting with the default /images/ directory. We can click any folder to reveal its contents in the main pane, and a breadcrumb trail at the top shows our current location. This visual cue helps us maintain orientation as we move deeper into nested subfolders.
Because the Media Manager is a core component, we never need to install additional extensions to access it. This built‑in availability saves us time and reduces the risk of compatibility issues. It also means that any user with the appropriate permissions can reach the file browser directly from the backend.
When we edit an article, the TinyMCE editor provides a “Insert Image” button that opens the Media Manager in a modal window. This inline access lets us select or upload an image without leaving the article context. The modal mirrors the full‑screen view, offering the same folder menu structure and preview features.
We can also drag a file from the Media Manager directly into the article body, and the editor automatically inserts the appropriate HTML tag. This drag‑and‑drop interaction feels natural, like placing a picture on a corkboard. It reduces the steps required to embed media, especially when working on long posts.
After inserting an image, the editor displays a small thumbnail with options to edit alt text, alignment, and caption. These settings are stored alongside the image reference, ensuring accessibility and SEO compliance. The smooth integration between the editor and the Media Manager simplifys our publishing workflow.
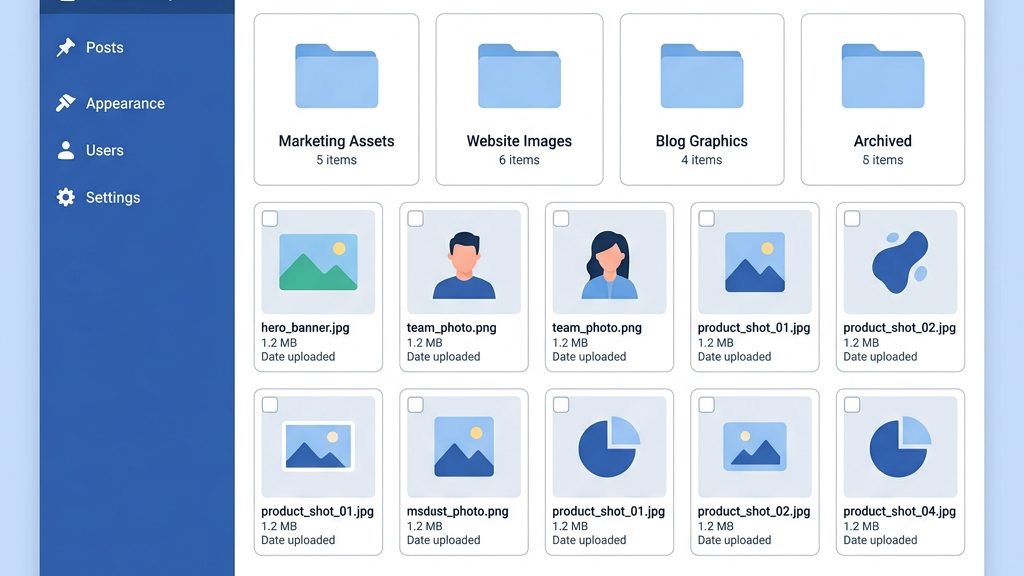
The Media Manager’s interface is divided into three main zones: the folder tree, the file grid, and the details pane. The folder tree on the left lets us go to the directory structure, while the grid in the center displays thumbnails and file names. The details pane on the right reveals metadata such as MIME type, size, and last modified date.
Above the grid we find a toolbar with actions like “Upload,” “Create Folder,” “Delete,” and “Rename.” Each button is accompanied by an icon that clarifies its purpose at a glance. The toolbar also includes a search field, allowing us to locate files quickly by name or extension.
At the bottom of the screen, a status bar reports the total number of items selected and the cumulative file size. This feedback helps us stay within the upload limits defined in the global configuration. By monitoring these metrics, we avoid unexpected errors when handling large batches of files.
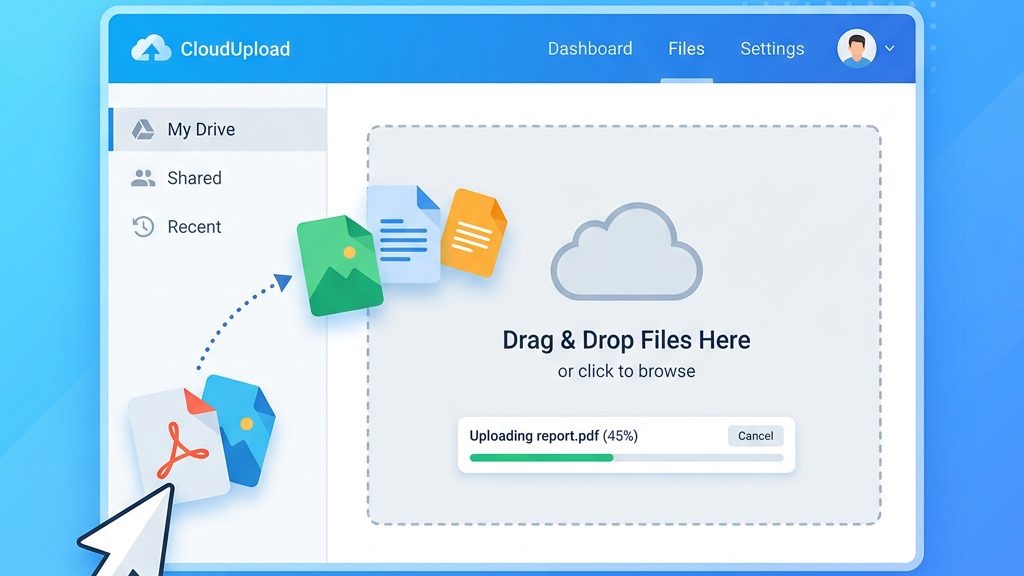
We can simply drag files from our desktop into the Media Manager’s grid area to start an upload. The interface shows a progress bar for each file, giving us visual confirmation that the transfer is in progress. This method works for images, PDFs, and any other allowed file type.
When we drop multiple files, the Media Manager groups them into a batch and processes them sequentially. The batch view includes a thumbnail preview for each item, allowing us to verify that the correct files were selected. If a file exceeds the size limit, the system highlights it in red and provides an error message.
Drag‑and‑drop is particularly useful when we need to upload a collection of product photos or event flyers. The tactile nature of the action feels like moving physical photographs onto a shelf. This intuitive approach reduces the friction of managing large media libraries.
The toolbar’s “Upload” button opens a file selector dialog where we can choose one or many files at once. This classic method complements drag‑and‑drop and is helpful when the browser blocks automatic file drops. After selecting files, we click “Start Upload” to begin the transfer.
For bulk uploads, we can select an entire folder from our computer, and the Media Manager will recreate the folder hierarchy inside the chosen Joomla directory. This feature preserves our organization scheme and saves time compared to creating each subfolder manually. The system respects the allowed extensions and MIME types defined in the configuration.
When uploading large images, we may want to enable the “Resize on Upload” option, which automatically scales the image to a preset maximum width. This helps us keep the file size within the limits and improves page load speed. The resized version is stored alongside the original, giving us flexibility for future use.
In the global configuration, we can set the maximum upload size for the Media Manager, typically expressed in megabytes. Adjusting this value allows us to accommodate high‑resolution images or large video files when needed. We must also consider server limits such as upload_max_filesize and post_max_size in PHP.
The allowed file extensions and MIME types are listed in the Media Options tab, where we can enable or disable specific formats. By restricting uploads to only the types we use, we reduce the risk of malicious files being introduced. This security measure is a simple yet effective safeguard.
When we need to expand the list of permitted extensions, we edit the configuration and add the new types, separating them with commas. The system immediately validates future uploads against this updated list. This flexibility ensures that our media workflow can evolve without compromising safety.
We can create new folders by clicking the “Create Folder” button and entering a name that reflects the content it will hold. The Media Manager then adds the folder to the tree, ready for us to upload files into it. Using descriptive names such as “blog‑images” or “product‑docs” helps us locate assets quickly.
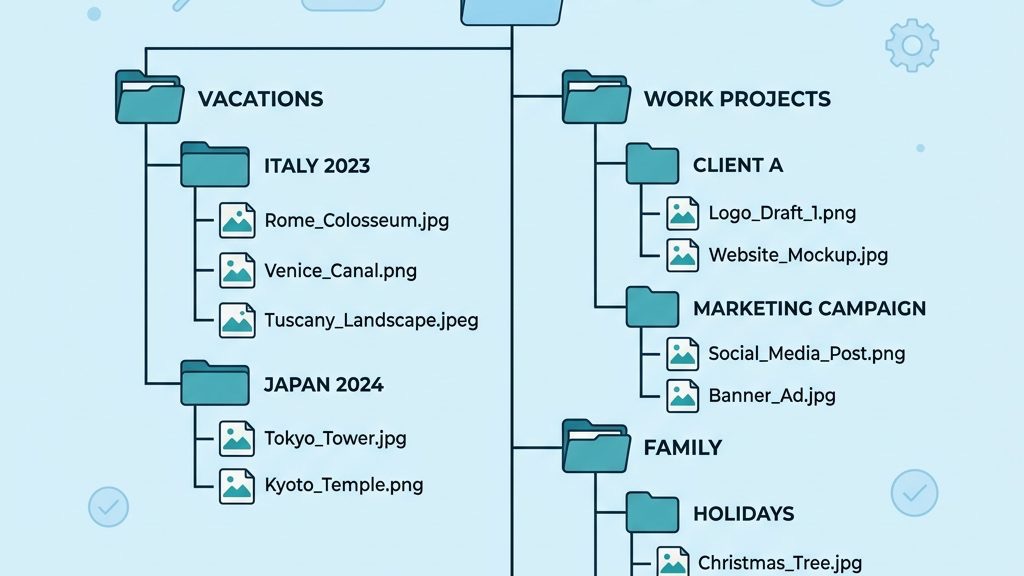
Subfolders can be nested to any depth, allowing us to mirror the structure of our website’s sections. For example, a “news” folder may contain “2024”, “2023”, and “2022” subfolders, each holding the images for that year. This hierarchical approach is akin to a well‑sorted filing cabinet, where each drawer contains smaller compartments.
We can also rename folders directly from the interface, which updates the path for all contained files automatically. Renaming is useful when a project’s scope changes or when we adopt a new naming convention. The system ensures that any references in articles are updated to reflect the new location.
To move a file, we select it and drag it onto the target folder in the tree, or we use the “Move” command from the toolbar. The file’s path changes instantly, and the Media Manager updates the thumbnail view to reflect its new location. This operation is reversible via the undo button, giving us confidence to reorganize.
Renaming a file is as simple as clicking the filename, typing a new name, and pressing Enter. The system validates the new name against allowed characters and extensions, preventing accidental errors. Maintaining consistent naming conventions improves SEO and makes it easier for editors to locate assets.
When we delete a file, the Media Manager moves it to a temporary trash folder for a short period before permanent removal. This safety net allows us to recover accidentally deleted images or documents. We can also permanently delete items from the trash to free up server space.
We recommend starting with a top‑level /images/ folder and then creating subfolders for each major content type, such as “articles”, “banners”, and “downloads”. Within those, further categorization by year or campaign keeps the hierarchy tidy. This systematic approach reduces the time spent searching for files.
File names should be short, descriptive, and use hyphens instead of spaces to avoid URL encoding issues. Including a date stamp or version number can be helpful for assets that are updated frequently. For example, “2024‑spring‑sale‑banner‑v2.jpg” conveys both content and chronology.
We also advise adding alt text and captions directly in the article editor, rather than relying on file names alone. This practice improves accessibility and search engine visibility. By combining clear folder organization with proper metadata, we achieve a harmonious media environment.
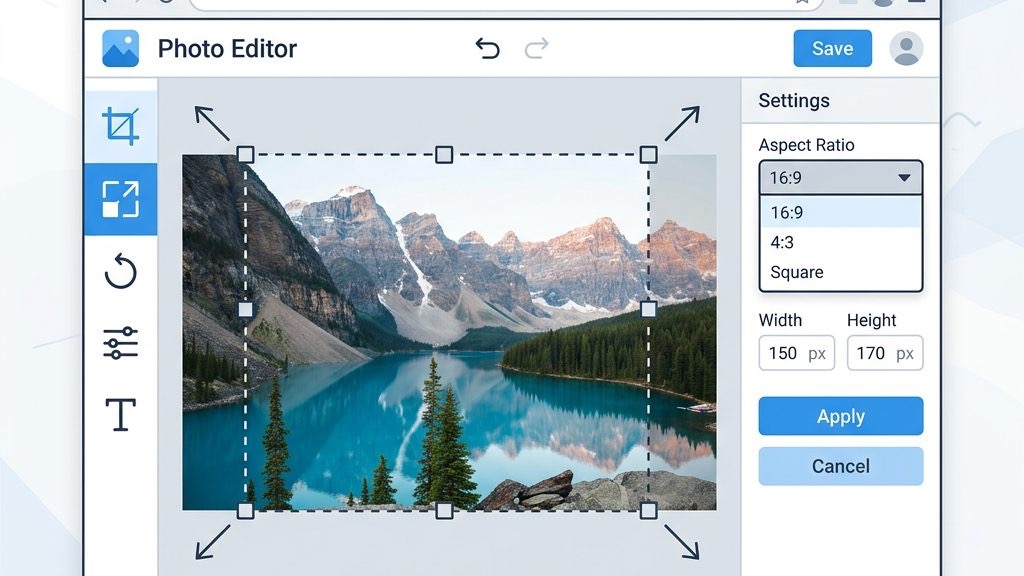
When we select an image and click the “Edit” button, the Media Manager opens a lightweight editor with cropping and resizing tools. The cropping tool lets us define a rectangular area, which we can adjust by dragging the corners. This feature is useful for creating thumbnails or focusing on a specific subject.
Resizing is performed by entering a target width or height, and the editor maintains the aspect ratio unless we specify otherwise. We can preview the result before applying the changes, ensuring the image retains clarity. The edited version replaces the original file, while a backup copy is stored in the same folder.
These editing capabilities are comparable to a small studio in the browser, allowing us to make quick adjustments without leaving Joomla. By handling simple edits on the spot, we avoid the overhead of external graphic software for routine tasks. The result is a faster turnaround for publishing visual content.
Within the editor we can change the image quality setting, which controls the compression level for JPEG files. Lower quality reduces file size but may introduce artifacts, while higher quality preserves detail at the cost of larger files. We balance these factors based on the intended use, such as web display versus print.
We can also convert images to different formats, for example from PNG to WebP, which often yields smaller files with comparable visual fidelity. The conversion tool respects the original transparency and color depth, ensuring the output looks as intended. Supporting modern formats helps us deliver faster loading times for visitors.
When we need to retain the original file, we can save the edited version under a new name or in a separate subfolder. This practice maintains a history of changes and prevents accidental loss of the source image. It also aligns with our version‑control strategy for media assets.
Simple tasks like cropping, resizing, or adjusting quality are well‑suited for the built‑in editor, especially when we need a quick fix. For complex manipulations such as layer blending or advanced color grading, we prefer external tools like Photoshop or GIMP. This contrast ensures we use the right instrument for each job.
We also consider the final output format; if the image will be used in a responsive layout, we may generate multiple sizes in an external program and then upload them as a set. The Media Manager can then serve the appropriate version based on device resolution. This workflow combines the strengths of both internal and external editing.
By establishing clear guidelines on when to use each method, we keep our media workflow efficient and our site performance optimal. The decision matrix is simple: quick edits in Joomla, detailed work elsewhere. This approach prevents unnecessary steps and keeps our content pipeline flowing smoothly.
In the Joomla Global Configuration, the Media tab lets us define default paths, upload limits, and thumbnail dimensions. These settings apply to every user who accesses the Media Manager, ensuring a consistent environment. Adjusting them can improve performance and align the system with our hosting constraints.
We can also enable or disable the “Automatic Thumbnail Generation” feature, which creates smaller versions of images for faster browsing. Turning it off may be beneficial when storage space is limited, but it can slow down the interface for large libraries. The choice depends on the balance between speed and resource usage.
Another option is to set a default folder for new uploads, which helps us keep the root /images/ directory clean. By directing uploads to a specific subfolder, we maintain order from the moment a file enters the system. This proactive measure reduces the need for later reorganization.
We define the list of permitted extensions in the Media Options, separating each with a comma. The system cross‑checks the file’s MIME type to ensure it matches the declared extension, providing an extra layer of validation. This dual check guards against files that might masquerade as harmless images.
Common allowed extensions include jpg, png, gif, pdf, and docx, while disallowed types such as executable files are automatically blocked. By limiting the set to only what we need, we reduce the attack surface of our site. This practice is a simple yet effective security measure.
When a new file type is required, we add it to the list and test the upload to confirm the MIME type is recognized. The Media Manager will then accept files of that type, provided they also meet the size constraints. This flexibility allows us to adapt to evolving content needs without compromising safety.
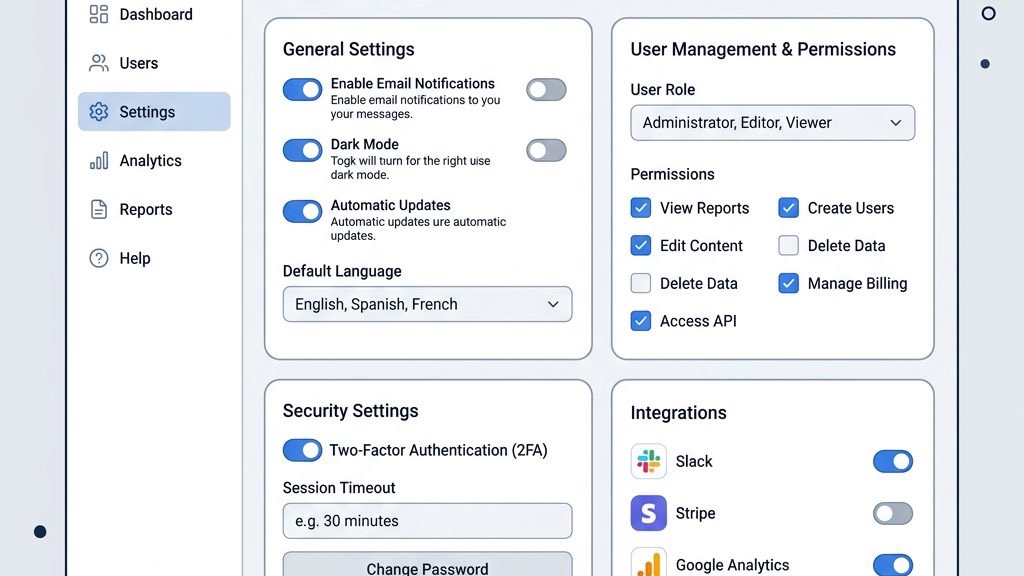
Access to the Media Manager is controlled through Joomla’s ACL (Access Control List), where we assign permissions to user groups such as “Administrator”, “Editor”, and “Author”. Each group can be granted rights to create, edit, delete, or upload files, giving us granular control over who can modify media. This hierarchy mirrors the way we manage article permissions.
We can also restrict upload capabilities to specific folders, ensuring that only trusted users can place files in critical directories like /images/. This folder‑level permission prevents accidental overwriting of essential assets. By combining group and folder permissions, we create a strong security model.
When a user encounters a permission error, the Media Manager displays a clear message indicating the missing rights. We can then adjust the ACL settings in the User Manager to resolve the issue. This feedback loop helps us maintain a smooth workflow for all contributors.
One frequent error is “File exceeds maximum size”, which occurs when the uploaded file is larger than the limit set in the global configuration. We can resolve this by increasing the upload_max_filesize and post_max_size values in the server’s php.ini file, then updating the Media Manager’s upload limit accordingly. After making these changes, we clear the cache to ensure the new settings take effect.
Another common issue is a timeout during large batch uploads, often caused by server execution time limits. We can address this by raising the max_execution_time directive or by uploading files in smaller groups. Splitting the upload reduces the load on the server and minimizes the chance of interruption.
If the error persists, we check the server error logs for clues such as permission denied messages or insufficient disk space. Resolving the underlying server condition typically eliminates the upload problem. Maintaining adequate disk space is a preventive measure that keeps the Media Manager running smoothly.
When a user cannot delete or move a file, the most likely cause is a mismatch between the file’s ownership on the server and the Joomla user’s permissions. We can correct this by adjusting the file’s ownership to the web server’s user, often using chown commands via SSH. Proper ownership ensures that Joomla can manage the file without encountering “permission denied” errors.
We also verify that the folder permissions are set to 755 for directories and 644 for files, which allows Joomla to read and write as needed while keeping the system secure. Changing permissions incorrectly can expose the site to risk, so we follow the principle of least privilege. Regular audits of folder permissions help us stay ahead of potential issues.
In cases where the ACL settings are misconfigured, we review the user group permissions in the Joomla backend and adjust them to grant the necessary rights. The Media Manager’s error messages often indicate which permission is missing, guiding us to the correct ACL entry. By keeping the ACL tidy, we prevent future access problems.
If we attempt to upload a file with an extension not listed in the allowed types, the Media Manager blocks the upload and displays a warning. To resolve this, we add the required extension to the Media Options list and ensure the corresponding MIME type is recognized by the server. This adjustment enables the upload while maintaining security.
Sometimes the server reports a MIME type mismatch, even though the file extension is permitted. This can happen when the file’s header is corrupted or when the server’s MIME database is outdated. Re‑encoding the file with a reliable tool often fixes the mismatch, allowing the upload to proceed.
For persistent issues, we consult the Joomla documentation and community forums, which provide troubleshooting steps for specific file types. The official docs at Joomla official media docs offer detailed guidance. Leveraging these resources helps us resolve obscure errors quickly.
The Media Manager is Joomla’s built‑in component for handling images, documents, and other digital assets. It provides a file browser, upload tools, and basic image editing capabilities directly within the backend. By centralizing media, it simplifies the process of adding and managing content across the site.
We can upload any file whose extension is listed in the Media Options, typically including jpg, png, gif, pdf, docx, and svg. The system also checks the MIME type to ensure the file matches its declared format. Additional types can be added by editing the allowed extensions list.
We increase the limit by editing the Global Configuration’s Media tab and raising the “Maximum Upload Size” value. We must also adjust the server’s PHP settings, specifically upload_max_filesize and post_max_size, to match the new limit. After saving the changes, we clear the Joomla cache to apply the new settings.
Yes, the Media Manager includes a lightweight editor that allows us to crop, resize, and adjust image quality without leaving the backend. These tools are ideal for quick adjustments such as creating thumbnails or optimizing file size. For more complex edits, we recommend using external graphic software and then re‑uploading the final image.
All uploaded media are stored under the /images/ directory in the Joomla installation root, unless a different default folder is configured. Subfolders can be created within this directory to organize assets by type, project, or date. The path is reflected in the URL used by articles and modules when displaying the media.