Physical Address
304 North Cardinal St.
Dorchester Center, MA 02124
Physical Address
304 North Cardinal St.
Dorchester Center, MA 02124
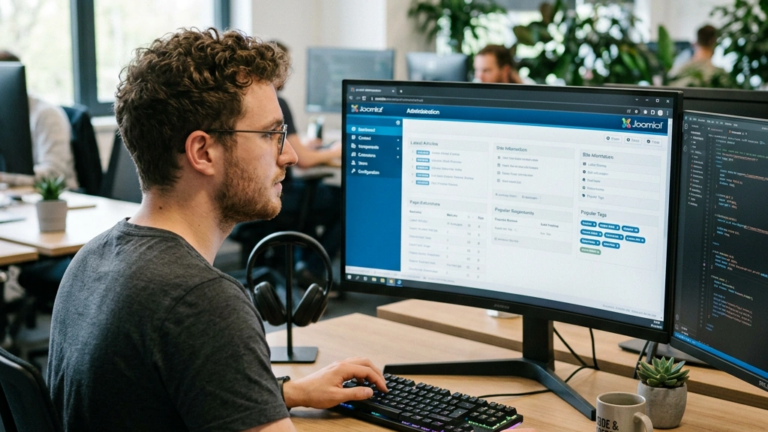
joomla 4 tutorial is the compass that will steer us through the fresh terrain of Joomla 4, and we’ll walk you through every turn, from the revamped admin panel to the sleek Cassiopeia template. In this guide we adopt a first‑person plural voice, because building a site is a team sport and we want you to feel the camaraderie of a shared journey.

The admin panel now feels like a freshly painted studio, with a clean layout that reduces visual clutter. We notice that the top navigation bar has been reorganized into logical groups, allowing us to locate settings with the ease of a well‑marked map. The new guided tours act as friendly mentors, popping up at just the right moment to explain each feature.
Behind the scenes, the interface leans on MVC (Model‑View‑Controller) architecture, which separates data handling from presentation, making custom development more predictable. This separation is akin to a playwright assigning distinct roles to actors, ensuring each line lands where it should. Moreover, the TinyMCE editor has been upgraded, offering a richer palette of formatting tools that feel like a painter’s brush set.
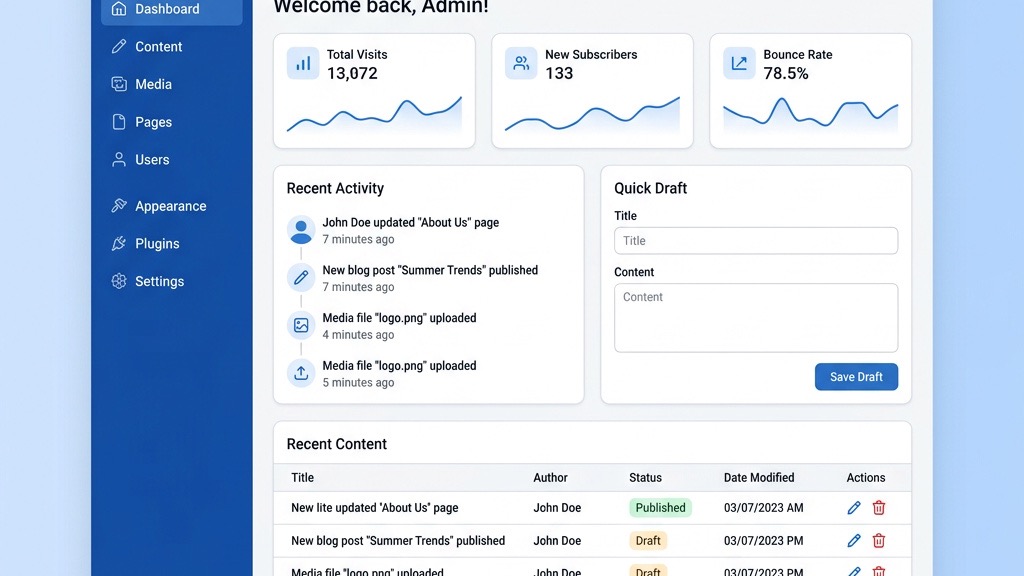
Finally, the dashboard now includes quick‑access widgets for user management, system information, and extension updates, giving us a real‑time pulse of the site’s health. The widgets are customizable, so we can arrange them like pieces on a chessboard, positioning the most critical information within arm’s reach.
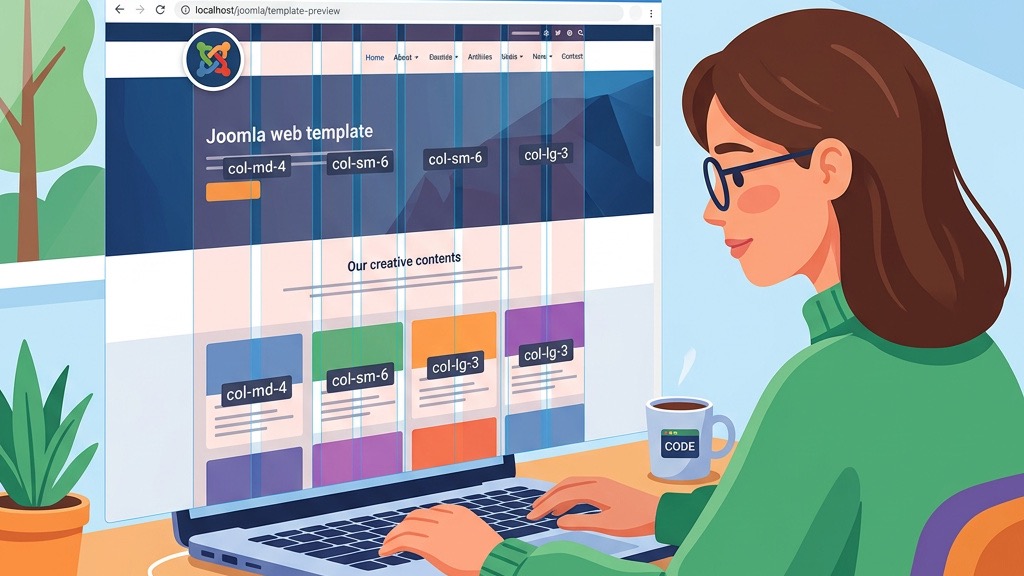
Joomla 4 embraces Bootstrap 5, a contemporary frontend framework that replaces the older Bootstrap 2/3 stack used in Joomla 3. This shift brings a more fluid grid system, allowing us to craft responsive layouts that adapt gracefully to any screen size. The new grid behaves like a living organism, expanding and contracting without breaking the visual harmony.
Because Bootstrap 5 drops the reliance on jQuery, page loads become lighter and faster, much like a sprinter shedding excess weight before a race. The framework also introduces utility classes that let us tweak margins, paddings, and colors directly in the markup, reducing the need for custom CSS. This approach is comparable to using a Swiss‑army knife: one tool, many functions.
The integration works smoothly with the Cassiopeia template, which ships with built‑in Bootstrap components such as cards, modals, and off‑canvas menus. By using these components, we can assemble sophisticated page structures without writing a single line of JavaScript. The result is a site that feels both modern and familiar, like a classic novel retold in contemporary language.
The Media Manager has been rebuilt from the ground up, offering a thumbnail view that resembles a polished gallery wall. We can drag and drop files, edit image attributes, and organize assets into folders with the simplicity of arranging photos on a corkboard. The manager also supports bulk actions, enabling us to rename, move, or delete multiple items in a single sweep.
A standout addition is the Workflow System, which introduces content states such as Draft, Review, and Published. This system operates like a production line, where each piece of content passes through defined checkpoints before reaching the audience. By assigning permissions to each state, we ensure that only authorized editors can advance articles, safeguarding editorial quality.
The workflow is tightly coupled with custom fields, allowing us to attach metadata that can trigger automatic state changes. For example, a field marking “Ready for Review” can move an article from Draft to Review without manual intervention, much like a traffic light directing the flow of vehicles. This automation reduces human error and speeds up the publishing cycle.
Installation begins with downloading the latest Joomla CMS package, which is a compact zip file that contains all core files. We recommend using an FTP client or the hosting control panel to upload the archive to the web root, then extracting it with a single click. After extraction, we navigate to the installer script, which guides us through database configuration and site setup.
During the database step, we must provide MySQL credentials and ensure the server runs PHP 7.4 or newer; these versions act as the foundation that supports the new features. The installer also creates an initial admin user with a strong password, a critical security measure that we should treat like a vault key. Once the installation finishes, we delete the installation folder to prevent unauthorized re‑entry.
A quick post‑install check includes verifying file permissions, ensuring the htaccess file is present for URL rewriting, and confirming that the site loads over HTTPS. These steps are comparable to a pilot performing a pre‑flight checklist before taking off.
The dashboard greets us with a sleek toolbar at the top, followed by a left‑hand navigation pane that groups items into logical sections such as Content, Users, and Extensions. Each menu item expands into sub‑menus, allowing us to drill down to specific functions like articles, categories, or plugins. The layout feels like a well‑organized library, where every shelf is clearly labeled.
At the center of the dashboard, we find a set of widgets that display recent activity, system messages, and quick links to common tasks. These widgets can be rearranged or hidden, giving us control over the visual hierarchy much like a curator arranging artworks in a gallery. The guided tours button sits in the corner, ready to launch a step‑by‑step walkthrough for first‑time users.
We also have access to a global configuration panel, where we can adjust SEO settings, enable caching, and set media handling options. This panel acts as the control room of a spacecraft, where we monitor and fine‑tune the ship’s systems before launch.
Global settings reside under the System → Global Configuration menu, and they affect every page and component across the site. Here we define the default language, timezone, and error reporting level, which together shape the site’s overall behavior. Setting the error reporting to “Maximum” during development is like turning on a bright spotlight that reveals hidden flaws.
We also enable SEO-friendly URLs by toggling the “Search Engine Friendly” option and ensuring the htaccess file is active. This configuration helps search engines crawl the site more efficiently, akin to laying down a clear road for travelers. Additionally, we can specify the default editor (TinyMCE) and configure its toolbar to match our content creation style.
Finally, we set the session lifetime, choose a cache handler, and decide whether to use gzip compression for faster page delivery. These performance tweaks are comparable to tuning a musical instrument, where each adjustment contributes to a harmonious final performance.

Articles remain the heart of any Joomla site, and the new editor provides a richer canvas for storytelling. We start by selecting Content → Articles → Add New, where the form presents fields for title, alias, and the main body. The TinyMCE editor offers drag‑and‑drop image insertion, table creation, and a full set of formatting tools, making the writing experience feel like drafting a manuscript in a modern office.
Categories help us organize articles into logical groups, much like chapters in a book. We can nest categories to any depth, creating a hierarchy that mirrors a family tree. When we assign an article to a category, the site automatically generates a URL that reflects this structure, improving both navigation and SEO.
The metadata section lets us add descriptions, keywords, and custom meta tags, which act as signposts for search engines. By filling out these fields, we give each article a distinct identity, similar to giving each character a unique voice in a novel.
Custom fields are a powerful way to attach extra information to articles without altering the core database schema. We can create fields of various types—text, list, image, or even a Web Services API endpoint—and then display them in the article layout. This flexibility is comparable to adding accessories to a plain outfit, enhancing its appeal without changing the base garment.
To add a custom field, we navigate to Content → Fields → New, choose the field type, and assign it to the appropriate category or article. Once created, the field appears in the article editor, ready for data entry. We can also set default values and validation rules, ensuring data consistency across the site.
When rendering the article, we can use template overrides to place custom field values exactly where we want them, such as beneath the title or within a sidebar. This level of control is like a sculptor shaping a statue, carving out details that make the final piece unique.
The revamped Media Manager replaces the old file list with a visual grid that displays thumbnails, file sizes, and dates. We can upload images, PDFs, and audio files by dragging them into the window, a gesture that feels as natural as dropping a photograph onto a desk. The manager also offers inline editing of image attributes, such as alt text and caption, which are essential for accessibility and SEO.
Folders can be created, renamed, and nested, giving us a tidy hierarchy that mirrors the site’s content structure. For example, we might store all banner images in a folder called “/images/banners,” making it easy to locate and replace them later. The manager’s search function filters files by name or type, acting like a librarian’s catalog system.
Finally, we can set permissions on individual folders, restricting who can upload or delete files. This granular control ensures that only trusted users can modify critical assets, protecting the site from accidental loss.
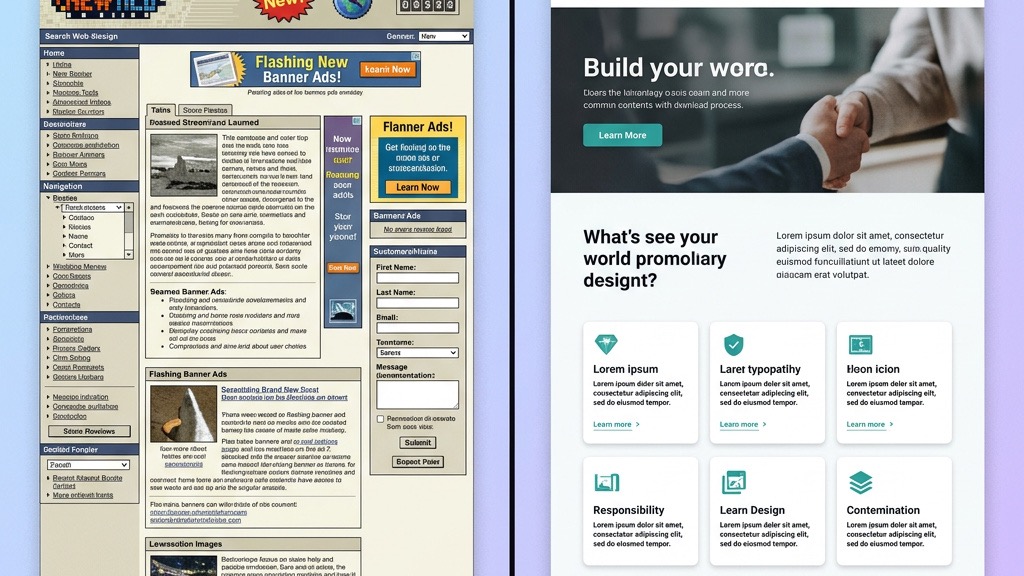
Cassiopeia arrives as the default template in Joomla 4, built on Bootstrap 5 and designed for speed and flexibility. Its clean markup and minimal CSS make it a solid starting point for any project, much like a blank canvas awaiting an artist’s vision. The template includes several pre‑defined module positions, such as “top,” “sidebar,” and “footer,” which we can populate with extensions.
Responsive behavior is baked in, so the layout automatically adapts to smartphones, tablets, and desktops without additional code. This adaptability is akin to a chameleon changing colors to blend with its environment, ensuring a consistent user experience across devices.
We can customize the look by editing the template.css file or by creating a child template, which inherits all core files while allowing us to override specific styles. This inheritance model protects our changes from being overwritten during core updates, similar to planting a sapling that grows alongside a mature tree.
A child template is a lightweight layer that sits on top of Cassiopeia, letting us modify HTML, CSS, and JavaScript without touching the parent files. To create one, we copy the templateDetails.xml file, rename the folder, and adjust the tag to reference the parent. This process is comparable to drafting a sequel that uses the same characters but tells a new story.
Once the child template is installed, we can add template overrides for components, modules, or layouts. Overrides are stored in the /html folder of the child template and replace the core view files at runtime. This mechanism is like swapping out a window pane with a custom glass design, changing the view without rebuilding the entire wall.
We also have the option to define custom module positions in the child template’s XML file, giving us the freedom to place content exactly where we need it. By registering these positions, we expand the layout possibilities without altering the core template, much like adding new rooms to an existing house.
Modules are the building blocks that populate the positions defined by Cassiopeia or any child template. We can assign modules to positions such as “banner,” “mainmenu,” or “footer” via the Extensions → Modules manager. Each module can be styled individually, using custom CSS classes that act like decorative trim on a piece of furniture.
Layout customization is further enhanced by the Layout Builder, which allows us to drag and drop module positions into a grid interface. This visual editor feels like arranging tiles on a floor plan, where each tile represents a module slot. By previewing changes in real time, we can fine‑tune the site’s appearance without writing code.
For advanced designs, we can integrate Bootstrap 5 components directly into module output, such as carousels, accordions, or cards. This integration gives us a modern look while keeping the underlying code lightweight, much like adding sleek furniture to a classic room.
The Joomla Extensions Directory (JED) is a marketplace where we can browse thousands of free and commercial extensions. To install an extension, we click Extensions → Manage → Install, then either upload a zip file or provide the JED URL. The installer validates compatibility with our PHP 7.4 environment, ensuring a smooth addition.
Once installed, the extension appears in the Extensions → Manage list, where we can enable, disable, or uninstall it with a single click. This central hub functions like a control panel, giving us a clear overview of all active components.
We recommend reviewing the extension’s documentation and user reviews before installation, as this research helps avoid conflicts and ensures the extension meets our needs. Think of it as reading a product manual before assembling a piece of furniture.
Plugins extend Joomla’s core functionality by reacting to events such as user login, content saving, or page rendering. Some essential plugins include System – Cache, System – SEO, and Content – Page Builder. These plugins work behind the scenes, much like backstage crew members who keep a theater production running smoothly.
The System – SEO plugin automatically adds canonical URLs, meta tags, and Open Graph data, improving our site’s visibility on search engines. By configuring its settings, we can fine‑tune how search bots interpret our content, similar to adjusting the lighting on a stage to highlight key actors.
The Content – Page Builder plugin provides a drag‑and‑drop interface for constructing complex page layouts without coding. It offers pre‑built blocks such as hero sections, testimonials, and pricing tables, allowing us to assemble pages quickly, like building a LEGO set from ready‑made bricks.
Conflicts arise when two extensions attempt to use the same event or library, leading to errors or broken pages. To diagnose a conflict, we enable debug mode in Global Configuration and review the error logs, which point to the offending component. This process is akin to a detective following clues to uncover the culprit.
If a conflict is identified, we can try disabling one of the extensions temporarily to confirm the source of the issue. Once confirmed, we may need to update the extension, adjust its settings, or contact the developer for a patch. Maintaining a backup before making changes is essential, as it provides a safety net similar to an insurance policy.
In some cases, we can resolve conflicts by creating a template override that modifies the output of one extension without affecting the other. This technique allows us to keep both extensions active while customizing their interaction, much like negotiating a compromise between two parties.
Joomla 4 now includes WCAG‑compatible markup and ARIA attributes throughout the core output. Forms, navigation menus, and interactive widgets are designed to be usable by screen readers, providing an inclusive experience for all visitors. This commitment to accessibility is like installing ramps and elevators in a historic building, ensuring everyone can enter.
We can further enhance accessibility by enabling the Accessibility plugin, which adds skip‑to‑content links and high‑contrast styles. These options allow us to meet legal requirements and improve usability for users with visual impairments.
Regular audits using tools such as WAVE or Lighthouse help us verify that our custom templates and extensions maintain the same level of compliance. By treating accessibility as an ongoing process rather than a one‑time checklist, we keep the site welcoming, much like a well‑maintained garden that welcomes all visitors.
Performance is a critical factor for both user experience and SEO. Joomla 4 offers multiple caching layers, including page caching, view caching, and static file caching, each of which can be toggled in Global Configuration. Enabling these caches reduces server load, similar to a library using a copy‑on‑demand system to serve popular books quickly.
We also have the option to enable GZIP compression and configure expires headers via the htaccess file, which compresses page data before it reaches the browser. This compression is comparable to packing a suitcase efficiently, allowing more items to fit into the same space.
For further speed gains, we can integrate a CDN and use lazy loading for images, which delays loading off‑screen assets until they are needed. These techniques together create a site that feels as swift as a hummingbird in flight.
The Web Services API in Joomla 4 opens the door to headless architectures, where the backend delivers JSON data to any frontend framework such as React, Vue, or Angular. We can enable the API in the System → Web Services menu and generate authentication tokens for secure access.
This API follows RESTful principles, providing endpoints for articles, categories, users, and media. By consuming these endpoints, developers can build custom mobile apps or single‑page applications that draw content from Joomla without rendering the full HTML page.
The headless approach is akin to separating the kitchen from the dining room: the kitchen (Joomla) prepares the food (data), while the dining room (frontend) serves it in whatever style the chef (developer) chooses. This separation offers flexibility and scalability for modern digital experiences.
Before we begin migration, we compile a checklist that includes backing up the database, verifying PHP and MySQL versions, and reviewing installed extensions for compatibility. A full site backup—both files and database—acts as a safety net, much like a life jacket before a deep swim.
We also audit third‑party extensions, disabling any that are not yet Joomla 4‑ready, and note any custom code that may need rewriting. This audit prevents unexpected errors after migration, similar to inspecting a vehicle before a long journey.
Finally, we set the site to offline mode to avoid user interactions during the migration process, ensuring a clean environment for the upgrade.
Joomla 4 ships with a built‑in Migration Tool that automates the transition from Joomla 3. We access it via Components → Joomla! Migration, where we select the source site’s database credentials. The tool copies core tables, converts schema differences, and updates extensions that support the new version.
During migration, the tool generates a detailed log, highlighting any issues such as missing PHP extensions or incompatible plugins. We can address these warnings before proceeding, much like a pilot reviewing a pre‑flight report.
After the migration finishes, we clear the cache, re‑enable the site, and perform a thorough front‑end test to confirm that articles, menus, and modules display correctly.
One frequent issue is template incompatibility; the old Joomla 3 template may not support Bootstrap 5 or the new Cassiopeia layout. In such cases, we either switch to a Joomla 4‑compatible template or create a child template that adapts the old design to the new framework.
Another common problem involves extensions that rely on deprecated APIs. We can either update the extension to a Joomla 4‑compatible version or replace it with an alternative from the JED. This replacement process is similar to swapping out an old engine part with a modern, efficient component.
If URLs break after migration, we enable SEF URLs and regenerate the htaccess file, ensuring that old links redirect to the new structure. This step preserves SEO equity, much like rerouting traffic around a construction zone.
1. Is Joomla 4 easy to learn for beginners?
Yes, Joomla 4 is designed with a more intuitive admin interface and guided tours that walk new users through core tasks. The learning curve is comparable to picking up a new language when you already know the alphabet, thanks to familiar concepts like articles, categories, and menus.
2. What is the difference between Joomla 4 and Joomla 5?
Joomla 5 builds on the foundation of Joomla 4, adding further refinements such as enhanced Web Services, additional Bootstrap 5 components, and tighter WCAG compliance. While Joomla 4 introduced the modern admin panel and Cassiopeia template, Joomla 5 focuses on performance tweaks and extended API capabilities.
3. Is Joomla easier than WordPress?
Joomla offers a more granular permission system and a stronger emphasis on structured content, which can feel more complex at first but provides greater flexibility for larger sites. WordPress excels in simplicity for blogging, whereas Joomla shines when you need intricate menu hierarchies and multiple content types.
4. Does Joomla 4 have free templates?
Yes, Joomla 4 ships with the free Cassiopeia template, and the Joomla Extensions Directory hosts many additional free templates that are compatible with the new framework. These templates can be installed directly from the admin panel, giving you a quick start without extra cost.
5. What are the system requirements for Joomla 4?
Joomla 4 requires PHP 7.4 or newer, MySQL 5.6 (or MariaDB 10.1) or higher, and a web server that supports HTTPS. It also recommends the Apache or Nginx server with the mod_rewrite module enabled for clean URLs.
6. How do I update Joomla 4 to the latest version?
To update, log into the admin panel, navigate to Components → Joomla! Update, and click “Check for Updates.” If a newer version is available, click “Install the Update,” and the system will download and apply the changes automatically. Always back up your site before updating to avoid data loss.
For more on related topics, see our articles: