Physical Address
304 North Cardinal St.
Dorchester Center, MA 02124
Physical Address
304 North Cardinal St.
Dorchester Center, MA 02124

migrate Joomla 3 to 5 is a journey that demands careful planning, precise execution, and a dash of patience. We will walk you through every stage, from backup to post‑migration testing, so that our site emerges stronger and ready for the future.
Key Takeaways
• A full Akeeba backup is the safety net that catches us if anything goes wrong.
• Extension compatibility is the gatekeeper that decides whether we can walk straight into Joomla 5.
• Staging environments act as rehearsal stages where we perfect the performance before the live show.

Image: The step-by-step path from Joomla 3 to Joomla 5
The clock has already struck on Joomla 3, and the community has stopped releasing security patches for it. We find ourselves standing at a crossroads where old vulnerabilities can slip through the cracks like a leaky roof, exposing user data and server integrity. When a hacker exploits an unpatched flaw, the breach can cascade across the site, corrupting databases and eroding visitor trust. By moving to Joomla 5, we seal those cracks and protect our visitors from malicious traffic, while also gaining access to modern security mechanisms such as CSP headers and improved password hashing.
When a platform reaches its end of life, the ecosystem around it begins to thin, and third‑party developers shift their focus elsewhere. We notice fewer updates, and the support forums become quiet as a deserted town, leaving us without timely help when issues arise. This silence is a warning sign that we must act before the site becomes a liability that could damage our brand reputation. In addition, many hosting providers now flag Joomla 3 sites as outdated, which can affect performance and reputation. We experience slower page loads and higher bounce rates when the server is forced to apply work‑arounds, and we may even face higher hosting fees due to the need for custom patches. Upgrading eliminates those work‑arounds and restores the site’s agility, allowing us to take advantage of newer server optimizations such as HTTP/2 and OPcache.
Tip: Before we even touch the code, we should run a quick security scan with a tool like Sucuri SiteCheck to list the most glaring vulnerabilities. The report will highlight which extensions are the most exposed, giving us a prioritized list for replacement or patching.
Joomla 5 arrives with a modern JavaScript‑driven admin interface that feels like a sleek cockpit for our content. The new UI replaces the old panels with a responsive layout that adapts to any screen size, much like a chameleon changes its colors, letting us edit articles from a tablet while on the move. This responsiveness improves our workflow when we manage the site from tablets or phones, cutting down the time spent toggling between devices. The interface also introduces a dark‑mode toggle, which reduces eye strain during long editing sessions and aligns with contemporary design trends.
The core now includes native support for PHP 8.2, which unlocks performance gains and access to the latest language features. We can write cleaner code, and the CMS runs faster, similar to a sports car with a turbocharged engine, delivering quicker page renders and lower CPU usage. These gains translate into lower server costs and happier visitors, as page‑load metrics improve across the board. PHP 8.2 also brings typed properties and union types, allowing our custom extensions to enforce stricter data contracts and reduce runtime errors.
Finally, Joomla 5 introduces a built‑in media manager that handles images, videos, and audio with drag‑and‑drop simplicity. We no longer need separate extensions for basic media handling, and the system automatically generates responsive image sets, serving the optimal file size for each device. This feature helps us maintain a consistent visual experience across devices, while also improving SEO through faster loading times. The media manager also supports bulk renaming and folder organization, which simplifies the workflow for content editors who manage large asset libraries.
Comparison: Compared with Joomla 4’s media manager, Joomla 5 adds native lazy‑loading attributes and WebP conversion, giving us a performance edge without extra plugins.
Warning: Some older browsers (IE 11) do not support the new JavaScript modules, so we should enable a fallback polyfill in the template’s index.php if we still need to serve those users.
The upgrade route is a three‑step staircase: Joomla 3 → Joomla 4 → Joomla 5. Skipping a step is like trying to jump two rungs at once; the risk of a fall increases dramatically, and we may lose data or break core functionality. By following the prescribed path, we ensure that each migration layer has been validated and that database transformations occur in the correct order, preserving referential integrity. This staged approach also lets us test each version in isolation, catching compatibility issues early before they compound.
First, we migrate to Joomla 4, which updates the core tables and introduces the new schema version. During this phase, we must address any deprecated extensions that could break the transition, such as those that rely on removed helper classes. Once Joomla 4 runs smoothly, we can trigger the Joomla 5 updater, which applies the final set of changes and activates the new features, including the revamped admin UI and media manager. We also take this moment to review the site’s error logs, ensuring that no hidden warnings linger after the upgrade.
This staged approach also gives us two opportunities to test and roll back if needed. We can restore the Joomla 4 backup before attempting Joomla 5, giving us a safety net that is as reassuring as a parachute, and we can compare performance metrics between versions to quantify improvements. By documenting each step in a migration log, we create a reference for future upgrades and for any team members who may need to repeat the process on a similar site.
Step‑by‑step tip: After each upgrade, we should run php bin/joomla core:check to list any missing database columns or tables. The command outputs a concise list that we can address with a single SQL script, reducing manual guesswork.
Akeeba Backup is our trusted companion for creating a complete snapshot of the site. We begin by installing the latest Akeeba version from the Joomla Extensions Directory, then navigate to the backup profile screen, where we can tailor the backup to our environment. In the profile, we enable “Database only†and “Full site†options, ensuring that both files and tables are captured, and we also set the archive compression level to high to reduce storage size without sacrificing integrity. We also configure the backup to exclude the cache folder, which speeds up the process and prevents unnecessary duplication.
After configuring the profile, we click the “Backup Now†button and wait for the process to finish, monitoring the progress bar for any stalls that might indicate permission issues. The resulting archive is stored in the /administrator/components/com_akeeba/backup folder, and we download a copy to an off‑site location such as Dropbox or an S3 bucket, adding an extra layer of protection against server failure. We also generate a checksum file for the archive, which we can later use to verify that the download has not been corrupted during transfer.
Finally, we verify the integrity of the archive by extracting a small portion and checking that key files like configuration.php and the .htaccess file are present, confirming that the backup includes essential configuration data. We also run a quick import test on a local development machine, restoring the backup to ensure that the process works end‑to‑end before we rely on it during migration. This verification step gives us confidence that the backup can be restored if anything goes awry, and it also highlights any missing permissions that we need to correct on the live server.
Code snippet:
// Example of a simple Akeeba CLI backup command
php /path/to/joomla/administrator/components/com_akeeba/akeeba.php --profile=1 --output=/tmp/joomla_backup.zip
Tip: Schedule the backup to run during off‑peak hours using a cron job; this reduces load on the live site and ensures a clean snapshot.
Our extension audit starts with a spreadsheet that lists every installed component, module, plugin, and template, allowing us to see the full space of code that will be affected by the upgrade. We add columns for “Joomla 4 compatible?†and “Joomla 5 compatible?†and fill them by consulting the developers’ documentation, release notes, and changelogs, noting any version numbers that indicate support. For each item, we visit the extension’s Joomla! Extensions Directory page and look for a compatibility badge, which often appears as a colored icon next to the version number.
If the badge is missing, we reach out to the developer via the support forum or GitHub issue tracker, asking for clarification on future plans and requesting a test build for Joomla 5. When an extension lacks a Joomla 5 version, we search for alternatives that provide the same functionality, evaluating them based on ratings, recent updates, and community feedback. For example, we replace the old “JCE Editor†with the newer “JCE 3.x†which supports Joomla 5, and we map its configuration settings to match our existing workflow.
We also note any custom code that may need rewriting, such as overrides that reference deprecated core classes, and we schedule time in our migration plan to refactor those pieces. In addition, we create a “must‑update†list that prioritizes extensions that affect core site functions, like SEO, caching, and form handling, because any failure in those areas would have a noticeable impact on visitors.
Comparison: While “Regular Labs – Conditional Content†has a Joomla 5‑ready fork, “Advanced Module Manager†still lags; we therefore test both in a staging environment before deciding which to keep.
Warning: Some extensions store data in custom tables that do not follow Joomla’s naming conventions; we must write migration scripts to move that data into the new schema, otherwise we risk orphaned records.
A staging site acts as a sandbox where we can test the migration without affecting live traffic, reducing risk and allowing us to experiment freely. We clone the production database and files onto a subdomain like staging.example.com, using the backup we created earlier, and we ensure that the file permissions match those of the live site to avoid permission errors during testing. We then adjust the configuration.php file to point to the staging database and change the $live_site variable to the staging URL, which prevents redirects back to the live domain.
Additionally, we set the $debug flag to true, which helps us spot PHP notices and deprecation warnings early, and we enable error reporting to “maximum†so that any hidden issues surface during the migration steps. To isolate the staging site from search engines, we add a robots.txt rule that disallows all crawlers, and we configure the .htaccess file to require HTTP authentication, which blocks unwanted visitors while we work.
We also replicate the production server’s PHP and Apache/Nginx settings on the staging environment, ensuring that the same extensions (e.g., intl, gd, zip) are installed, which prevents surprises when we run the updater. Finally, we perform a quick smoke test on the staging copy, confirming that the home page loads, the admin login works, and that key extensions function as expected before we begin the upgrade.
Code snippet for .htaccess authentication:
AuthType Basic
AuthName "Staging Access"
AuthUserFile /path/to/.htpasswd
Require valid-user
Tip: Use a database cloning tool like phpMyAdmin to copy the live database quickly, then run SET GLOBAL max_allowed_packet=64M; to avoid truncation errors during import.
We start by logging into the Joomla 3 administrator and navigating to “Components → Joomla! Updateâ€, where the update component checks the official Joomla servers for the latest release packages. We select the “Joomla 4†channel and click “Check for Updatesâ€, which triggers a remote request that returns the version number and a brief changelog, helping us confirm that we are pulling the correct package. If the update is available, we click “Install the Update†and watch the progress bar, which displays each stage of the installation, including file extraction, database schema changes, and cache clearing.
During the process, we monitor the log file located at /administrator/logs/joomla_update.log for any errors, scanning for messages that indicate missing PHP extensions or permission problems that could abort the upgrade. If a fatal error occurs, we stop the update, restore the Akeeba backup, and troubleshoot the offending extension before retrying, ensuring that we do not lose data or break the site. After the installation finishes, we log in to the new Joomla 4 backend and verify that the admin template loads correctly, checking that the new toolbar icons appear and that the menu hierarchy is intact.
We also check that all core components (articles, menus, users) are present and functional, opening a few sample articles to confirm that content displays without styling issues. If any core component shows a warning, we consult the Joomla documentation for known migration quirks and apply the recommended fixes, such as updating template overrides that reference old view files.
Step‑by‑step tip: Run the following command to clear old caches after the upgrade:
php bin/joomla cache:clear --allWarning: Some third‑party extensions may require a minimum Joomla 4.2 version; we should verify that requirement before proceeding to avoid a second rollback.
With Joomla 4 stable, we enable the “Joomla 5†update channel in the Joomla! Update component, which points the updater to the newer repository and prepares the system for the next major change. We repeat the same steps: check for updates, click “Installâ€, and let the installer run, watching the console output for progress messages that indicate which migration scripts are being applied.
The Joomla 5 updater performs a series of schema migrations, including renaming the #__extensions table columns and adding new fields for the media manager, which are essential for the new media handling features. We watch the console output for messages like “Migrating #__content tagsâ€, which confirm that tag data is being transferred to the new schema without loss. If the installer reports missing PHP extensions, such as intl or gd, we install them via the server’s package manager (e.g., apt‑get install php‑intl), then restart the web server to load the new modules before resuming the update.
Once the update completes, we clear the Joomla cache and the browser cache, then log in to the new backend to verify that the new admin UI appears and that the site’s front‑end renders without errors. We also run a quick check of the site’s error logs for any deprecation warnings that might indicate lingering compatibility issues, fixing them before the site goes live.
Code snippet for schema verification:
SELECT column_name FROM information_schema.columns
WHERE table_name = '#__extensions' AND column_name = 'type';
Tip: Use the Joomla CLI command php bin/joomla core:upgrade after the update to ensure any pending migrations are applied automatically.
The database migration includes several steps that we must validate manually, because automated scripts sometimes miss edge cases that affect custom extensions. We start by running the Joomla CLI command php bin/joomla core:upgrade to ensure that any pending schema changes are applied, which also outputs a summary of actions taken, giving us a clear view of what was modified.
Next, we inspect the #__assets table for orphaned entries that can cause permission issues, running a SQL query that identifies rows whose parent_id does not exist in the same table. We delete any orphaned rows, which restores the hierarchical permission model and prevents “Access denied†errors when users attempt to edit content.
We also check the #__menu table for missing home flags, which can break the default landing page; if the flag is missing, we set it manually with an UPDATE statement that marks the appropriate menu item as the home page. Finally, we run a search‑replace on the #__content table to update any hard‑coded URLs that still point to the old Joomla 3 path, using a script that processes each article’s introtext and fulltext fields, preserving internal links and preventing 404 errors after the migration.
SQL snippet for orphaned assets:
DELETE a FROM #__assets a
LEFT JOIN #__assets p ON a.parent_id = p.id
WHERE p.id IS NULL;
Warning: Deleting rows without a backup can cause data loss; always export the #__assets table before running the delete command.
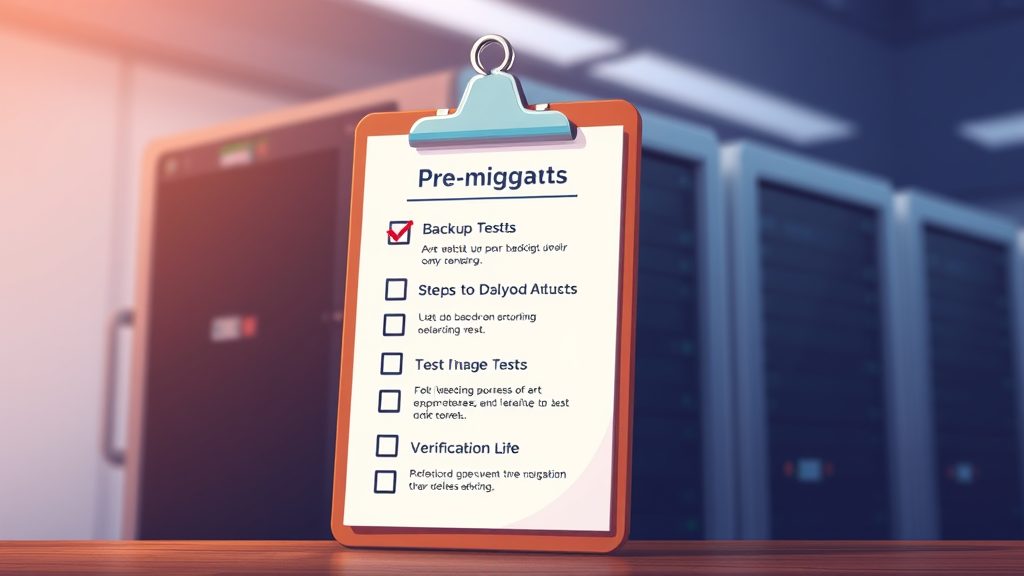
Image: Essential pre-migration preparation steps
For more on this topic, check out our Joomla backup guide.
Cassiopeia is the default Joomla 5 template that embraces modern CSS Grid and Flexbox layouts, giving us a solid foundation for responsive design without writing custom CSS from scratch. We install Cassiopeia via the Extension Manager, then assign it as the default template in the “Templates → Styles†screen, where we can also set the site’s language and direction attributes.
After activation, we copy any custom CSS from the legacy template’s custom.css file into Cassiopeia’s custom.css location, preserving our branding while taking advantage of the new responsive grid. This step ensures that colors, fonts, and spacing remain consistent, and we can also add media queries that target specific device breakpoints introduced by the new layout engine.
We also migrate any template overrides by copying the /templates/legacy/html folder into /templates/cassiopeia/html, preserving the folder structure so that Joomla can locate the overridden view files. During this copy, we review each override file for deprecated core calls, such as $this->item->introtext syntax, which aligns with the namespaced architecture of Joomla 5. , and replace them with the new $item->introtext
Step‑by‑step tip:
1. Create a temporary folder tmp/override-migration.
2. Run rsync -av /templates/legacy/html/ /tmp/override-migration/.
3. Use a find‑replace command to update $this-> references:
`bash
find /tmp/override-migration -type f -name “*.php” -exec sed -i ‘s/\$this->/\\$item->/g’ {} +
`
4. Move the folder to /templates/cassiopeia/html/.
Contrast: While the old template relied heavily on table‑based layouts, Cassiopeia uses flexbox, which results in cleaner markup and faster rendering.
Some extensions that worked in Joomla 3 no longer exist in Joomla 5, so we must find replacements that provide comparable functionality and are actively maintained. For a contact form, we switch from “ChronoContact†to “Joomla! Contact†which now supports the new API and offers built‑in spam protection via reCAPTCHA.
We install the new extension, import the old contact data using the built‑in CSV importer, and map the fields accordingly, ensuring that each contact’s name, email, and message history are preserved. After importing, we test the front‑end form to ensure that email notifications are sent correctly, checking both the sender and recipient headers for proper formatting.
For SEO, we replace “sh404SEF†with “OSMap†and “Regular Labs – ReReplacerâ€, which together provide URL management and meta tag control without the overhead of a monolithic package. We configure OSMap to generate an XML sitemap, setting the frequency and priority values to match our content update schedule, and we create ReReplacer rules that rewrite legacy URL patterns into the new Joomla 5 routing format.
We also audit the site’s analytics integration, updating any hard‑coded Google Analytics IDs in the template or extensions to use the new Joomla! Plugin framework, which injects the tracking script in a way that respects user consent settings.
Code snippet for ReReplacer rule (CSV):
search,replace,description
^/old-section/(.*)$,/new-section/$1,Redirect old section URLs
Warning: When replacing a contact extension, double‑check that any custom fields (e.g., phone number) are mapped correctly; otherwise, we may lose important data.
Custom plugins often contain legacy code that references Joomla 3 core classes, which must be updated to the new namespace structure to avoid fatal errors. We open each plugin file and replace calls like JFactory::getApplication() statement at the top of the file to import the class into the current namespace. with Factory::getApplication(), and we add the appropriate use Joomla\CMS\Factory;
We also adjust any JoomlaScript declarations to use the new Joomla\CMS\HTML\HTMLHelper, which ensures that the script loader registers the correct dependencies for the Joomla 5 asset pipeline. After updating the code, we run the Joomla PHP_CodeSniffer tool to detect any remaining deprecated functions, fixing any warnings before committing the changes to version control. syntax, for example, replacing JHtml::_('behavior.modal') with HTMLHelper::_('behavior.modal')
Finally, we clear the cache and test the plugin’s functionality on the staging site, verifying that event listeners fire as expected and that any database writes use the new Table classes, which provide built‑in protection against SQL injection. We also review the plugin’s language files, updating the language keys to match the new naming conventions introduced in Joomla 5.
Example of a Table class update:
use Joomla\CMS\Table\Table;
class MyTable extends Table
{
    public function __construct(&$db)
    {
        parent::__construct('#__mytable', 'id', $db);
    }
}
Tip: Enable the Joomla “Debug†system plugin during testing; it shows the exact SQL queries executed, helping us spot inefficient statements that may need optimization.
For more on this topic, check out our Joomla security tips.
Our functional checklist begins with a smoke test: we visit the home page, login, and navigate to the admin dashboard, confirming that the new admin UI loads without missing assets and that the toolbar icons respond to clicks. We verify that all menus load, that articles display correctly, and that modules appear in their intended positions, checking both desktop and mobile viewports for layout consistency.
Next, we test form submissions, such as contact forms and newsletter sign‑ups, to ensure that data is saved and email notifications are dispatched, monitoring the mail logs for any delivery failures or spam‑filter rejections. We also check the user registration flow, confirming that activation emails contain the correct links and that newly created accounts can log in without errors.
Finally, we run a series of automated Selenium scripts that simulate user interactions across browsers, clicking through the site, filling out forms, and capturing screenshots for visual verification. These scripts also record HTTP response codes, allowing us to spot any hidden 500 errors that may not appear during manual testing.
Tip: Use the Joomla “System – Log Viewer†plugin to capture backend errors in real time; it writes entries to a dedicated log file that we can review after each test run.
To keep our search rankings intact, we must preserve the existing URL structure, which involves a careful audit of all routing rules and menu aliases before the migration. We enable Joomla’s built‑in redirect component and import a CSV file containing old URLs mapped to their new equivalents, ensuring that each row includes the source URL, the target URL, and a 301 status code indicator.
For any URLs that have changed due to template or routing updates, we add manual redirects in the component’s interface, testing each redirect by entering the old URL in a browser and confirming that it lands on the new page with a 301 status code. This process also helps us identify any orphaned pages that no longer exist, allowing us to create custom 404 pages that guide visitors back to relevant content.
We also configure the .htaccess file to enforce trailing‑slash consistency, which helps avoid duplicate content; the rule RewriteRule ^(.+[^/])$ $1/ [R=301,L] ensures that every URL ends with a slash, and we add a canonical tag to the head of each page to reinforce the preferred URL to search engines.
Code snippet for .htaccess canonical rule:
<IfModule mod_headers.c>
    Header set Link "<%{REQUEST_URI}e>; rel=\"canonical\""
</IfModule>
Contrast: While Joomla 4 relied on the sef_rewrite plugin for clean URLs, Joomla 5 adds a built‑in canonical generator, reducing the need for external SEO plugins.
Joomla 5 stores meta data in the #__content table, so we run a SQL query to confirm that title, description, and keywords fields are populated for all articles, checking for any null values that could cause search engines to generate generic snippets. We also review the Open Graph and Twitter Card meta tags, adding them via the new meta‑tag plugin to improve social sharing previews.
We then use the external tool Google Search Console to submit the new XML sitemap generated by OSMap, monitoring the coverage report for any crawl errors that appear after the migration.
Finally, we run a site audit with a service like SEMrush to detect any broken links or missing meta tags, fixing any issues identified and re‑running the audit until the score is satisfactory. This iterative process ensures that the site maintains its visibility and that visitors continue to find the content they expect.
Tip: Set the “robots.txt†to allow the sitemap URL explicitly:
`
Sitemap: https://example.com/sitemap.xml
`
Warning: Forgetting to update the sitemap after adding new content can cause search engines to miss fresh pages, reducing organic traffic.
For more on this topic, check out our Joomla SEO extensions.
We never begin a Joomla‑3‑to‑5 migration directly on the live server because any misstep could corrupt the production database, break extensions, or cause a prolonged outage. By isolating the work on a copy, we protect real visitors and preserve revenue streams while we experiment with configuration changes. The safety net also lets us roll back instantly if a script fails, which is far harder once the live site is altered. This approach aligns with industry best practices for any major platform upgrade.
To create a reliable staging environment we first duplicate the current site using Akeeba Backup, then extract the archive with Akeeba Kickstart on a separate host or a local LAMP stack. We point the staging virtual host to the cloned directory, adjust the configuration.php file to reference a fresh database, and import the backup SQL dump. After the clone is operational we verify that PHP version, required extensions, and file permissions match the production server, ensuring parity. This step gives us a sandbox where we can run the Joomla 4 upgrade wizard and the subsequent 5 migration scripts without affecting real traffic.
Once the staging copy is ready we run the Joomla 4 core upgrade, monitor the log files, and resolve any PHP deprecation warnings that appear. After the core upgrade succeeds we repeat the process for Joomla 5, using the official migration component and any third‑party migration tools that support the version jump. Throughout this cycle we document each error message, adjust configuration values, and re‑run the upgrade until the staging site mirrors the expected final state. Only after the staging environment passes functional, performance, and security tests do we schedule the cut‑over for the production server.
We allocate roughly two weeks for the initial backup and staging setup, followed by three days to complete the Joomla 4 core upgrade on the staging instance. The subsequent Joomla 5 migration typically requires four to five days, depending on the number of custom extensions and the size of the media library. Finally we reserve a full day for final data validation, DNS switch‑over, and post‑migration monitoring. This schedule provides a buffer for unexpected issues while keeping the overall project within a reasonable window.
Our timeline respects dependencies such as PHP version upgrades, database collation changes, and third‑party extension compatibility checks. We begin by updating the server to PHP 8.2, then confirm that all required PHP extensions (e.g., intl) are present before touching the Joomla codebase. After the core upgrade we address custom components, ensuring each one is either replaced with a Joomla‑5‑compatible version or patched with a migration script. This ordered flow prevents us from having to redo earlier steps when a later dependency fails., gd, mysqli
Team coordination hinges on clear communication channels and a documented rollback plan. We assign a lead developer to monitor the migration logs, a database administrator to handle charset conversions, and a content editor to verify front‑end rendering after each phase. A shared Slack channel receives status updates every two hours, and we send a pre‑migration notice to stakeholders outlining the expected downtime window of approximately 30 minutes. If any critical error surfaces, the lead can trigger the rollback procedure, restoring the production backup within minutes.
We start by compiling an inventory of every installed extension, noting the version, vendor, and whether it is a core Joomla component, a third‑party module, or a custom plugin. For each item we open a ticket with the developer, requesting a Joomla‑5‑compatible release or guidance on required code changes. In many cases vendors such as Regular Labs (for Modals, Articles Anywhere) or J2Store already provide migration guides, which we download and store in our project repository. This proactive outreach reduces the risk of encountering unsupported code during the final migration.
The Joomla Extensions Directory (JED) serves as a quick reference for checking compatibility; we filter the list by “Joomla 5†and note any extensions that have been marked as “compatible†or “needs update.†For extensions that lack an official update, we examine the source code for deprecated API calls, such as JControllerLegacy, and plan to replace them with the new namespace‑based classes introduced in Joomla 5. When a compatible version exists, we download the latest package, test it on the staging site, and record any configuration differences that must be replicated on production. or JModelLegacy
For custom components that we built in-house we write migration scripts that map old table names to new ones, adjust event listeners, and replace legacy helper functions. These scripts run as part of a Composer post‑install hook, ensuring they execute automatically after the core upgrade. We then isolate each component on the staging site, perform functional tests (e.g., form submissions, data listings), and verify that the output matches the expected format. Only after every extension passes these checks do we consider the migration ready for the live environment.
The Joomla 4 release introduced a new #__extensions lookup table. These structural shifts require us to adjust any custom SQL queries that reference the old column names directly. We audit all custom modules and plugins for hard‑coded field references and replace them with the updated schema identifiers. schema that separates core and third‑party entries more cleanly, adding columns such as enabled and protected to improve permission handling. In Joomla 5 we see further refinements, including the #__menu table now storing type as an integer reference to a new #__menu_types
New tables appear in Joomla 5 to support the revamped media manager, worth mentioning, #__media flag. We write migration queries that transfer any remaining rows from the old table into the new structure, preserving the featured status of articles. and #__media_folders, which store metadata for each file and folder. The legacy #__assets table also gains additional rows for the new com_media component, allowing finer‑grained access control. Conversely, tables such as #__content_frontpage have been deprecated, with their data now merged into the main #__content table under a featured
Because Joomla 5 mandates UTF‑8 MB4 for all text columns, we convert the database collation from utf8_general_ci) to accommodate the larger index sizes that UTF‑8 MB4 can generate. After the conversion we run a checksum comparison between the original and the new database to confirm that no data was lost or altered during the process. to utf8mb4_unicode_ci. This process involves dumping the database, editing the dump file to replace every occurrence of the old collation, and re‑importing the data on a test server. We also adjust the MySQL server configuration (innodb_large_prefix=ON
Joomla 5 reorganizes the media directory by moving all user‑uploaded assets into a media to point to the new paths, ensuring that front‑end image tags render correctly after the migration. folder that mirrors the component hierarchy, for example media/com_content/article/. We replicate this structure on the staging server by running a PHP script that scans the old images folder, creates the corresponding subfolders under media, and moves each file while preserving its original filename. The script also updates any database references in #__content and #__media
File permissions must be set to 755 file to block direct access to PHP files inside the media folder, preventing potential code execution attacks. These steps guarantee that the assets are both accessible to visitors and protected from unauthorized modification. for directories and 644 for files to satisfy the security defaults of Joomla 5, which now rejects files with overly permissive modes. We apply these permissions recursively using the find command, and we verify that the web server user (typically www-data or apache) owns the media directory. In addition, we adjust the .htaccess
If the site relies on a Content Delivery Network (CDN) such as Cloudflare or Amazon CloudFront, we must purge the CDN cache after the media migration to avoid serving stale URLs. We update the CDN origin path to point to the new media status, and confirms that the image loads without distortion. Once the CDN passes these checks we enable the full caching layer for the live site. directory, and we configure cache‑control headers in Joomla’s htaccess to respect the updated file timestamps. A test script then requests a sample image through the CDN URL, checks the response header for a 200 OK
Joomla 5 retains the core routing engine but introduces a new router class that can generate cleaner URLs for menu items and articles. To preserve the existing URL structure we enable the “Legacy URL†option in the Global Configuration, which tells the router to fall back to the old pattern when a matching legacy route exists. We also import the existing #__redirect_links table from the previous version, ensuring that any manually created redirects remain active after the upgrade.
We generate a complete list of old URLs by exporting the #__menu table. Each redirect includes the original URL, the new target, and a status code of 301, signaling search engines that the move is permanent. After populating the table we run a crawler such as Screaming Frog to verify that every old URL returns the correct redirect and that no redirect loops appear. and #__content tables, then we feed this list into a bulk 301 redirect script that writes entries into the #__redirect_links
Finally we rebuild the XML sitemap using the Joomla SEO extension “OSMap†and submit the updated file to Google Search Console and Bing Webmaster Tools. The sitemap reflects the new URL format, includes the lastmod attribute for each page, and respects the priority` settings defined in the component. We monitor the crawl error report for a week after the migration, addressing any 404 errors that surface by adding additional redirects. This systematic approach helps us maintain the site’s search rankings and ensures a smooth transition for both users and bots.
Q1: Can I skip Joomla 4 and jump straight from Joomla 3 to Joomla 5?
A1: Skipping Joomla 4 is not recommended because the database schema changes in Joomla 4 are required for Joomla 5 to function correctly. The migration scripts in Joomla 5 assume those intermediate changes have already been applied.
Q2: How long does a typical migration take?
A2: The duration depends on the size of the site and the number of extensions. A small site with a few extensions can be migrated in a couple of hours, while a large site with many customizations may need a full day of testing and adjustments.
Q3: Will my SEO rankings drop after the migration?
A3: If we preserve URL structures and set up proper 301 redirects, the impact on rankings should be minimal. It is essential to monitor Google Search Console for crawl errors during the first weeks after launch.
Q4: Do I need to upgrade PHP before migrating?
A4: Joomla 5 requires PHP 8.1 or higher, so we must upgrade the server’s PHP version before starting the migration. Upgrading PHP early also allows us to test compatibility of extensions and custom code.
Q5: What should I do if the migration fails halfway through?
A5: We can restore the Akeeba backup to the staging environment, fix the issue that caused the failure, and then retry the migration. Keeping a reliable backup is the safety net that prevents data loss.