Physical Address
304 North Cardinal St.
Dorchester Center, MA 02124
Physical Address
304 North Cardinal St.
Dorchester Center, MA 02124
joomla contact form setup is the cornerstone of any interactive Joomla site, and we will walk you through every step with clarity and confidence.
When a visitor lands on a page and sees a clear way to reach out, the experience feels as inviting as a warm welcome mat at the front door. We treat the contact form as a bridge, a metaphorical rope that connects the user’s curiosity with our expertise. By placing the form in a prominent location, such as the header or a dedicated “Contact” page, we make it obvious that communication is welcomed.
Trust grows when the form behaves predictably, like a lighthouse that shines steadily through fog. We make sure each field is labeled clearly, so users know exactly what information is required. This transparency reduces hesitation and encourages more genuine inquiries, and we keep the visual design consistent with the rest of the site to avoid confusing users.
Beyond the visual cue, the form’s responsiveness adds a layer of credibility. We respond promptly to each submission, turning a single click into a conversation. Over time, this pattern builds a reputation for reliability that spreads through word of mouth, and we often follow up with an automated acknowledgment to reassure the sender that their message was received.
Every submission is a seed that can blossom into a client relationship, and we nurture those seeds with careful data collection. By configuring form fields to capture name, email, and message, we gather the essential details needed for follow‑up. This information becomes the foundation for targeted outreach and personalized service, and we store it in a secure database that can be exported for CRM integration.
We view the contact form as a funnel, guiding casual browsers into the sales pipeline. Each field acts as a rung on a ladder, moving visitors step by step toward a deeper engagement. When the ladder is well‑built, the climb feels natural rather than forced, and we can add progress indicators to show users how many steps remain.
In addition to basic contact information, we can add custom fields that reveal project size, budget, or preferred contact time. These extra data points allow us to prioritize leads and allocate resources efficiently, turning raw inquiries into actionable opportunities. We also set up automated tagging based on these fields so that our sales team can filter and route leads instantly.
Spam is the digital equivalent of unwanted weeds in a garden, and we must prune it without harming the flowers we desire. By integrating CAPTCHA and other anti‑spam measures, we create a barrier that filters out automated bots while preserving the user’s ease of use. We test the CAPTCHA on mobile devices to ensure it does not hinder legitimate users.
Our approach is akin to a guard at a gate, checking each visitor’s credentials before granting entry. We choose solutions like reCAPTCHA that blend security with a smooth experience, ensuring legitimate users are not deterred. We also enable a timeout feature that blocks repeated failed attempts, further protecting the form.
Beyond CAPTCHA, we can employ honeypot fields and server‑side validation to catch suspicious submissions. These tactics work together to keep the inbox clean, allowing us to focus on genuine conversations rather than sifting through junk. We regularly review the spam logs to fine‑tune our filters and stay ahead of new bot patterns.

The native contact component arrives with Joomla as a ready‑made form builder, providing essential form fields such as name, email, and message. We can activate it from the Joomla backend without installing additional extensions, making it a quick solution for simple sites. This component also respects the site’s language settings, automatically translating field labels when multilingual support is enabled.
It also supports multiple contact categories, allowing us to group contacts by department, region, or service line. This categorization helps route messages to the appropriate recipient, streamlining internal workflows. We can assign different email addresses to each category, ensuring that inquiries reach the right team without manual forwarding.
While the component covers basic needs, it also includes options for email notifications, enabling us to receive alerts whenever a form is submitted. These notifications can be customized to include the full message body or just a summary, depending on our preferences. We can also set up CC or BCC recipients for internal tracking.
Contact categories act like folders in a filing cabinet, organizing each contact into logical groups. We create categories in the Joomla backend under Components → Contacts → Categories, then assign each contact entry to the appropriate folder. Naming conventions such as “Support – North America” help us keep the structure clear as the site grows.
By structuring categories thoughtfully, we can display different forms on separate pages, each targeting a specific audience. For example, a “Support” category may have a form that routes messages to the help desk, while a “Sales” category sends inquiries to the sales team. We can also attach a description to each category that appears on the front end, providing context for visitors.
Categories also influence the email routing rules, ensuring that each submission reaches the correct mailbox. This level of organization reduces the chance of missed messages and improves response times. We can further refine routing by setting up auto‑reply templates that differ per category.
Although the built‑in component is convenient, it lacks advanced features such as conditional logic, multi‑step layouts, or extensive styling options. We may find ourselves constrained when trying to create a form that matches a complex design mockup. In such cases, we often turn to third‑party extensions that provide a visual builder.
Another shortcoming is the limited anti‑spam toolkit; the component only offers basic CAPTCHA integration, which may not be sufficient for high‑traffic sites. We might need to supplement it with third‑party extensions for stronger protection, such as adding invisible honeypot fields or integrating with external spam‑filtering services.
Finally, the default email handling relies on PHP mail by default, which can suffer from deliverability issues on some hosting environments. Configuring SMTP is often necessary to ensure reliable email notifications. We also recommend testing the email flow after any server change to confirm that messages are still delivered.
We begin by navigating to Components → Contacts → Contacts in the Joomla backend. Clicking “New” opens a blank form where we can enter the contact’s name, email address, and a brief description that appears on the front end. We also set the publishing status to “Published” so the form becomes visible immediately.
Next, we assign the contact to a previously created category, such as “General Inquiry.” This categorization determines which menu item will display the form and which email address will receive the submission. We can also add an alias for SEO‑friendly URLs.
After filling in the required fields, we save the entry and verify that the contact appears in the list. At this stage, the contact is ready to be linked to a menu item, turning it into a functional form. We double‑check that the email address is correct and that the contact is set to receive messages.
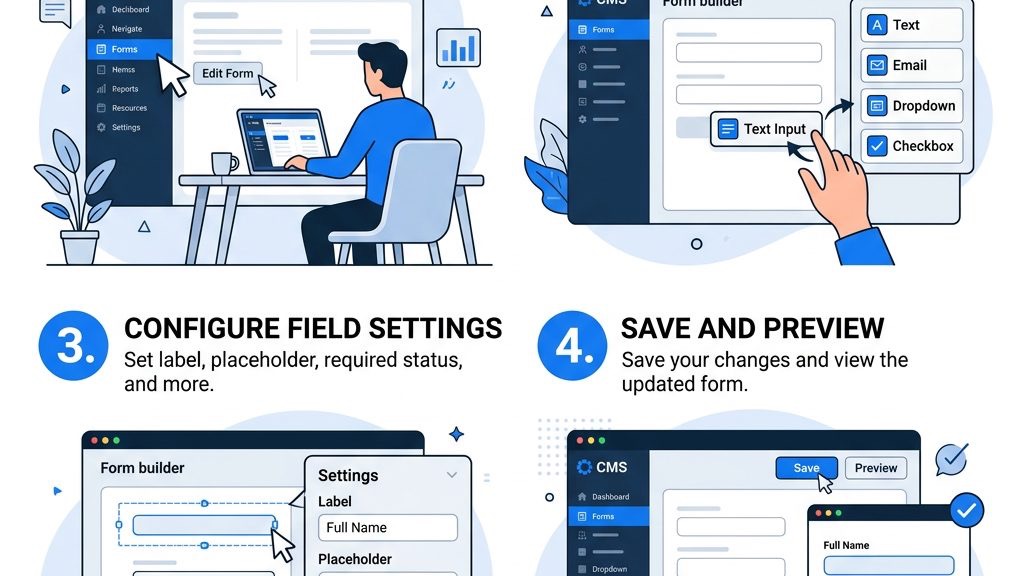
Within the contact entry, we locate the “Form” tab to adjust the fields that appear to visitors. We can enable or disable the default fields, add a custom field for “Company,” and set the required status for each element. We also decide whether to show placeholders that guide users on the expected input format.
We also configure the email settings, specifying the sender’s address, subject line, and whether to include a copy of the message in the email notification. These options help us maintain consistent branding and clear communication. We can also add a custom email template that includes our logo and branding colors.
Finally, we enable the built‑in CAPTCHA to guard against spam. By selecting “reCAPTCHA” from the dropdown and entering the site key and secret key, we add a layer of protection without compromising user experience. We test the CAPTCHA on several browsers to ensure it loads correctly.
To make the form accessible, we create a new menu item under the desired menu, such as “Contact Us.” We choose the “Single Contact” type, then select the contact we created in the previous steps. We also set the access level so that all visitors can see the link.
We give the menu item a clear title and optionally assign a CSS class for custom styling. Once saved, the menu item appears on the site’s navigation, providing a direct path to the form. We can also add a tooltip that appears on hover, giving users a brief description of the form’s purpose.
We test the link by visiting the front end and confirming that the form displays correctly, with all fields and CAPTCHA in place. This step ensures that visitors can reach the form without any broken links. We also check the page’s SEO metadata to make sure the title and description are optimized.
Testing begins with a simple submission using a personal email address. We fill out each required field, solve the CAPTCHA, and click “Send.” The system should display a success message and send an email notification to the designated address. We also verify that the auto‑reply, if configured, arrives in the inbox.
We check both the inbox and the Joomla backend’s “Messages” log to verify that the submission was recorded and the email was delivered. If the email does not appear, we review the SMTP configuration and error logs. We also confirm that the message appears in the “Contact” list under “Messages.”
Finally, we repeat the test with different browsers and devices to ensure the form is responsive and functional across all platforms. This thorough testing helps us catch any hidden issues before the site goes live. We also validate that the form works with screen readers to meet accessibility standards.

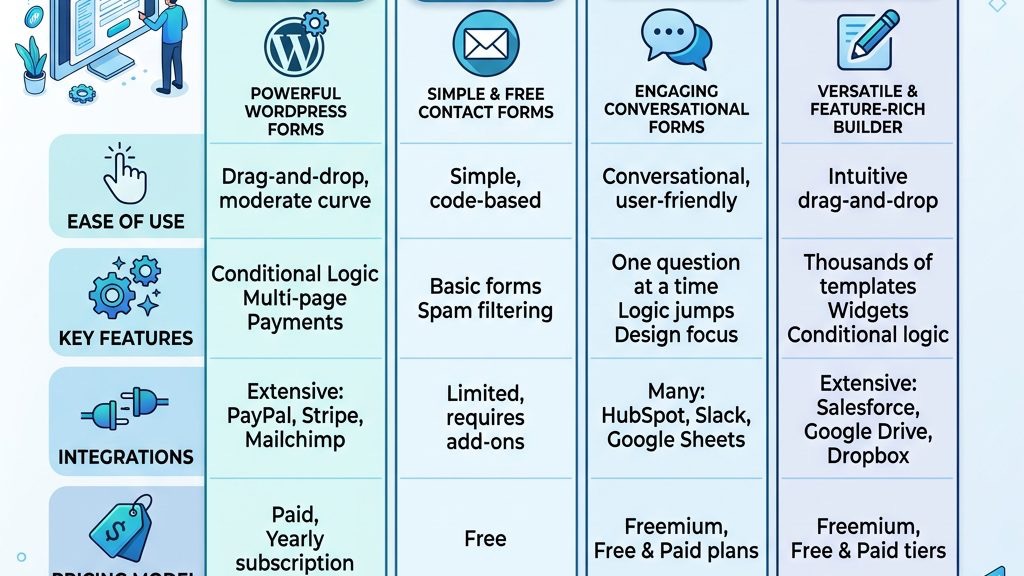
While the native component covers basic needs, extensions like Convert Forms, ChronoForms, and Balbooa Forms offer richer functionality. We compare them based on ease of use, feature set, and pricing to help you choose the right tool. Each extension also provides documentation and community support that can speed up implementation.
Convert Forms shines with its drag‑and‑drop builder, allowing us to assemble forms quickly without coding. ChronoForms provides deep customization through PHP scripts, making it ideal for complex workflows. Balbooa Forms balances visual design with powerful integrations, such as email marketing services. We also note the availability of free versus premium add‑ons for each platform.
All three extensions support CAPTCHA, SMTP, and custom fields, but they differ in their approach to styling and conditional logic. By evaluating each against our project requirements, we can select the extension that best matches our goals. We also test the extensions on a staging site before committing to a production deployment.
We start by downloading Convert Forms from the Joomla Extensions Directory and uploading it via Extensions → Manage → Install. After activation, a new “Convert Forms” menu appears in the backend. We then run the quick‑start wizard to set up basic defaults such as email sender and default layout.
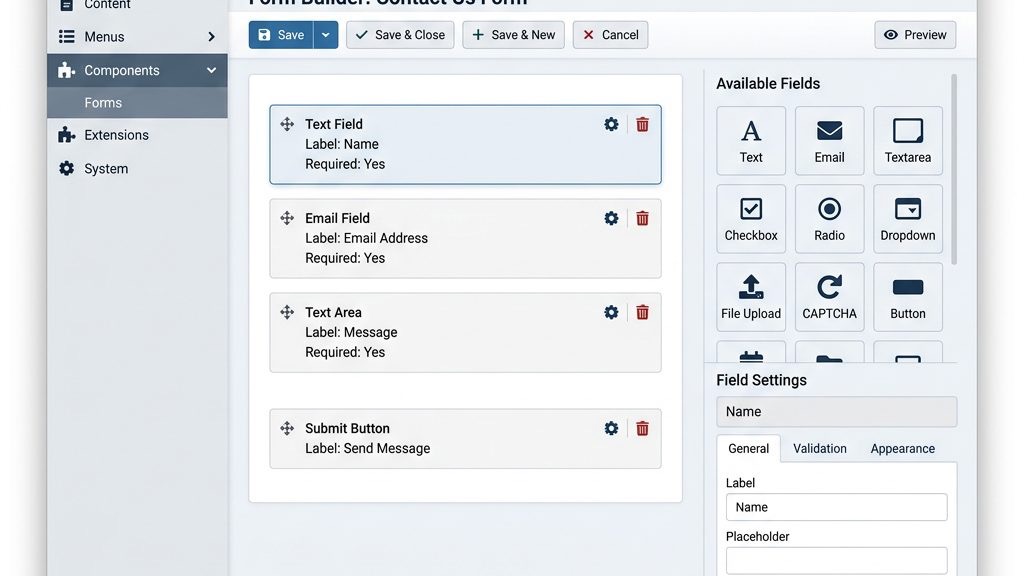
Creating a form involves clicking “New” and using the visual builder to drag elements like text fields, dropdowns, and a submit button onto the canvas. We can set each field’s validation rules, such as required or email format, directly within the builder. We also add a hidden field that captures the page URL for tracking purposes.
To protect the form, we enable reCAPTCHA under the “Security” tab and input the site and secret keys. We also configure email notifications, selecting the SMTP profile we set up earlier to ensure reliable delivery. We test the form using the built‑in preview mode before publishing it on the site.
ChronoForms offers a more technical approach, giving us access to PHP code snippets for custom processing. After installing the extension, we create a new form and select a pre‑made template or start from scratch. We can also import existing form definitions to speed up development.
We add fields using the form designer, then switch to the “Actions” tab to define what happens after submission. Here we can send an email, store data in a database, or trigger a webhook to an external service. We also set up a “Redirect” action that sends users to a thank‑you page after a successful send.
Security is handled by enabling the built‑in CAPTCHA and adding a hidden honeypot field. We also set up SMTP under the “Email” action to improve email deliverability, especially on shared hosting environments. We enable logging for each submission to help troubleshoot any issues later.
Custom fields let us collect information that goes beyond the standard name and email. We can add a “Preferred Contact Time” dropdown, a “Project Budget” numeric field, or a “Message Category” radio button. These fields help us segment inquiries and respond more effectively.
In the native component, we create these fields under the “Form” tab by selecting “Add New Field” and choosing the appropriate type. For extensions, the visual builder often includes a library of custom field options ready to drag onto the form. We also set default values where appropriate to reduce friction for users.
Each custom field can be marked as required, and we can set validation rules such as numeric only or a specific format. This ensures that the data we receive is clean and useful for downstream processing. We also enable server‑side validation to catch any attempts to bypass client‑side checks.
CAPTCHA remains a cornerstone of anti‑spam strategy, and we can choose between Google reCAPTCHA, hCaptcha, or a simple image challenge. We enable the chosen method in the form’s security settings and enter the necessary keys. We also test the CAPTCHA on low‑bandwidth connections to ensure it loads quickly.
To further reduce spam, we add a hidden honeypot field that only bots are likely to fill. This field remains invisible to human users but can be detected by server‑side validation, allowing us to discard suspicious submissions. We also configure rate limiting to block repeated attempts from the same IP address.
We also configure the form’s email handling to use SMTP, which improves deliverability and reduces the chance that legitimate messages are flagged as spam by recipient servers. We set up SPF and DKIM records for the sending domain to enhance trust. Regularly reviewing bounce reports helps us keep the email list clean.
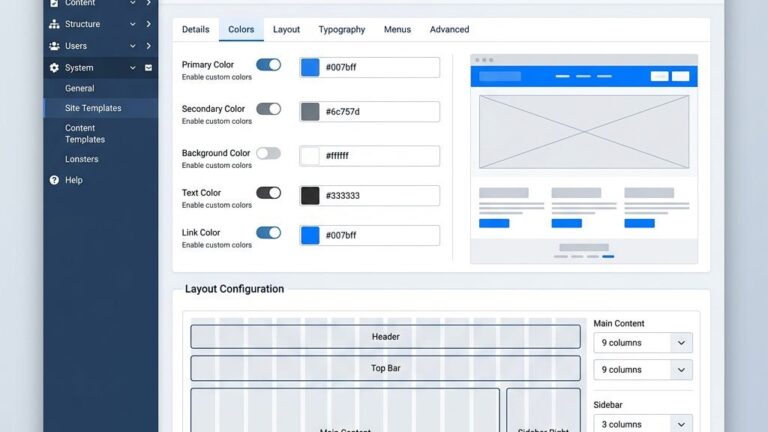
While Joomla’s default styling provides a functional layout, we often want a look that matches our site’s branding. By adding custom CSS rules to the template’s stylesheet, we can adjust colors, fonts, and spacing. We also use media queries to ensure the form looks good on mobile devices.
For example, we might target the form’s input fields with a selector like “.contact-form input” and set a border radius and background color that aligns with our theme. We can also style the submit button with a subtle hover effect to enhance interactivity. Adding a focus outline improves accessibility for keyboard users.
When using extensions, many offer a “Custom CSS” box directly within the form builder, allowing us to apply styles without editing theme files. This approach keeps our customizations organized and easy to maintain. We also document any CSS changes in a version‑controlled file for future reference.

If submissions are not arriving in our inbox, the first step is to check the email settings in the form configuration. We verify that the sender address, recipient address, and subject line are correctly entered. We also confirm that the email template does not contain syntax errors that could block delivery.
Next, we examine the server’s mail logs for any errors related to PHP mail. Many hosts block PHP mail by default, so switching to SMTP is often the solution. We also test the SMTP connection using the “Send Test Email” feature provided by the extension.
Finally, we test the form using a different email address to rule out spam filtering on the recipient side. If the email still does not arrive, we enable debug mode to capture detailed error messages. We also check that the server’s firewall is not blocking outbound SMTP traffic.
Setting up SMTP involves entering the host, port, encryption method, and authentication credentials provided by our email service. We configure these settings in the Global Configuration or within the form extension’s email action. We also enable TLS or SSL encryption to protect the credentials during transmission.
We also test the connection using the “Send Test Email” button, which confirms that the server can communicate with the SMTP server. Successful tests indicate that the form will be able to dispatch messages reliably. We keep a record of the test results for future reference.
If the test fails, we double‑check the port number (often 587 for TLS or 465 for SSL) and ensure that the firewall is not blocking outbound connections. Adjusting these parameters usually resolves the issue. We also verify that the email service allows relay from our server’s IP address.
Validation errors appear when users submit incomplete or incorrectly formatted data. We review the field settings to confirm which fields are marked as required and what validation rules are applied. We also check that the error messages are clear and helpful for users.
Common problems include missing “required” attributes or mismatched email regex patterns. By correcting these settings, we ensure that the form only accepts valid input. We also add custom error messages that guide the user on how to fix the issue.
We also test the form on multiple browsers to verify that client‑side validation works consistently. If server‑side validation still blocks submissions, we check the PHP error log for any syntax issues in custom scripts. We keep a backup of the original configuration before making changes.
Yes, Joomla includes a native contact component that provides a basic form with fields for name, email, and message, along with email notification capabilities. We can activate it directly from the backend without installing extra extensions. The component also supports multiple categories for better organization.
We can embed a contact form in an article by using the “Load Module” syntax or by creating a menu item of type “Single Contact” and linking it within the article content. The module approach lets us place the form anywhere inside the article text. We also ensure the module is assigned to the appropriate position and access level.
Convert Forms offers a free version with a drag‑and‑drop builder, making it a popular choice for simple yet stylish forms without cost. It includes basic field types, CAPTCHA integration, and email notifications. The free tier also allows us to create up to three forms, which is sufficient for many small sites.
In the form settings, we enable CAPTCHA, select reCAPTCHA (or another provider), and enter the site and secret keys obtained from the provider’s dashboard. We also configure the display position to keep the form layout tidy. After saving, we test the CAPTCHA on both desktop and mobile devices.
Multi‑step forms are possible using extensions like ChronoForms or Balbooa Forms, which allow us to split fields across several pages or sections. We can configure progress indicators so users know how many steps remain. These extensions also support conditional logic to show or hide fields based on previous answers.
We should verify the email configuration, switch to SMTP if PHP mail is unreliable, and test the connection to ensure credentials are correct. We also check the spam folder and any server‑side filters that might block the message. Enabling debug mode can reveal detailed error information for troubleshooting.
Yes, the built‑in contact component lets us create a simple form without any additional extensions, though advanced features may require a plugin. We can still customize the form’s fields, email settings, and basic styling using the core options. For more complex requirements, we consider a lightweight third‑party extension.