Physical Address
304 North Cardinal St.
Dorchester Center, MA 02124
Physical Address
304 North Cardinal St.
Dorchester Center, MA 02124

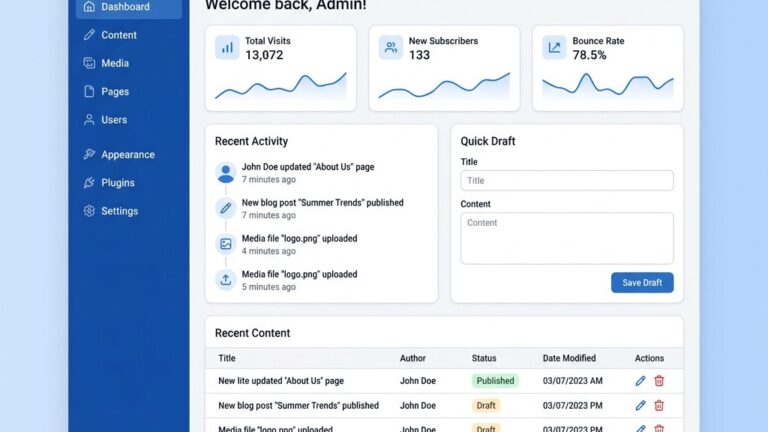
joomla contact form is the cornerstone of any website that wants to turn visitors into leads, and we will walk you through every step of building one that feels as natural as a conversation over coffee. In the next few thousand words we will explore the native component, compare top‑tier extensions, and sprinkle in tips for security, styling, and email reliability.
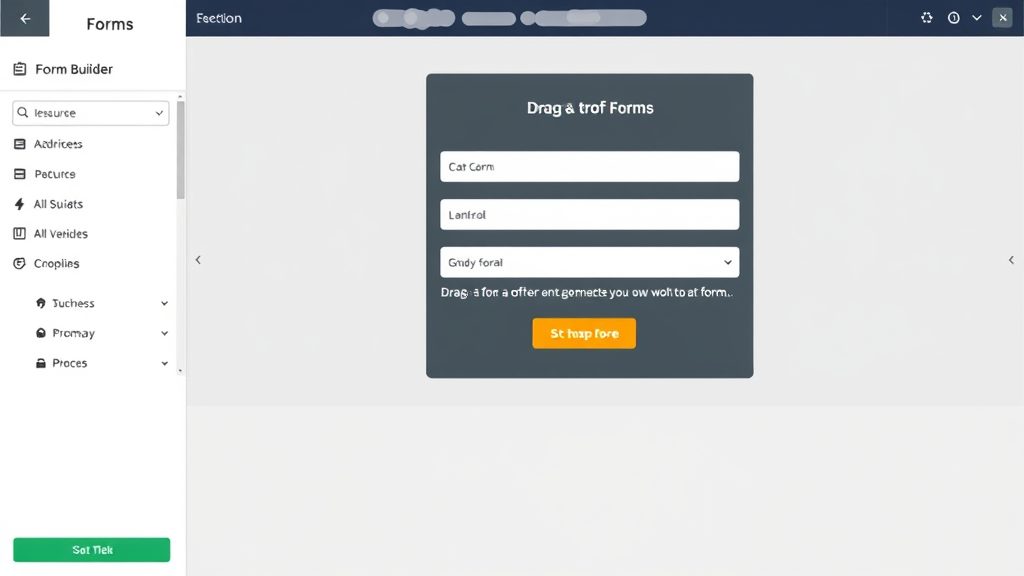
Image: Creating custom contact forms in Joomla
We begin by opening the Joomla administrator and navigating to Components → Contacts. The first screen shows a list of existing contacts; we click the New button to create a fresh entry. In the contact form we fill out a name, email address, and a short description that will appear on the front end. After saving, Joomla automatically generates a record that can be linked to a menu item or module.
The next step is to assign the contact to a category, which helps organize multiple contacts for different departments. We select a category such as “Customer Support†or create a new one if the default does not fit our structure. Category assignment also influences the layout of the contact page, as Joomla pulls the category’s parameters for display. Once the category is set, we revisit the contact details to ensure the email address is correct; a typo here would cause all messages to disappear into the void.
Now we turn to the publishing options, where we decide whether the contact is visible to guests or only to registered users. For a public contact form we enable Show to All and make sure the Access level is set to Public. We also enable the Display Contact Form toggle, which tells Joomla to render the form fields on the front end. After confirming all settings, we click Save & Close and the contact is ready to be linked to a menu item.
Finally, we test the newly created contact by visiting the front‑end URL that Joomla assigns to it. The page should display the contact’s name, a brief description, and a simple form with fields for name, email, subject, and message. If the form appears correctly, we have completed the core setup and can move on to linking it into the site navigation.
We head back to the administrator and select Menus → [Your Menu] → Add New Menu Item. In the Menu Item Type dropdown we choose Contacts → Single Contact, which tells Joomla to render the contact we just created. The menu title is set to something clear like “Contact Usâ€, and we assign it to the appropriate menu position on the site.
The next tab, Display Settings, lets us control the page layout, such as showing the contact’s image or hiding the email address. We enable Show Contact Form if it is not already active, and we may also set the Page Class Suffix to a custom value for later CSS styling. After configuring the display options, we click Save and the menu item appears in the site navigation.
To verify the link, we visit the front end and click the new “Contact Us†menu entry. The page should load the contact’s details and the form we prepared earlier. If the form is missing, we double‑check the contact’s Display Contact Form flag and the menu item’s Parameters tab. Once the form is visible, we can submit a test message to ensure the email routing works as expected.
At this point the site visitors have a direct line to us, and the entire process required only core Joomla features—no extra extensions, no custom code, just a few clicks and a bit of patience.
The default contact form uses Joomla’s global mail settings, which we find under System → Global Configuration → Server → Mail Settings. Here we select the mailer type—PHP Mail, SMTP, or Sendmail—depending on our hosting environment. For most shared hosts we stick with PHP Mail, but if we have a dedicated server we may prefer SMTP for better deliverability.
When using SMTP we fill in the host address, port number, encryption method (TLS or SSL), and authentication credentials. These details are usually provided by the email service provider, and entering them correctly prevents the dreaded “mail not sent†error. After saving the global configuration we return to the contact record and verify that the Email field contains the correct destination address.
To test the email flow we submit a message through the front‑end form and check the inbox of the address we set. If the message lands in the spam folder, we may need to adjust the From name and address to match the domain, or add SPF/DKIM records at the DNS level. Once the test message arrives in the inbox, we know the contact form can reliably deliver messages to our team.
We also enable the Copy to Sender option if we want the visitor to receive a confirmation copy of their submission. This small touch improves trust and reduces the chance of the message being ignored. With the mail settings fine‑tuned, the built‑in contact form is ready for production use.
Convert Forms, crafted by Tassos.gr, arrives as a free extension that packs a surprising amount of power. We install it from the Extensions → Manage → Install screen, then navigate to Components → Convert Forms to start building. The interface offers a drag‑and‑drop canvas where each field is a block that can be repositioned with a single mouse movement.
One of the standout features is conditional logic, which lets us show or hide fields based on previous answers—perfect for creating a dynamic questionnaire. For example, if a visitor selects “Need a quoteâ€, a price‑range field appears; otherwise it stays hidden. The extension also supports file uploads, so users can attach documents or images directly from the form.
Convert Forms stores each form as a shortcode, which we can embed in articles, modules, or custom positions using the syntax [convertform id="X"]. This flexibility means we can place the same form in multiple places without duplicating the configuration. The premium tier, priced at €29 per year, unlocks multilingual support and advanced integrations, but the free version already covers most small‑business needs.
RSForm Pro is a paid extension that has earned a reputation among developers for its extensibility. After purchasing a license we download the package and install it through the Joomla extension manager. The component adds a new RSForm! Pro menu entry where we can create forms using a visual builder or raw XML.
What makes RSForm Pro powerful is its extensive plugin ecosystem, allowing us to connect forms to third‑party services such as Mailchimp, PayPal, or Google Sheets. We can also write custom PHP scripts that run after form submission, giving us full control over data handling. The built‑in validation engine supports regex patterns, making it easy to enforce strict formats for phone numbers or postal codes.
The interface includes a Layout Designer where we can edit the HTML markup of the form, inserting our own CSS classes for precise styling. For large sites we can clone existing forms, adjust fields, and reuse them across multiple pages. Although the price tag is higher than free alternatives, the depth of features justifies the investment for complex workflows.
BreezingForms presents a visual, drag‑and‑drop builder that feels like arranging furniture in a room. After installing the component we open the BreezingForms dashboard and click New Form to start with a blank canvas. Each field appears as a tile that we can drag onto the form area, resize, and configure via a side panel.
The builder includes a live preview mode, so we can see how the form will look on desktop and mobile without leaving the editor. We can also set up email notifications, autoresponders, and conditional sections directly from the visual interface. For developers, BreezingForms offers a PHP Script field that executes custom code after submission, bridging the gap between simplicity and flexibility.
A notable advantage is the built‑in Spam Protection module, which bundles reCAPTCHA, hCaptcha, and honeypot options in a single dropdown. The extension also supports multi‑page forms, allowing us to break lengthy questionnaires into bite‑size steps. The free version covers most basic needs, while the premium license adds advanced integrations and priority support.
Shack Forms focuses on field management and styling, giving us granular control over each input’s appearance. After installation we find a Shack Forms menu where we can create a form and then assign CSS classes to individual fields. This approach is handy when we need to match a corporate design system without writing custom HTML.
Other extensions worth a glance include ChronoForms, which offers a modular architecture for building complex workflows, and Form2Content, which stores submissions as Joomla articles for easy front‑end display. Each of these tools brings a unique flavor to the Joomla ecosystem, and the best choice depends on the specific project requirements.
When evaluating extensions we consider factors such as ease of use, community support, and compatibility with the latest Joomla version. The Joomla Extensions Directory provides user ratings and screenshots that help us make an informed decision. By testing a few candidates on a staging site we can see which one feels like the right fit for our workflow.

Image: Form submissions delivered to your inbox
For more on this topic, check out our Joomla tutorial.
We start by creating a site key and secret key on the Google reCAPTCHA dashboard, choosing either v2 (“I’m not a robotâ€) or v3 for invisible verification. After obtaining the keys we return to the Joomla administrator and go to System → Global Configuration → Site → ReCAPTCHA. Here we paste the site key and secret key into the appropriate fields and select Google reCAPTCHA as the default captcha plugin.
Next we enable the captcha for a specific form. In the built‑in contact component we open the contact record, click the Options tab, and set Captcha to Google reCAPTCHA. For extensions like Convert Forms or BreezingForms we locate the Spam Protection section and choose the same captcha plugin. This ensures that every submission must pass the verification step before the data is processed.
To verify the integration we load the front‑end form and confirm that the reCAPTCHA widget appears in the expected location. We then submit a test entry, checking that the form rejects submissions when the captcha is left unchecked or solved incorrectly. If the widget does not load, we double‑check that the site key matches the domain and that no JavaScript errors are blocking the script.
Finally we consider the user experience: placing the captcha near the submit button reduces scrolling, and using the invisible v3 option can keep the form looking clean while still providing strong protection. With Google reCAPTCHA correctly configured, we have a solid barrier against automated spam bots.
While Google reCAPTCHA is popular, some visitors prefer privacy‑focused alternatives such as hCaptcha or Friendly Captcha. We can install the corresponding Joomla plugin from the Extensions → Manage → Install screen and then select it in the global captcha settings. The setup process mirrors that of Google reCAPTCHA: we obtain API keys from the provider and paste them into Joomla’s configuration page.
Another lightweight technique is the honeypot field, a hidden input that humans never see but bots often fill out. Many form extensions include a built‑in honeypot option that we can enable with a single toggle. When the hidden field contains any value, the form silently discards the submission, keeping the user unaware of the rejection.
Combining a visible captcha with a honeypot creates a layered defense. The visible captcha stops most automated attacks, while the honeypot catches more sophisticated bots that can solve captchas. We should also monitor the server logs for repeated failed attempts, as a sudden spike may indicate a targeted spam campaign that requires additional throttling.
By offering multiple protection methods we respect user preferences and maintain a high level of security without sacrificing accessibility.
We keep the captcha challenge short and place it near the submit button, so users do not have to scroll back up after filling out the fields. When using invisible captchas we rely on background risk analysis, which reduces friction for genuine visitors while still filtering out bots.
It is also wise to limit the number of submissions per IP address within a given time frame. Many extensions provide a Rate Limiting option where we can set a threshold, such as three submissions per hour. This helps stop brute‑force attacks without locking out legitimate users on shared networks.
Finally we test the form on a variety of devices and browsers to ensure that the captcha loads correctly on mobile. A broken captcha on a smartphone can drive away potential leads. By balancing security measures with a smooth user journey we keep our contact form both safe and inviting.
For more on this topic, check out our Joomla extensions.
Client‑side validation runs in the browser and provides instant feedback, preventing users from submitting incomplete or malformed data. In Joomla’s built‑in contact form we enable Validate Email and Validate Required Fields in the contact options, which adds HTML5 attributes like required to the markup. and type="email"
Server‑side validation is the safety net that catches any data that slips past the client checks, especially when a malicious user disables JavaScript. Extensions such as RSForm Pro allow us to define custom validation rules using regular expressions or PHP callbacks. For example, we can enforce a phone number format of “+1‑123‑456‑7890†by adding a regex pattern to the field’s validation settings.
We also configure error messages that appear next to each field, using clear language that tells the visitor exactly what needs fixing. Consistent styling of error messages—such as a red border and a small explanatory text—helps maintain a professional look. After setting both client‑ and server‑side validation, we test the form by entering invalid data and confirming that the appropriate messages appear.
By covering both layers of validation we reduce the chance of bad data reaching our inbox while keeping the user experience smooth and informative.
Sometimes the default fields—name, email, subject, message—are not enough for a specialized inquiry. We can add custom fields like “Preferred Contact Timeâ€, “Company Sizeâ€, or “Upload Project Briefâ€. In the built‑in contact component we use the Extra Fields tab to create additional inputs, selecting the appropriate type (text, list, date, file).
For more complex field types we turn to extensions. Convert Forms offers a Field Builder where we can drag a “Dropdown†element, populate the options, and set a default value. BreezingForms adds a Date Picker and a Currency field that automatically formats numbers. These custom fields can be mapped to email placeholders, so the submission email contains all the extra information in a readable format.
We also consider the order and grouping of fields; placing related items together improves readability. Using fieldsets or tabs—features available in RSForm Pro—lets us hide less‑important sections until the user needs them. After adding the custom fields we preview the form to ensure the layout remains clean and that required fields are marked appropriately.
Custom fields give us the flexibility to capture exactly the data we need, turning a simple contact form into a powerful lead‑generation tool.
Conditional logic lets us show or hide fields based on previous answers, creating a dynamic experience that feels like a conversation. In Convert Forms we define a rule such as “If Service Type equals ‘Design’, then display Design Portfolio URLâ€. The rule is evaluated instantly on the client side, so the extra field appears without a page reload.
RSForm Pro provides a more advanced Conditional Fields module where we can chain multiple conditions together. For example, we might hide the Budget field unless the visitor selects “I have a budgetâ€. This reduces visual clutter and guides users through a focused path.
We also use conditional logic to change the email template based on the user’s selections. If a visitor chooses “Request a Quoteâ€, the email can include a pricing table; otherwise it can omit that section. Testing these dynamic behaviors is crucial—​we must verify that the correct fields appear and that the final email contains the right data for each scenario.
By leveraging conditional logic we transform a static form into an interactive questionnaire that adapts to each visitor’s needs.
For more on this topic, check out our Joomla security tips.
Joomla’s mail system can be tuned to work with most hosting environments. We start by opening System → Global Configuration → Server → Mail Settings and selecting the mailer that matches our server—SMTP is often the most reliable choice. We then fill in the SMTP host, port, encryption method, and authentication credentials provided by our email service.
To avoid messages being flagged as spam we set the From Email and From Name to match the domain of the website. Many mail providers require the From Email to be a verified address, otherwise they may reject the message. We also enable SMTP Authentication and ensure that the SMTP Security matches the provider’s recommendation (TLS is common).
After saving the configuration we send a test email from the Mail Settings page, confirming that the message arrives in the inbox. If the test fails, we check the server’s error logs for clues such as “authentication failed†or “connection timed outâ€. Adjusting the port number (e.g., switching from 587 to 465) can resolve many connectivity issues.
By fine‑tuning the mail settings we lay a solid foundation for all future form notifications, ensuring that no lead is lost due to delivery problems.
An auto‑responder acknowledges receipt of a visitor’s message and sets expectations for a follow‑up. In the contact component we enable Send Copy to Sender and customize the message template with placeholders like {name}. This simple feature gives the visitor confidence that their inquiry is being processed. and {message}
For more sophisticated autoresponders we use the Email Templates feature of extensions such as BreezingForms. We create a new template, insert dynamic fields, and schedule a delay if needed (e.g., send a follow‑up after 24 hours). The extension also lets us attach files, such as a PDF brochure, to the autoresponder email.
Notification emails to the site administrators can be sent to multiple recipients. We add additional email addresses in the Recipient List field, separating them with commas. Some extensions provide a CC and BCC option, which is useful for keeping a record of all submissions in a central inbox.
We test both the autoresponder and admin notifications by submitting a test form and verifying that each email arrives with the correct content and formatting. Any missing placeholders are corrected by reviewing the template syntax.
With a reliable autoresponder and clear admin notifications, our contact workflow becomes a well‑orchestrated communication loop.
When messages disappear, we first check the Joomla Log for any error entries related to mail sending. The log often contains a clear error code, such as “SMTP connect() failedâ€. If the log shows no errors, we verify that the server’s firewall is not blocking outbound SMTP traffic.
Another frequent culprit is the Spam Filter on the recipient’s side. We ask the admin to add our sending address to the whitelist and to check the spam folder for misplaced messages. Adding SPF and DKIM records to the DNS zone improves the reputation of our outgoing mail and reduces the chance of being marked as spam.
If the form uses a third‑party service like SendGrid, we ensure that the API key is still valid and that the service’s sending limits have not been exceeded. Some extensions also provide a Debug Mode that logs the raw SMTP conversation, which can be invaluable for pinpointing where the handshake fails.
Finally, we confirm that the From Email domain matches the site’s domain; mismatched domains often trigger rejection by strict mail servers. By systematically checking these areas we can resolve most delivery problems without needing to dive into code.
We begin by adding a custom CSS file to our template’s css folder, then we reference it in the template’s index.php or via the Custom CSS option in the template settings. In this file we target the form’s classes, such as .joomla-contact-form or the specific field classes generated by the extension.
For example, we might set input[type="text"], textarea { border-radius: 4px; border: 1px solid #ccc; padding: 8px; } and adding a hover effect for interactivity. to give the inputs a modern look. We also adjust the submit button with a background color that matches the site’s branding, using background: #0066cc; color: #fff;
Responsive design is handled by media queries; we ensure that on screens narrower than 600 px the form fields stack vertically and the font size scales down slightly. Testing on multiple devices confirms that the form remains readable and easy to tap.
If the extension provides a Form Class Suffix, we can assign a unique class to a specific form instance and write CSS that only affects that form, preventing unintended style clashes elsewhere on the site.
With a few targeted CSS rules we can transform a plain Joomla contact form into a polished element that blends seamlessly with the overall design.
Joomla allows us to place a form anywhere using shortcodes, module positions, or direct HTML. For the built‑in contact component we create a Menu Item of type Single Contact, then use the Menu Assignment options to display it on a specific page or module position.
Convert Forms and BreezingForms provide shortcodes like [convertform id="5"] that we can paste into an article’s editor. The form then renders inline with the article content, making it easy to embed a contact form at the end of a blog post.
Modules such as Custom HTML can host the shortcode or a direct PHP snippet that calls the form rendering function. By assigning the module to a position like footer, we can display a compact contact widget site‑wide. or sidebar
When embedding in a custom position we ensure that the module’s Chrome Style does not add extra wrappers that break the form layout. A quick preview in the front end helps us spot any spacing issues before publishing.
Through these embedding techniques we gain the flexibility to place the contact form wherever it best serves the user journey.
A mobile‑first approach starts with a single‑column layout, allowing fields to stretch to the width of the screen. We set each input’s width to 100% to keep the vertical rhythm comfortable. and add a modest margin-bottom
Touch‑friendly controls are essential; we increase the height of buttons and form fields to at least 44 px, which matches the recommended tap target size for mobile devices. We also avoid tiny checkboxes or radio buttons that can be hard to select on a small screen.
If the form includes a file upload, we provide a clear label and a preview area that scales down on mobile. Some extensions automatically generate a thumbnail preview, which helps users confirm they selected the right file.
Finally, we test the form using Chrome’s device toolbar and real smartphones to catch any overflow or zoom issues. Adjusting the viewport meta tag in the template’s head ensures that the page scales correctly on all devices.
By following these guidelines the contact form remains usable and attractive, whether the visitor is on a desktop or a pocket‑sized phone.
We start by using the core Contacts component, creating a contact record, and then linking it to a menu item of type Single Contact. The component automatically generates a form with fields for name, email, subject, and message. After configuring the global mail settings, the form can send messages directly to the address we specified. This approach requires no additional code and works out of the box on any Joomla installation.
The native contact component does not support file uploads, so we need an extension that offers this feature. Convert Forms, BreezingForms, and RSForm Pro all include a File Upload field that can be added to the form layout. Once the field is placed, we configure the allowed file types and size limits, then map the uploaded file to an email attachment. This gives us a simple way to receive documents, images, or PDFs from visitors.
Version 2 displays a checkbox or image challenge that users must solve, providing a clear visual cue that spam protection is active. Version 3 runs silently in the background, assigning a risk score to each submission without interrupting the user. For sites that prioritize a seamless experience, v3 is often preferred, while v2 offers stronger protection for high‑risk forms. Both can be configured in Joomla’s global captcha settings and then assigned to individual forms.
Many extensions, such as RSForm Pro and BreezingForms, have a built‑in Database Storage option. When we enable this feature, each submission is saved as a record in a dedicated table, which we can view from the Joomla backend. Some extensions also allow exporting the data to CSV or Excel, making it easy to analyze trends or import leads into a CRM system.
Yes, we can embed the form directly in an article using a shortcode provided by the extension. For example, Convert Forms uses [convertform id="X"], which we paste into the article editor at the desired location. When the article renders, Joomla replaces the shortcode with the full form markup, allowing us to place the form anywhere within the article content.
First, we enable Joomla’s Debug Mode in System → Global Configuration → System to see any PHP errors that may be occurring. Next, we check the web server’s error log for fatal errors or permission issues. If the form uses an extension, we verify that the extension’s version is compatible with our Joomla version. Finally, we test the form with a simple configuration—removing custom fields and disabling captcha—to isolate the cause. Once the offending element is identified, we adjust the settings or update the extension accordingly.
—
We hope this deep dive equips you with the knowledge to build, secure, and style a Joomla contact form that works like a well‑tuned instrument, playing in harmony with your site’s goals.