Physical Address
304 North Cardinal St.
Dorchester Center, MA 02124
Physical Address
304 North Cardinal St.
Dorchester Center, MA 02124

Setting up joomla google search console integration is one of the smartest moves we can make for any Joomla website that wants to appear in search results. In this guide, we walk through every step—from creating a GSC account and verifying ownership to submitting sitemaps and reading performance reports—so our Joomla site gets the visibility it deserves.
Key Takeaways
We begin by opening a Google account if we do not already have one. The sign‑up flow asks for a name, a password, and a recovery email, and it finishes within a few clicks. After the account is ready, we head to search.google.com/search-console to reach the console’s home screen.
The console’s dashboard greets us with a clean layout that shows a quick overview of performance, coverage, and enhancements. A small panel displays the number of sites we have already added, while a larger chart hints at traffic trends. The official help page explains each widget in detail.
Google Search Console gathers a wealth of data that we will rely on throughout this guide:
This information forms the backbone of any SEO analysis we will perform later.
The “Add Property” button sits at the top left of the dashboard and invites us to register a new site. Clicking it opens a dialog where we paste the full URL of our Joomla installation, then we choose the property type. The system validates the entry and creates a placeholder for the site’s future data.
Once the property appears in the list, we see a fresh overview screen that is currently empty. The console prompts us to verify ownership before any data can be displayed. This step is crucial because it tells Google that we have the right to speak for the site.
After verification, the property begins to collect information automatically. Within a day we can expect to see the first impressions and crawl statistics. The property stays visible in the left‑hand navigation, ready for deeper exploration.
| Feature | Domain Property | URL‑Prefix Property |
|———|—————-|——————–|
| Scope | All subdomains and protocols (http / https) | Only the exact URL we entered |
| Verification | Requires DNS TXT record or Google Search Console’s DNS method | Can use HTML tag, file upload, or GA |
| Ideal for Joomla | Useful for multisite setups or when we want to track every sub‑site | Simpler for a single site with a fixed protocol |
A domain property works like a wide‑angle lens, capturing every corner of our web presence. It automatically includes www, blog, and any other sub‑domains we might create later. This breadth can be a double‑edged sword if we only care about the main site.
The URL‑prefix property behaves like a spotlight, illuminating just the path we specify. It is straightforward to set up because the verification options are more varied. For most Joomla sites that run on a single domain, the URL‑prefix approach is the quicker route.
Choosing between them depends on how we structure our Joomla installation. If we plan to add sub‑domains for multilingual content, the domain property saves us future work. Otherwise, the URL‑prefix property gives us a clean, focused view.

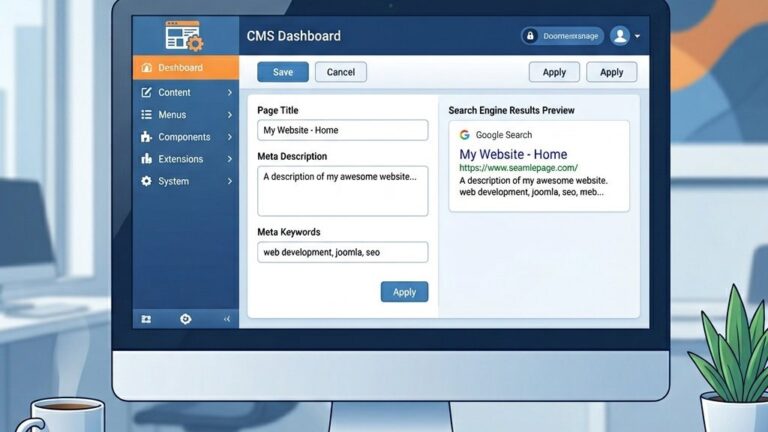
Google supplies a meta tag that looks like the snippet below, and we need to place it inside the section of our Joomla template. The easiest route is opening the template’s index.php file through System > Site Templates > [our template] > index.php in the administrator panel. We paste the tag right after the opening tag, save the file, and the work is done.
The tag sits beside other meta tags like description and viewport, acting as a silent handshake with Google. If we prefer not to touch template files directly, a lightweight extension such as Custom Code or Header/Footer Code Manager can inject the tag for us through the administrator panel. After saving, we return to the console and click “Verify”—the process usually finishes within seconds.
Because the meta tag lives in the template, it remains present even after we update Joomla core files. This method is the most popular among Joomla users because it requires no FTP access, no DNS changes, and no file uploads. Think of it as slipping a secret note into a mailbox that only Google’s mail carrier can read.
Google also offers a tiny HTML file named googleXXXXXXXXXXXX.html. We download the file from the console and upload it to the root folder of our Joomla site using FTP or the hosting file manager. Once the file is in place, we test its accessibility by visiting https://example.com/googleXXXXXXXXXXXX.html.
If the file loads correctly, we click the “Verify” button in the console and the ownership claim is accepted. This approach works even when we cannot edit the template files, making it a handy fallback.
The DNS method involves adding a TXT record to the domain’s DNS zone at our registrar. We copy the verification string, create a new TXT record, and wait for propagation, which can take up to 48 hours. After the record appears, we confirm it in the console and the site becomes verified.
This method requires that the Google Analytics tracking code already resides on the Joomla site. In the console we select the “Google Analytics” option and choose the appropriate GA property from the dropdown list. Google then scans the page source for the tracking ID and confirms ownership automatically.
Using GA for verification saves us an extra step, especially when the site already reports traffic data. It also keeps the verification hidden from visitors, preserving a clean HTML head. For a full walkthrough of installing GA on Joomla, see our Google Analytics setup guide.
The GA verification method is particularly useful for agencies managing multiple Joomla sites, since they often have Google Analytics deployed before any SEO work begins. We simply pick the matching property from the dropdown, and the handshake between GSC and GA happens behind the scenes. If we ever remove the GA tracking code, the verification remains intact—Google does not revoke access once ownership is confirmed.
Below is a quick ranking of the four verification methods, ordered by ease of implementation:
1. HTML Meta Tag – Fast, no external tools needed.
2. Google Analytics – Ideal if GA is already active.
3. HTML File Upload – Simple FTP work.
4. DNS TXT Record – Most technical, but works for any site.

We often start with the popular OSMap extension, which builds a full XML sitemap with just a few clicks. After installing the component, we go to its settings and enable the inclusion of articles, categories, and menu items. The generated file lives at https://example.com/sitemap.xml.
A quick check in the browser confirms that the file returns a list of URLs wrapped in
The extension also supports automatic updates whenever we publish new content, keeping the sitemap fresh without manual effort. This automation acts like a river that constantly carries new pages downstream to Google’s crawlers.
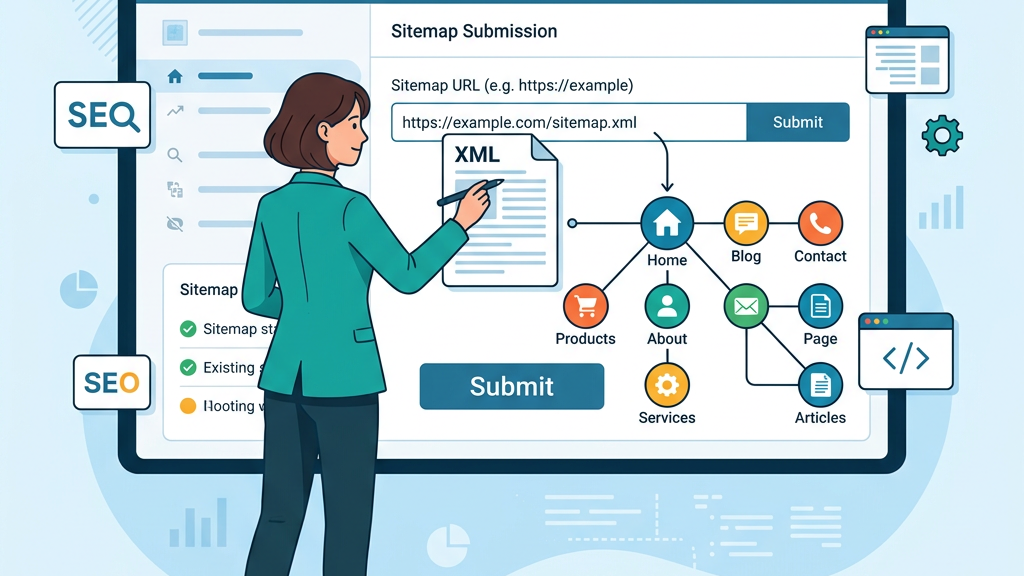
Inside GSC we open the Sitemaps menu under the “Index” section and click the “Add/Test Sitemap” button. We enter the path sitemap.xml (or the full URL) and press Submit. The console then begins to fetch the file and displays a status label such as “Pending” or “Success”.
When the status turns to Success, Google has read the file and queued the URLs for crawling. The dashboard shows the number of discovered URLs and any warnings that may have arisen. A green checkmark is our signal that the sitemap is live.
If the console reports an error like “Couldn’t fetch”, we double‑check the file’s permissions and confirm the URL is reachable. After fixing the issue, we simply click Resubmit to trigger another fetch.
The Sitemaps page also lists the count of indexed URLs versus the total submitted. A large gap between these two numbers may indicate that some pages are blocked by robots.txt, carry a noindex tag, or return server errors. We can drill down into each URL by clicking the “Coverage” report, which breaks the issue into specific categories. This is where detective work begins—we follow each clue until the root cause is found.
Common errors include “Submitted URL not found (404)” and “Submitted URL has a redirect.” Both can be resolved by updating the sitemap or fixing the underlying page in our Joomla installation. If URLs in the sitemap point to trashed or unpublished articles, we should either republish them or remove them from the sitemap configuration in OSMap. After correcting the problem, we click Resubmit to trigger another fetch and let Google re-evaluate.
Regular sitemap maintenance is not a one-time task—it is an ongoing commitment that pays dividends every time Google crawls our site.
Monitoring keeps the sitemap in sync with our Joomla site’s evolving structure, much like a lighthouse that guides ships safely to shore. We recommend checking sitemap status at least once a week during the first month after setup, then monthly after that. If we add content frequently, an extension that auto-regenerates the sitemap on each publish saves us from manual re-submissions.
The Performance report presents four key metrics: clicks, impressions, average position, and click-through rate (CTR). We can filter the data by page, country, device, or date range to uncover hidden patterns. For example, a high impression count with low CTR often points to a weak meta description that fails to attract clicks. Treating this report as our SEO scoreboard gives us a clear picture of what works and what needs attention.
By sorting the table, we spot the pages that bring the most traffic and those that need a boost. The insights guide us to rewrite titles, adjust headings, or add structured data to win rich snippets. Our Joomla SEO guide offers deeper tactics for turning these numbers into real growth. We can also export the data to a spreadsheet for deeper analysis or client reporting.
Comparing current metrics with the previous period helps us detect seasonal trends and algorithm shifts. A sudden dip in clicks may signal a crawl issue, a lost backlink, or a Google core update that requires immediate attention. We set up email alerts in GSC to get notified when coverage issues spike, so we never miss a critical change.
The URL Inspection tool lets us paste any page address and see exactly how Google views it. The result panel displays the last crawl date, index status, canonical URL, and any detected warnings or enhancements. We can request a fresh crawl directly from this screen if we have recently updated the content or fixed an error. This tool functions like a doctor’s stethoscope, letting us listen to the health of each individual page.
Two testing modes exist: a live test that checks the current live page in real time, and an indexed version that shows what Google has stored in its cache. The live test is useful right after fixing a broken link or updating a meta description, because it shows us the page as Googlebot would see it right now. The indexed version helps diagnose why an older snapshot might differ from what we expect. We often toggle between both modes when troubleshooting stubborn indexing problems.
We typically reach for this tool when a new Joomla article does not appear in search results after a few days. By confirming that the URL is indexed, free of errors, and pointing to the correct canonical, we can shift our focus from debugging to promotion. The tool also shows any detected structured data, which is valuable for sites that use schema markup for articles, FAQs, or products.
The Coverage report groups URLs into four categories, each color-coded for quick scanning:
Errors often arise from server problems or missing pages, while warnings indicate minor issues that still allow indexing. Joomla sites sometimes generate “Duplicate, without canonical tag” warnings, especially when menu items create multiple URLs for the same article. Adding a proper canonical link in the template resolves the issue and turns those yellow entries green.
A page listed as “Valid with warnings” still appears in search results, but the warning suggests we can improve its SEO. We click into each warning type to see the affected URLs and the specific reason Google flagged them. Addressing these warnings methodically can raise the overall health score of the site and prevent small problems from snowballing into larger ones.

Joomla can produce 404 errors when an article is deleted or a menu item points to a non‑existent alias. We locate the offending URLs in the Coverage report and note their patterns.
To fix them, we create 301 redirects using Joomla’s built‑in Redirect Manager, which maps the old URL to the new destination. This approach preserves link equity and guides users to the right page.
For a deeper dive into creating SEO‑friendly URLs, see our SEO‑friendly URLs guide.
The Global Configuration setting “Search Engine Visibility” controls whether Joomla outputs a noindex meta tag. We set this option to “Allow” for public sites.
Robots.txt can be edited via the Joomla backend or directly on the server; we verify that the file does not block essential folders like /components/ or /templates/.
If an article’s metadata accidentally includes a noindex directive, we remove it from the article’s options. Our best Joomla SEO extensions list includes tools that help audit such tags.
The Mobile Usability report flags problems such as text that is too small or clickable elements that are too close together. Common culprits in Joomla are outdated templates that lack a responsive viewport tag.
We add to the template’s head section, or we switch to a modern, responsive template. After updating, we run the page through the Google Mobile‑Friendly Test to confirm the fix.
Regularly reviewing mobile usability keeps the site accessible on smartphones, which is essential for maintaining a strong presence in search results.
We click the “Add Property” button, enter the full site URL, choose the property type, and confirm. After the property appears, we must verify ownership before any data is displayed.
The HTML meta tag method is the simplest because it only requires editing the template’s section. It works without FTP or DNS changes and is widely supported.
After installing an extension like OSMap, the sitemap is typically located at https://yourdomain.com/sitemap.xml. We can verify its existence by opening that URL in a browser.
Resubmitting is only necessary after major site changes, such as adding many new pages or fixing crawl errors. Otherwise, Google will automatically re‑crawl the sitemap on a regular schedule.
The page is indexed and appears in search results, but Google has detected a minor issue—often a duplicate URL or a missing canonical tag. Fixing the warning can improve the page’s ranking potential.
Yes, if the GA tracking code is already present on the site, we can select the Google Analytics verification option in GSC. Google will detect the tracking ID and confirm ownership automatically.