JoomlaXTC Quickstart Install Instructions:
JoomlaXTC Quickstart Template Editions are complete Joomla installers with the latest versions of Joomla and our Template with demo content. The quickstart editions are only for fresh installs of Joomla, if you already have a joomla site built and are looking to change the template - use the basic template with your Joomla installer.
JoomlaXTC offers many training videos for Joomla for register users. If you are a new user to Joomla, we strongly suggest you view these videos for basic Joomla! training - View Videos
Installing Joomla
Step One:
Unzip the Quickstart edition .zip file. Next, using an FTP program such as Filezilla, upload the contents of the unzipped Quickstart edition folder to the root of your server. After you have uploaded the files go to step 2.
Step Two:
Login to your servers control panel and create a new Database for your Joomla Install - Make sure to write down the Host, DB Name, Username, and Password - You'll need it later.
Step Three:
Point your browser to your web address - www.mydomain.com to start the Joomla Install
Joomla Install: Page One
Joomla Welcome Page:
This is the starting page of the Joomla installation. You should see this screen when you go to your web domain. If you get a page with Internal Server Error 500, make sure your file permissions are correct per your hosting companies requirements. Please note all the files are 777, some hosts restrict CHMOD 777 read write access. Please change your files and folders to CHMOD 755 and reload your site. If you still experience an issue please contact your hosting provider. For more information on changing permissions via FTP, please view our online FTP tutorial videos View Videos
Please select the default language you wish to use on your website now.
Joomla Install: Page Two
Pre Installation Check
This is the pre installation check page of the Joomla install. The first area is critical to running Joomla on your server, If any of these items are not supported (marked as No), your system does not meet the minimum requirements for installation. Please take appropriate actions to correct the errors. Failure to do so could lead to your Joomla! installation not functioning properly.
The Second area checks your core PHP settings, These are the recommended settings for PHP in order to ensure full compatibility with Joomla!. Joomla! will still operate even if your settings do not match.
Joomla Install: Page Three
Joomla GNU License page:
This page gives you full license information about Joomla and does not apply to JoomlaXTC products. The licenses for most software are designed to take away your freedom to share and change it. By contrast, the GNU General Public License is intended to guarantee your freedom to share and change free software--to make sure the software is free for all its users. This General Public License applies to most of the Free Software Foundation's software and to any other program whose authors commit to using it. (Some other Free Software Foundation software is covered by the GNU Library General Public License instead.) You can apply it to your programs, too.
Joomla Install: Page Four
Database Configuration:
This is where you will need to set up your database configuration for your Joomla install. Select the type of database from the drop down list. This will generally be MySQL. Enter the hostname of the database server Joomla! will be installed on. This may not necessarily be the same as your Web server so check with your hosting provider if you are not sure. Enter the MySQL username, password and database name you wish to use with Joomla!. These must already exist for the database you are going to use. If you are unsure about Database set up, please contact your hosting company.
Joomla Install: Page Five
Joomla FTP Layer:
Due to issues with the Joomla FTP layer we do not suggest you use this feature at this time. You may skip this process during the installation and configure later if you wish to use the FTP layer feature. Due to file system permission restrictions on Linux and other Unix systems (and PHP Safe Mode restrictions), an FTP layer is used to handle file system manipulation and enable Joomla! installers. Enter an FTP username and password with access to the Joomla! root directory. This will be the FTP account that handles all file system operations when Joomla! requires FTP access to complete a task. For security reasons and if the option is available, it is best to create a separate FTP user account with access to the Joomla! installation only and not the entire Web server.
Joomla Install: Page Six
Main Configuration:
One of the most important pages in the Joomla install, the main configuration page sets your main site name, your administrator password and adds the sample data for the JoomlaXTC quickstart. Enter the name of your Joomla! site. Enter your e-mail address. This will be the e-mail address of the Web site Super Administrator. Enter a new password and then confirm it in the appropriate fields. Along with the username admin, this will be the password that you will use to login to the Administrator Control Panel at the end of the installation. If you are migrating, you can ignore this section. Your current settings will be automatically migrated. Important!: Install the default sample data. To do this, select the option and click on the button before moving to the next stage.
Joomla Install: Page Seven
Finish:
Congrats! Your almost there. To finalize your Joomla install you must now delete the installation folder in the root of your Joomla install. You will not be able to proceed beyond this point until the installation directory has been removed. This is a security feature of Joomla!. After removing the file you can now view your site by going to your web domain or go to the adminustartion panel of Joomla by adding /administrator to your web domain address https://www.mydomain.com/administrator
JoomlaXTC Template Installation Instructions:
To install the a JoomlaXTC template to a pre-existing Joomla install follow these simple steps:
Downloading the template
Single purchases of our templates are downloadable with the download id sent to your email after purchase. Subscribers have access to the template files direct on the product page after subscribing. First please download the core template file named: template_jxtc_template name_J15.zip
Joomla Installation
Login to the administration side of your Joomla install and from the Extensions menu select Install / Uninstall. Browse your computer for the "template_jxtc_templatename.zip" and upload the file to your Joomla site.
Joomla Template Manager
From the Extensions menu select the Joomla! template manager. You now should see the default Joomla templates and the new JoomlaXTC template displayed in a list. Please select the template you wish to use by checking the box next to the template name and clicking "default" in the top right of the page.
JoomlaXTC offers many training videos for Joomla for register users. If you are a new user to Joomla, we strongly suggest you view these videos for basic Joomla! training - View Videos
Login Modules Instructions:
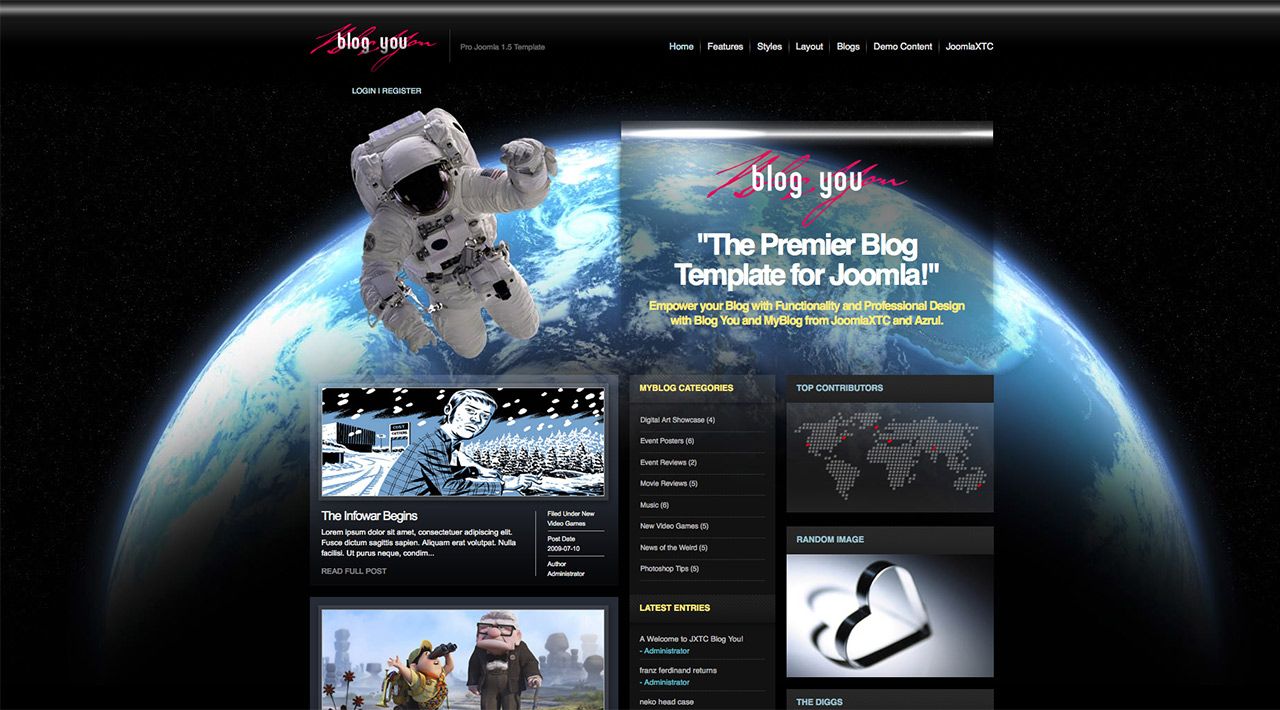
The login and register button is hardcoded into the index.php and uses a mootools based drop in feature to display two module positions. In our demo we loaded module position stylepanel1 with a custom html module with intro text and a link to the registration page. In module stylepanel2 we loaded the stock login module which has styles overides in our css to display in this format.
Top Contributors Module Instructions:
The top contributors module showcases the power of the JoomlaXTC Splash Panel and Newspro 2.0. The splash panel has been set to load the Newspro into the popup to display an article and the users avatar. The main module is the Splash Panel Module in the RIGHT module position. Each Contributor is loaded in module positions SPLASH 1 - 6. Take a moment to open each of these and see how it works to recreate your own Top Contibutors. This has been set up for demo purposes only and we are considering a special module to this sort of display on it's own dynamically.
The DIGGS Module Instructions:
The Diggs module is another static demo to showcase the power of the JoomlaXTC Newspro 2.0. This module is built from static content loaded into the Newspro HTML window and uses a load_module call to load the Search module inside the Newspro module. Take a moment to open up the newspro module 'THE DIGGS' in the RIGHT POSITION and see how useful Newspro 2.0 can be as a custom html module!
JoomlaXTC Add on Instructions:
Blog You comes with a free template for the popular free blog component I DO BLOG - Please unzip the folder and read the install instructions
Users of MyBlog and Jomcomment can easily change to the Blog Youtemplate style by selecting OVERIDE template style in the core Jom Comment / My Blog template admin page. The CSS styles for My Blog and JomComment have been included in the templates css.
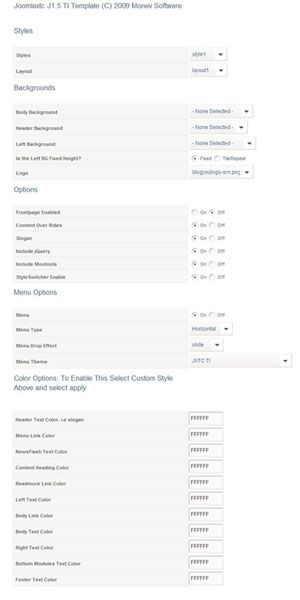
JoomlaXTC BlogYou TI Template Configuration:
STYLES:
Style: Select from one of the 12 pre styled themes or select custom to create your own
Layout: Select the module layout style
BACKGROUNDS:
Body Background: The background of the body of the website
Header Background: The backgroundfor the top posrtion of the website behind the showcase and newsflash modules
Left Background: The style of the Left module positions overall background
Is the left BG fixed height? Select BG height variation
OPTIONS:
Front page enabled? Turn front page content on or off
Content Overides? Use XTC content styles or use default Joomla styles
Slogan: Display website slogan text in header position / This slogan pulls from you website name in your Joomla Configuration file
Include JQuery: Use JQuery Call
Include Mootools: Use Mootools Call
Style Switch Enable: Enable front end style switcher?
MENU OPTIONS:
Menu: Use Menu style overides?
Menu Type: Horizontal Suckerfish Style or Dropline Menu
Menu Drop Effect: Select menu effect
Menu Theme: Select Menu CSS theme
CUSTOM COLOR OPTIONS: For use in CUSTOM STYLE MODE
Head Text Color: Color for head text
Menu Link: Color For Menu Links
Newsflash Text Color: Color of text in Newsflash Position
Content Heading Color: Color for content headings
Readmore Link Color: Color of Readmore Text
Left Text Color: Color of Text in Left Positions
Body Link Color: Overall website Link Color
Body Text Color: Overall website Font Color
Right Text Color: Color of Text in Right Positions
Bottom Modules Text Color: Color of bottom modules font
Footer Text Color: Color of footer fonts
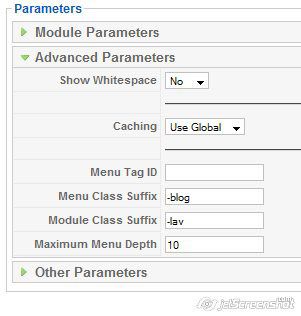
Custom Menu Suffix Classes
E-scene comes with several icon menu styles that can be set in the mod_main menu parameters
-blog
-vid
-event
-photo
-article
-split
Module Suffix Styles:
Blog you comes with 160 module styles - to view the module suffix codes please visit the online demos and view the module suffix page for a complete list of suffix styles.
Additional Style Modifications:
In order to edit the template styles beyond what is provided with the TI Template administration you will need to edit the template.css or styles/stylex.css files in the jxtc_blogyou/css folder. This requires a basic knowledge of css.
JoomlaXTC BlogYou Extensions:
Blog You comes pre packaged with several top notch modules. When using the Quickstart edition - these modules are pre loaded and configured. If you are install the template on a pre exisiting Joomla Install you will need to download and install each extension manually.
Deluxe NewsPro V2.5 Configuration:
Blog You comes with our 2.5 version of Newspro used on the homepage. If you are not using the quickstart version of the template you will need to upload the NewsPro Module and then configure it as detailed below to get the same look as our demo.
POSITION: INSET
|
|||||||||||||||||||||||||||||||||||||||||||||||||||||||||||||||||||||||

