Description
The Joomla! Power Email extension improves your user's experience by enabling custom HTML designs on all system emails. It also allows the customization of actual email contents for Joomla itself and any other component using standard language files. It includes multi-language support, variable customization, a super-fast browser for language constants and several pre-made email templates ready to get you started.
Installation
Power Email includes two Joomla extensions: A component and a plugin. Install both using Joomla's standard extension install procedures.
The plugin must be enabled for custom emails to work. You can activate the plugin using Joomla's plugin manager before or after configuring the component. There is nothing to configure on the plugin other than enabling or disabling it.
Operation
Power mail has two modes of operation: Templates and Language overrides. Each one is described below.
Templates
Most of the time, Joomla and other extensions send email in plain text format. This means they do not have any visual styling such as colors, different font sizes, images, links etc.
Power Email templates work as a wrapper for those emails and enables the use of HTML for markup and styling at the same time.
To create a template or browse the existing ones, select the Templates option from the "components/Power Email" menu or click on the Templates option in the left menu of Power Email component.
Browsing the templates

The Templates view shows a list of all the templates in the system. It will also show its state, a language icon and the component it was made for. As you can imagine, templates can be custom made for a specific language and/or component. We will explain how this works later on.
Use this view to quickly browse through the templates and enable or disable any of them.
Editing a template
On the Templates view, click on a template title or click the "New" button in the tool bar to open the Template Editor view:

Once in the "Template Editor" view, you can set the different properties of the template using the following parameters:
- Language
- Select any of the available languages. When a user has this language as default language he/she will receive emails using this template.
- Component
- Choose an available component. Any email sent by this component will use this template. Set the value as "System wide" if you want to use this template on all components and system messages.
- Template
- Use any Joomla editor available to edit the template layout. You can use plain text or HTML markup as needed (see notes below). To aid in the process, there are several place-holder tags available:
{content} This tag will be replaced with the actual email contents provided by Joomla or extensions. {date} Shows the date in YYYY-MM-DD format. {date format} Displays the date using custom formats, apply any valid arguments according to PHP date() function. {sitename} Shows the website name. {siteurl} The website URL address. Useful to make links and buttons. - State
- Enable or disable this template
- Use HTML?
- Enable this option if your template includes HTML code, otherwise the template will be sent as plain-text.
- Blind Copy
- If you want to send blind copies of any message using this template to someone, enter their email addresses here separated by coma.
- Notes
- Enter any comments or notes you wish to keep here.
Use the - Select Template - menu button to choose any of the available pre-made templates. Some of them contain sample content for you to see how emails may look and some others are ready to go. You can, of course, alter anything you want on the included templates or create your own new ones as explained below.
The Preview button will open a pop-up window with a preview of the template markup, use this window to review any changes you make to the template layout.
Click on the green Save button to store your changes and don't forget to set the template as published to enable it.
Using email templates
Templates are applied to all front end emails in the following order:
- Component templates in the user's language
- Component templates in English language.
- System wide templates in the user's language.
- System wide templates in English language.
If an email is sent to multiple users at once, Power Email will take care of using the right template for each one according to their default language.
Language overrides
Joomla and most extensions use custom language strings to set the content of emails. These language strings allow Joomla to handle multi-language features and are stored in plain-text files in the languages/ directory. Each Language file contains a list of common constant and a string pairs to represent all messages shown. Joomla will look for a specific constant on a given language file to show the corresponding string on messages and emails.
Language strings may contain special placeholder variables for data provided by Joomla such as your name, URLs, dates and more.
Power Email allows you to customize these constants and strings without having to edit or encode any markup into the language files yourself.
Browsing Language Overrides
Similar to the Templates view, the Language overrides view shows a list of all overrides created along with their language and other features:
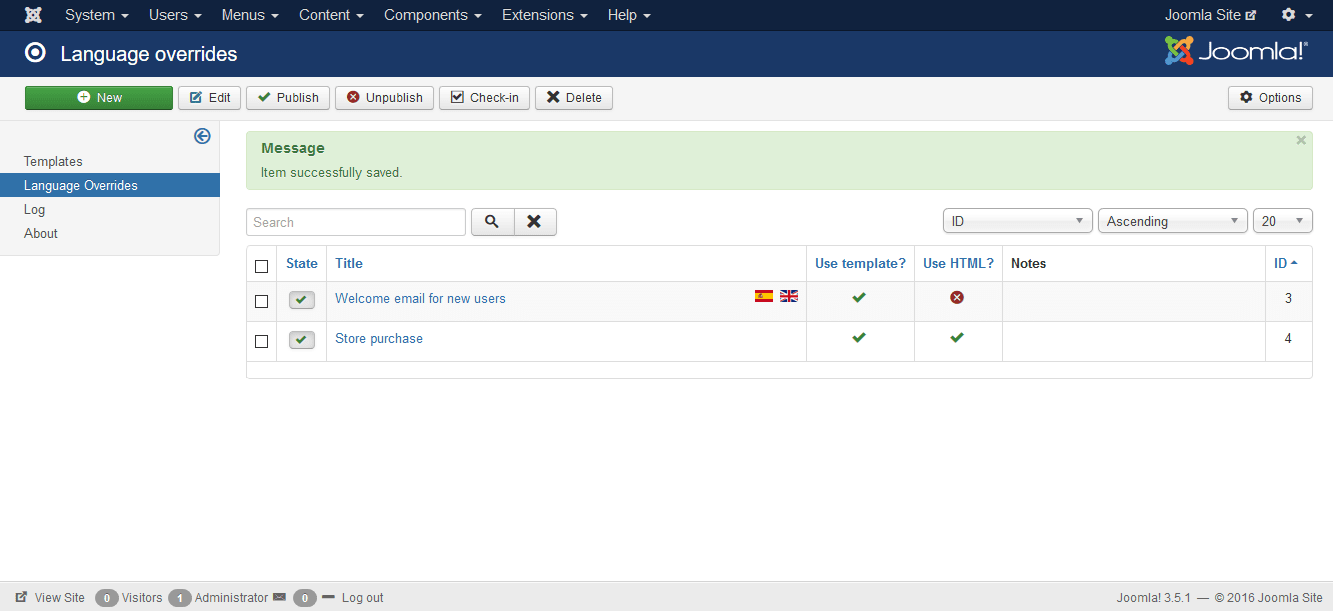
Use this view to quickly browse through the overrides and enable or disable any of them.
Editing an override
Emails consist of a Subject line and a message Body. These two elements have a corresponding Content/String pair from a language file. Use the Override editor to set the email Constants and configure the variables, then edit the string contents for each language in the system:
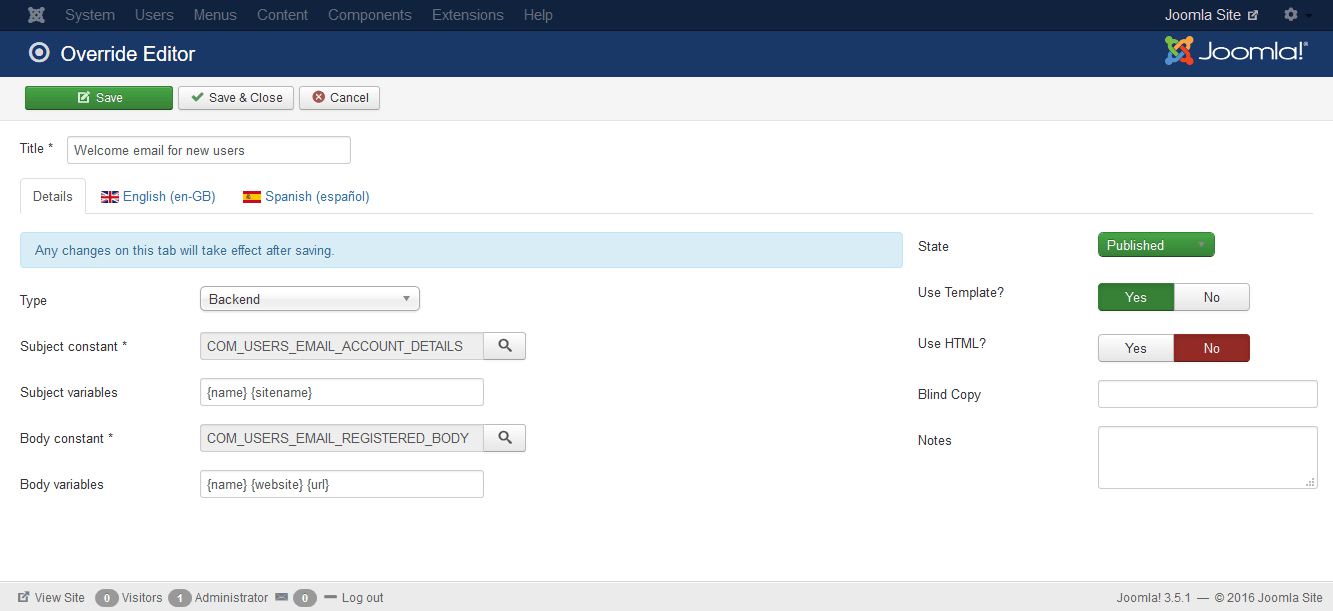
Select the entry Type to indicate if it is a front end or back end override, then set a name for it in the Title field.
Click on the search icon next to Subject and Body parameters to find the right Constant with the search tool. You can specify full or partial values and search by Constant or String. Any matching rows found on the language files will be shown. Click on one to select it and return to the Override editor.
Take notice each matching entry will be marked as "frontend" or "backend" so you can ensure it is the right one. Both Subject and Body constants need to match the override type.

If the language String contains placeholder variables, they will be shown in the variables field. You can leave the default names such as "{value1}" and "{value2}" as they are or rename them as you wish. Just remember to keep each one between curly brackets and separated by a space from the others.
The process is the same for the body fields. Once you have both the Subject and the Body constants identified, click on the green Save icon to store your changes.
After the details of an Override are stored, you can edit the string values for each language in their corresponding tabs:
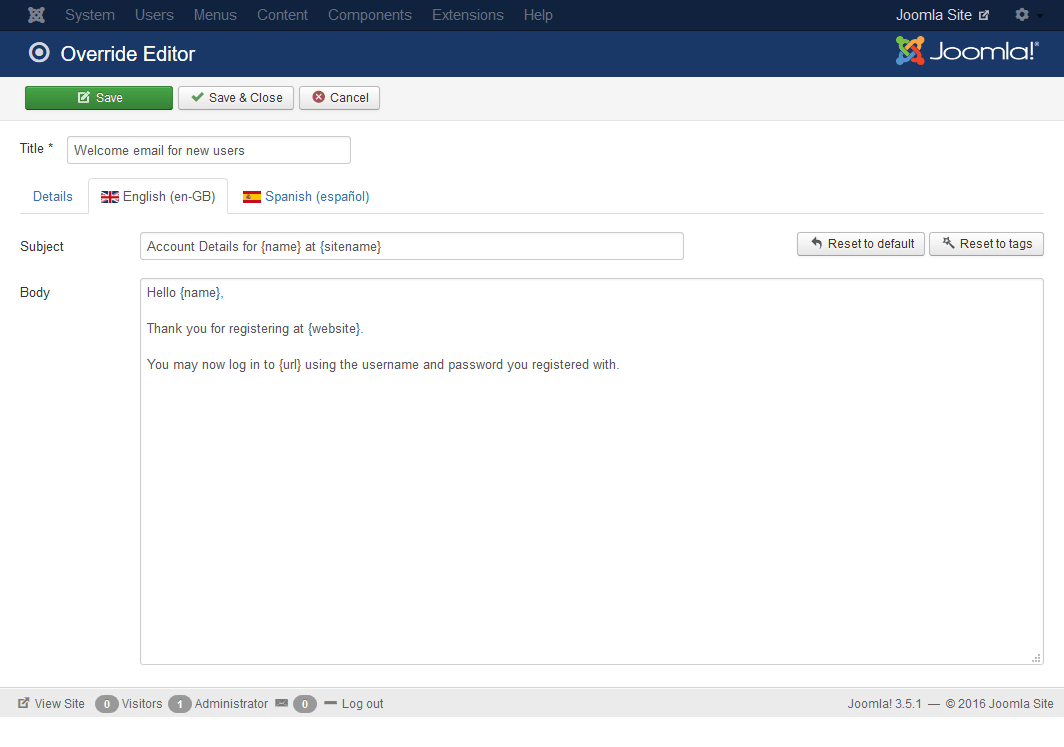
Enter any text for the Subject and Body and rearrange (or remove) the placeholder tags as you wish. If needed, you can also include HTML markup on the body section but you have to set the "Use HTML?" option to "Yes" to make it work.
Use the Reset to default button to reset the strings back to their default values from the original language file.
Use the Reset to tags button to reset the strings back to their placeholder tags only.
You can also change some attributes of the Override by going to the Default tab:
- Language
- Select any of the available languages. When a user has this language as default language he/she will receive emails using this template.
- State
- Set the override as enabled or disabled.
- Use template?
- Setting this parameter to "No" will prevent this particular email from using any Templates. Use this option to build custom-made layouts for specific messages.
- Use HTML?
- Enable this option if your override strings contain HTML code, otherwise the message will be treated as plain-text.
- Blind Copy
- Enter one or more email addresses separated by coma. They will receive a copy of this email whenever is sent.
- Notes
- Enter any comments or notes you wish to keep here.
Using language overrides
Similar to the templates, overrides are used in a specific order when available:
- Overrides in the user's language
- Overrides in English language.
Email log
To see a list of all emails sent recently click on the Log option on the left menu:
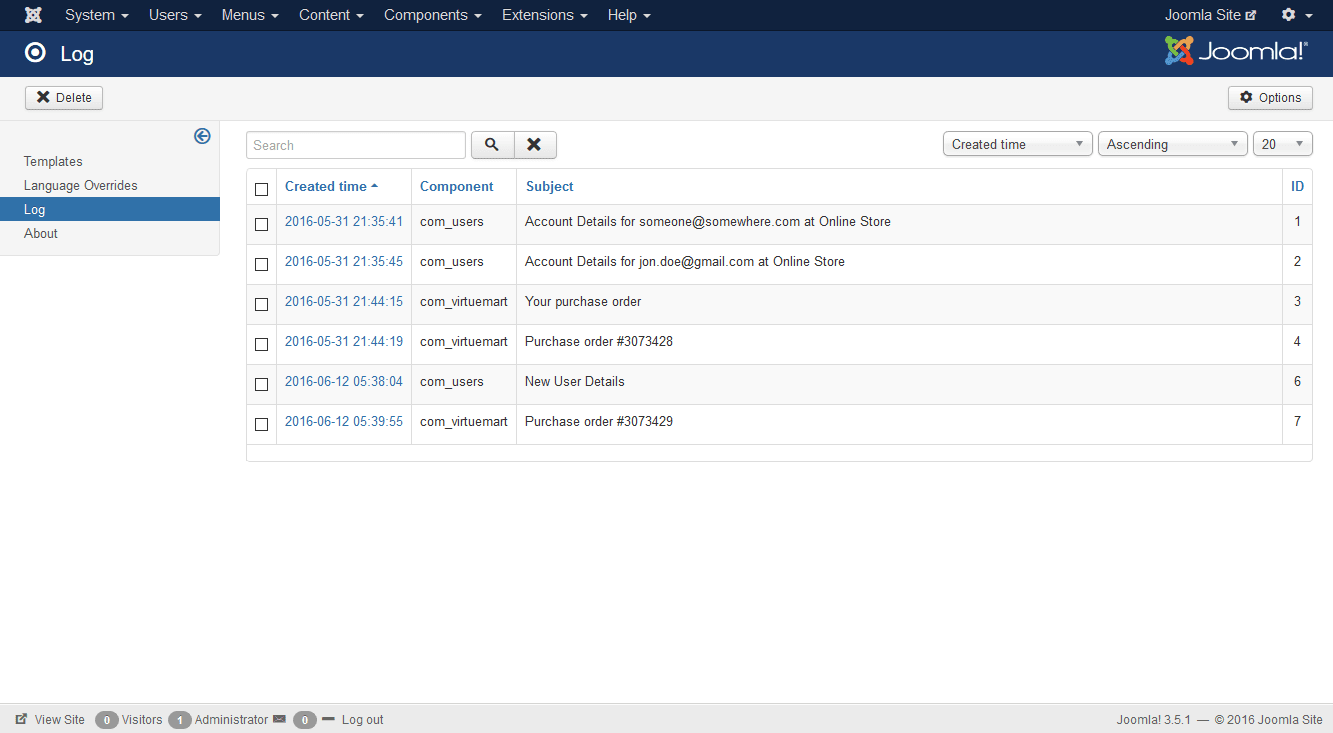
To see the contents of a specific email, click on the date field:
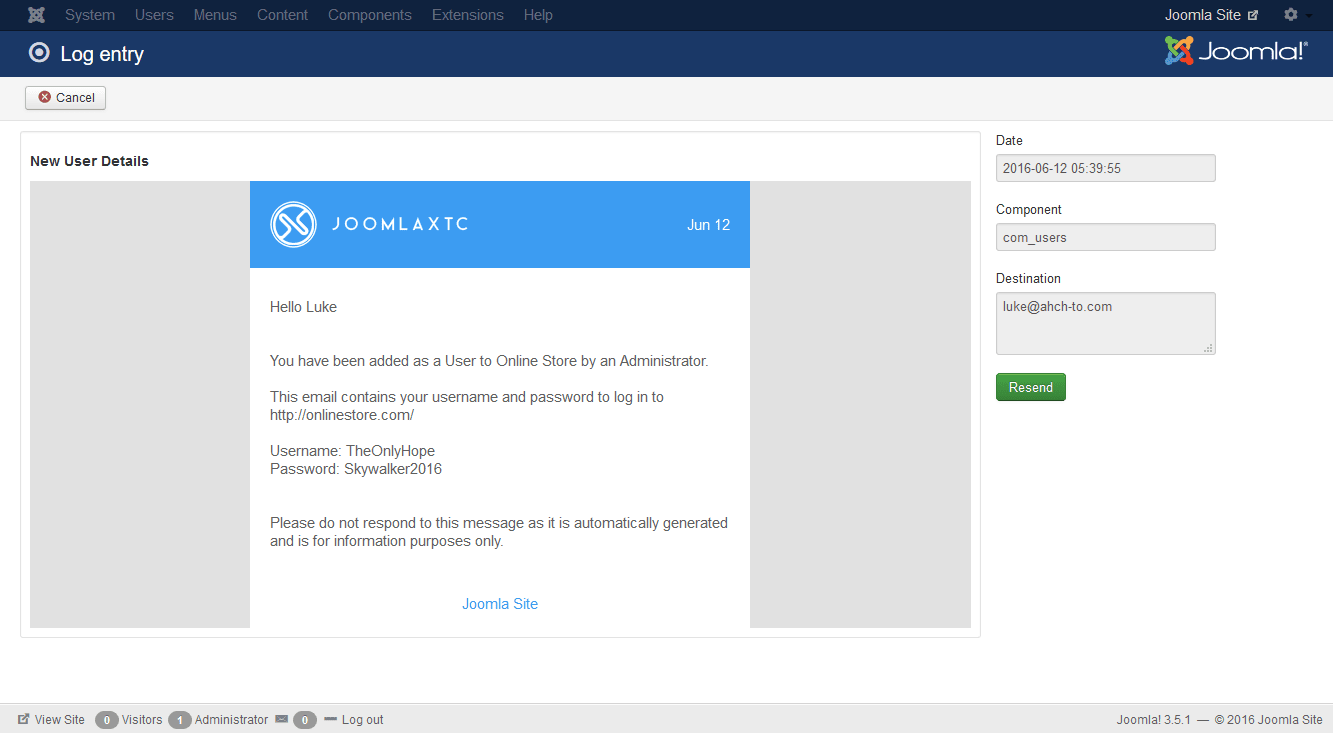
The email preview will show the contents of the email as sent originally, including all images, links and other elements. You can resend an email by clicking on the Resend button.
Customizing Power Email
Power Email has a few operating options, to change them click on the Options button at the top right of the components's main menu:
- Templates folder
- Select the source directory from the media folder where images used in your emails are stored.
- Log days
- Set the number of days to keep on the email log. A value of zero will disable the feature.
A word or two on Email creation
Building a nice-looking email requires some background knowledge. Internet is full with tutorials, guides and best practices on how to build email templates but we want to give you the most useful tips you should keep in mind right here:
- Most email today is sent in HTML format however, not all devices handle them equally. In fact, even some online services such as Gmail or Outlook will show the same email in different ways.
- The best method to build HTML emails is to base the layout on HTML tables and have all CSS styling inline. This means you should not have any other markup other than a table with hard-coded styling on your template.
- Most of the time, a single-column layout will be easier to read than a multi-column layout.
- For best results across multiple devices, try to keep the column width between 500 and 800 pixels. Use a wrapping table to center the column table.
- Keep your image to text ratio small, most automated filters will treat emails with many images as spam.
Adding custom templates
Adding your own templates to Power Email could not be easier: Just save your template markup file as a ".html" file in the /media/com_jxtcpoweremail/templates folder. Place your images anywhere you want and use absolute URLs to point to them.
The quickest way to get new templates added is by copying any of the sample templates to a different file and changing it.
If you wish to point images to the standard media folder, use the optional {mediaurl} tag as shown on the sample templates.
As you browse the markup code in the sample templates you will realize they are simple HTML tables as described above. You will also notice some of them have multiple columns in a single row by making use of the colspan attribute to set their width. A neat trick to handle multiple rows with different column widths on a single table is shown on file blue3_sample.html: We use a Boostrap-like layout of 12 columns and set each colspan to be a fraction of that. We thought you find this useful for complex layouts.
Feel free to grab any ready-made template from Internet and paste it on a file but keep in mind WYSIWYG editors in Joomla tend to remove problematic HTML tags. If you encounter this problem try changing the Text Filter options in Joomla's configuration, checking the editor's plugin to disable any custom filtering or disable Joomla's editor altogether. In this case the Preview button becomes very handy to review changes.
Changing the media folder location
By default, Power Email stores sample templates and emails on the /media/com_jxtcpoweremail directory. You can change the source location by going to either the Templates or Overrides vies and clicking on the Options button in the top right to select a different media directory.
Video Tutorial
Copyright 2016 Monev Software LLC www.joomlaxtc.com

