JoomlaXTC Appointment Book Manager
The Appointment Book Manager component is an easy-to-use tool to create and administer appointment requests for one or multiple calendars. Among its features are:
- Unlimited calendars with independent configuration
- Selectable days of the week for appointments, including weekends
- Optionally assign existing Joomla! users as Calendar owners
- Use joomla! user address or an alternate email address for optional appointment notifications
- Configurable start and end times for daily schedules
- Variable appointment durations in 5 minute increments
- Appointment Subject and up to 10 custom fields available to register booking information
- Custom field types such as plain text, multiple-line, radio selectors, drop-down selector or multiple selection inputs, each having their own set of unlimited options and 'required' attributes
- Completely editable profile information for each calendar, including full support of images, HTML and CSS
- Display one or more calendar profiles in the front page or as a menu option with optional link for their own booking form
- Unlimited appointments per calendar
- AJAX-based unlimited calendar picker displays what days and time slots are available, partially booked or fully booked at any given month
- Administrators can use four different views of appointment information: by Day, by Week, by Month or List mode and create new appointments at any time
- Selectable filters on each view ease the management and location of appointments
- Organize your time schedules by day, week or month with complete appointment information on tooltips and editable 1-click away
- Display full daily schedules or just "busy hours" for easier management
- Enable or cancel appointments with automatic notification emails sent to both calendar owner and appointment author
- Front page booking form can be shown in the same browser window, a pop-up window or Modal screen
- Fully customizable text or HTML Button for appointment booking
- Selectable display formats for time and date information
- Custom front-end themes
- Edit custom text to be shown on booking form including full HTML/CSS support
- Set custom Width and Height for pop-up or modal booking forms
- Fully editable email templates for both calendar owners and appointment authors, including over 18 custom tags to display specific information
- Email profile test option lets you review how emails will look before being sent
- Maintain your database at optimal size by purging any range of appointments from the system.
- Export any calendar in iCalendar format for compatibility with Google Calendar, Facebook, Microsoft Outlook, Windows Live Calendar, Thunderbird and dozens more!
- Export any calendar in CSV format and load it on any spreadsheet application such as Microsoft Excel or OpenOffice
Installation
Follow these steps to install the component:
- Unzip the jxtc_appbook_unzipfirst.zip package in your PC.
- Upload all the extracted files to your Joomla install via the Joomla Installer. com_jxtc_appbook Contains the required frontend and backend components interfaces and plg_jxtc_appbook contains the optional Appbook plugin.
Component Configuration
Access the component administration pages by selecting "JXTC Appointment Book" from the Joomla! administration Components menu.
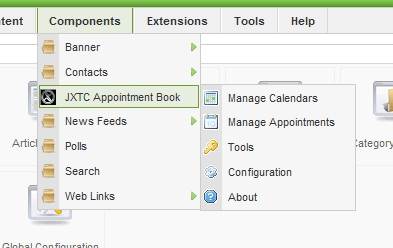
In order to enable your users to make an appointment you must first create a Calendar, a calendar could represent a resource or a person and your users in turn, will be able to make appointments to it according to the calendar settings and time availability. You can have an unlimited amount of calendars defined.
Creating and Configuring Calendars
Select the Calendar Configuration menu option; this will take you to a list of all calendars defined in your system. To create a new calendar click on the "New" icon in the top right.
The calendar edition page will display three areas where you can define the attributes of the calendar:
Calendar Setup
The parameters in this section are:
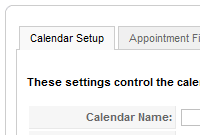
- Calendar Name
- A unique name for the calendar
- Availability
- Enable or disable any day of the week to allow appointments
- Owner User ID
- An existing Joomla! userid can be assigned as the "owner" of the calendar. In this case, he or she will receive appointment notifications
- E-mail:
- This is the email address to send owner appointment notifications if there is no user assigned as calendar owner
- Daily Schedule
- Select the start and end of working hours for every day
- Appointment Duration
- This value defines the appointment duration, when the user seems the time availability table in the frontend it will be computed according to this value.
- Published
- This enables or disables the calendar for use
- Name
- The field title, this will be shown as field label in the frontend
- Type
- Fields can be set different depending on the information you want to receive:
- Single text line - Allows only one line of text, useful for telephone number fields
- Multiple text line - Allows multiple lines of text, suitable for address fields
- Radio - User must choose one of a predefined options list using radio buttons
- Dropdown list - User must choose one of a predefined options list in a drop-down fashion
- Multiple selection - User can select one or more entries from a predefined set of options
- Required
- If enabled, the booking form will ask for the field to be entered before saving
- Enabled
- Enables or disables the field
- Time format
- Select the format to display time information
- Date format
- Select the format to display date information
- Notification emails
- Enable or disable the use of notification emails
- Style
- Select from any of the available component display templates. These templates allow you to fully customize the appearance of the component
- Introduction
- This text will be shown in the booking form and can contain custom text such as service descriptions, special instructions, etc. You can embed this tag: {calendar} to display the name of the calendar that corresponds to the booking form
- Form Button
- The string entered here will be shown as a clickable button in the calendar profile page when the {booking_form} tag is used. You can enter HTML code here, but be careful of the output you might get.
- Form mode
- This changes the display mode of the booking form when the {booking_form} button is clicked
- Width
- For pop-up and modal form modes, this will set the window width
- Height
- For pop-up and modal form modes, this will set the window height
- {state}
- Appointment status (Enabled or Cancelled)
- {name}
- Name of the calendar owner (if available)
- {username}
- The Joomla! username of the calendar owner (if available)
- {subject}
- The value of the appointment subject field.
- {email}
- The appointment author notification email as entered in the booking form
- {date}
- The date of the appointment
- {duration}
- The duration of the appointment
- {start}
- The starting time of the appointment
- {end}
- The ending time of the appointment
- {field1}
- The value entered or selected for custom field 1
- {field2}
- The value entered or selected for custom field 2
- {field3}
- The value entered or selected for custom field 3
- {field4}
- The value entered or selected for custom field 4
- {field5}
- The value entered or selected for custom field 5
- {field6}
- The value entered or selected for custom field 6
- {field7}
- The value entered or selected for custom field 7
- {field8}
- The value entered or selected for custom field 8
- {field9}
- The value entered or selected for custom field 9
- {field10}
- The value entered or selected for custom field 10
- {state}
- Appointment status (Enabled or Cancelled)
- {name}
- Name of the calendar owner (if available)
- {username}
- The Joomla! username of the calendar owner (if available)
- {subject}
- The appointment subject field value.
- {date}
- The date of the appointment
- {duration}
- The duration of the appointment
- {start}
- The starting time of the appointment
- {end}
- The ending time of the appointment
- {field1}
- The value entered or selected for custom field 1
- {field2}
- The value entered or selected for custom field 2
- {field3}
- The value entered or selected for custom field 3
- {field4}
- The value entered or selected for custom field 4
- {field5}
- The value entered or selected for custom field 5
- {field6}
- The value entered or selected for custom field 6
- {field7}
- The value entered or selected for custom field 7
- {field8}
- The value entered or selected for custom field 8
- {field9}
- The value entered or selected for custom field 9
- {field10}
- The value entered or selected for custom field 10
- Click on the "New" icon in the top left to create a new menu entry
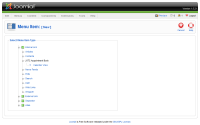
- On the menu entry settings page, edit the fields on the left "Menu Item Details" area according to your preference
- On the right side, open the "Parameters (basic)" tab and select which calendar to display. If ALL CALENDARS is chosen, all calendar profiles will be shown from top to bottom according to their ordering.
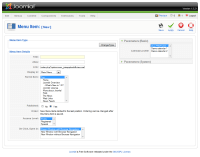
- If needed, open the "Parameters (System)" tab and edit the fields as you wish
- Click on the "Save" or "Apply" icons on the top left to store your changes
- Click on the "New" icon in the top left to create a new menu entry
- On the menu entry settings page, edit the fields on the left "Menu Item Details" area according to your preference
- On the right side, open the "Parameters (basic)" tab and select which calendar to display.
- If needed, open the "Parameters (System)" tab and edit the fields as you wish
- Click on the "Save" or "Apply" icons on the top left to store your changes
Appointment Fields
By default, the appointment book form has input fields for a Subject text and Email address; however you can add up to 10 additional fields for additional data by adding custom fields in this section. Custom fields will be shown under the first two default fields in the booking form, but you can change that by editing the component template (see below).
Each field has several parameters available:
It is advisable to spend some time thinking about the field and their order before adding them as each has a unique position. If you later decide to change, delete or create fields, the information already stored on existing appointments might not be available anymore.
Calendar Profile
 You can create custom text to be shown in the calendar view in the frontend page. This could be useful for such things as people résumés, service descriptions or just about anything you desire. In this section you can enter this text using any available Joomla! editor and if you are using the TinyMCE editor (available as part of Joomla!) then you also have a chance to edit the HTML, include graphics and so on in a WYSIWYG mode. If you want to display a link to the calendar appointment book, you can enter this tag: {booking_form} as a place holder within the text. When it is displayed in the frontend, the tag will be replaced by the booking form button you defined in the component configuration (see below).
System Configuration
Now that you have your calendars created, it is time to tell the component how to do certain for them. Most of the time this will be a one-time only task but you may want to change it according to your needs at any time.
Clicking on the "Configuration" menu option will take you to three sections of parameters. They control the overall behavior of the component:
System Settings
The fields in this section are:
Booking Form
These fields define how the booking form will operate:

Email Templates
If enabled, notification emails will be sent to both the calendar owner and the appointment author. You can edit the template format of both here, and you can also use special place-holder tags to include specific information. The list of place-holder tags is shown below:
For calendar owner emails:
For appointment author emails:
After editing the templates, you can go to the "Tools" menu option (see below) and send yourself a test email to verify the output is what you are expecting.
Component On Front page
After calendars are created and the component is configured you can enable your site's frontend for appointment creation. There are three options for that:
Creating a calendar menu option
To make a menu option link to a calendar's profile, you should use the standard Joomla! Menu Manager to edit the desired menu, and then follow these steps:
Creating a book menu option
To make a menu option link to a book form, you should use the standard Joomla! Menu Manager to edit the desired menu, and then follow these steps:
You have now created a menu link that will display a calendar's profile view. If enabled, the profile view will show an appointment book button for your users to make appointments.
Using the Appointment Book plugin
You can include an Appointment Booking form button on any joomla! article, for this you must have installed the Appointment Book plugin and enabled it in the Plugin manager of Joomla! Be sure to review the plugin parameters to configure the booking form display mode.
 To include the button on an article, use the Joomla! Article Manager to edit the article text, and then embed a tag like this: {appbook calendar_id}, where calendar_id is the numeric ID of the calendar as shown in the calendar list in the component administration page. When the article is shown in the front page, the place-holder tag will be replaced with the button you defined previously in the component configuration page. For example, the tag {appbook 1} will display a button for calendar #1 booking form.
Direct links
On certain scenarios, you may want to link directly to the Appointment Book form of a specific calendar, in this case the URL to use will have a format similar to this:
Where calendar_id is the numeric ID of the calendar as shown in the calendar list in the component administration page. Keep in mind you may have to change this URL to the specific address of your site. It is best to use any of the other two options if you are not familiar with this.
Making Appointments
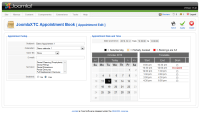
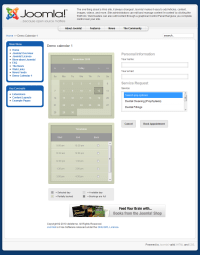 After clicking on the Appointment Booking form button in the frontend, the form will be shown containing certain information such as the form Introduction text, the input fields and a date and time selector. You can customize this form to have a specific layout and visual style by using a component template (see below).
The interactive month calendar allows users to look for available dates, they can click on the arrow buttons to see the next or previous month or years, or go to the current day. Also, days are colored depending on the availability: Available, Partially Booked or Full.
For the selected month day, a time table is shown representing the start and end times of appointment slots available on it. If an appointment is already made the slot will be marked as Occupied, else the slot will have a clickable radio button to select the slot. When this is done and the necessary fields are entered, a user can click on the Book Appointment button to save his appointment (notification emails will be sent at this point).
Managing Appointments
Viewing Appointments
The component provides different views to manage your appointments when selecting the Manage Appointments menu option in the backend, you can switch which one to use by clicking on the appropriate icon:

Day view
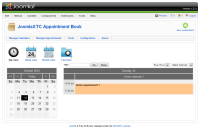 Displays an interactive month calendar and the appointments for the selected day. You can choose to display all hours of the day or just the busy hours. Move the mouse pointer over an appointment to see detailed information about it.
Week view
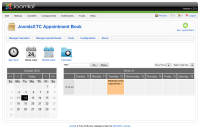 In a similar fashion, the week view displays the appointments for the week of the selected day.
Month view
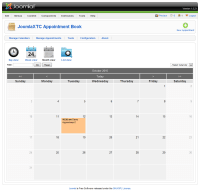 An interactive month calendar that shows appointments for each day, a vertical scroll bar will be shown if the number of appointments is too large.
List view
 This view lists all appointment records along with date filters and column sort.
Editing Appointments
On each view, you can click on an appointment to edit any of their properties or fields. If you Enable or Disable an appointment, a notification email will be sent to both parties announcing the change.
Tools
The Appointment Book manager also provides a set of tools for maintenance and data export, select the Tools menu option in the component to see the following options:

Delete Appointments
 After a while, you may have a large amount of old appointments in your system. If you consider this to be a burden on your system resources then you can delete old records from the database by selecting a start and end dates, then clicking on the Delete button in the top right. Be careful with this option as it will permanently delete the information from your system.
Export to iCalendar
 iCalendar is a popular format for calendar information exchange and it is supported by all major calendar applications such as Microsoft Outlook, Google Calendar, Thunderbird, etc. To export a calendar just click on the tool icon to see all available calendars, then click on the calendar of your choice to download the corresponding file. You can then import this file in the application of your choice.
Export to CSV
 This tool will export calendar data in a "comma separated values" file, which is a text file format accepted by many applications such as Microsoft Excel, OpenOffice and others. To export a calendar just click on the tool icon to see all available calendars, then click on the calendar of your choice to download the corresponding file. You can then import this file in the application of your choice.
Email test
 A simple tool that lets you review the notification email templates by sending test emails to an email address. Just fill-in the target email address and select the template to use. The email will be sent after you click on the Send button in the top right.

