
Sirus
Sirus is a multi purpose template for Joomla 3. Designed with the latest in cutting edge colors and effects, Sirus is a sure fire hit! Clean and content driven, Sirus comes pre packaged with some of the top Joomla extensions like, K2, Kunena, Virtuemart, and Joomla Event manager.
Requirements
- Joomla 3
- Apache 2.2+ or Microsoft IIS 7
- PHP 5.3+
- MySQL 5.0.4 or higher
Features
- XTC Framework
- 110+ module positions
- 60+ module styles
- Multiple Menu Styles
- CSS3 Effects
- JavaScript Effects
- Responsive Design
- Sticky Header Option
- Joomla Quickstart
- XTC Extensions
- Joomla Overrides
Introduction Video
Admin Video
Template Set Up
If this is for a brand new site, we suggest you use our QuickStart version of the template, which is a full pre-configured install of Joomla with all demo content in place.
Template Installation
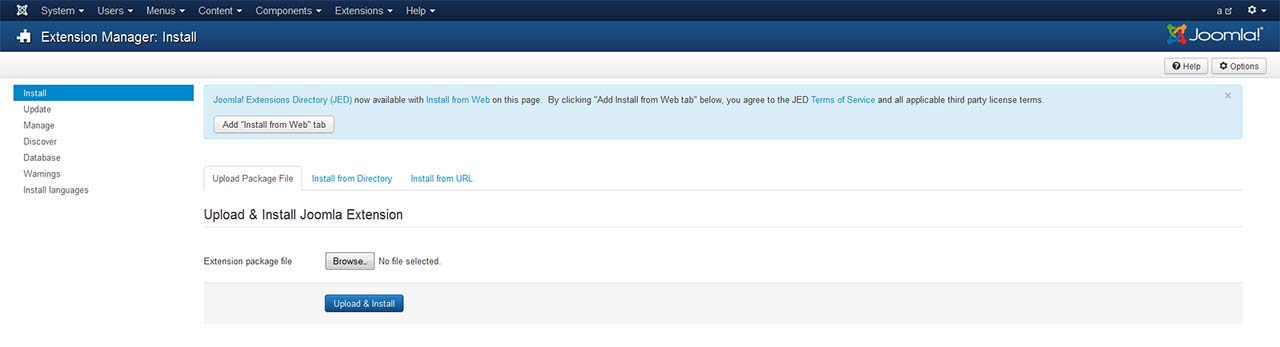
Uploading the template:
Login to the administration side of your Joomla install and from the Extensions menu select Install / Uninstall. Browse your computer for the "template_jxtc_templatename.zip" and upload the file to your Joomla site.
TemplateFramework Component:
XTC templates make use of a helper component required for it to work, if you are installing the stand-alone template then make sure to also install the XTC Helper Component also available in the template's download list before enabling the template.
Template Manager:
From the Extensions menu select the Joomla! template manager. You now should see the default Joomla templates and the new JoomlaXTC template displayed in a list. Please select the template you wish to use by checking the box next to the template name and clicking "default" in the top right of the page.
JoomlaXTC offers many training videos for Joomla for register users. If you are a new user to Joomla, we strongly suggest you view these videos for basic Joomla! training - View Videos
Extension Installation:
Each JoomlaXTC template comes with custom themes and extensions for the template. After you do your main install of the template you can install the custom extensions - please view the component or module documentation for docs on installing and configuring these extensions.
Quickstart Install
JoomlaXTC Quickstart Template Editions are complete Joomla installers with the latest versions of Joomla and our Template with demo content. The quickstart editions are only for fresh installs of Joomla, if you already have a joomla site built and are looking to change the template - use the basic template with your Joomla installer.
Installing Joomla
Step One:
Unzip the Quickstart edition .zip file. Next, using an FTP program such as Filezilla, upload the contents of the unzipped Quickstart edition folder to the root of your server. After you have uploaded the files go to step 2.
Step Two:
Login to your servers control panel and create a new Database for your Joomla Install - Make sure to write down the Host, DB Name, Username, and Password - You'll need it later.
Step Three:
Point your browser to your web address - www.mydomain.com to start the Joomla Install
Joomla Install: Page One
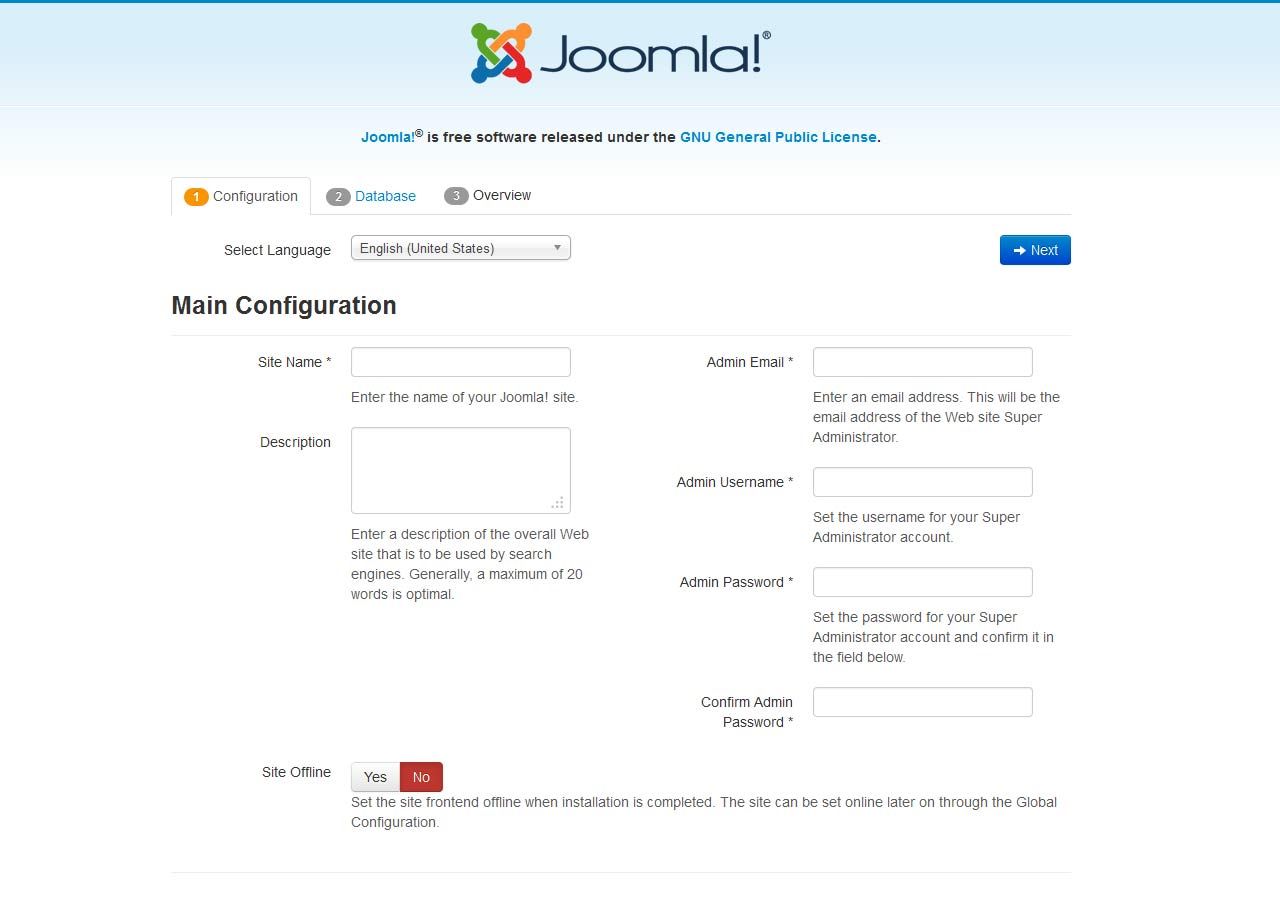
Joomla Welcome Page:
This is the starting page of the Joomla installation. You should see this screen when you go to your web domain. On this page you set up your domain name information, Super User Name and Password
Joomla Install: Page Two
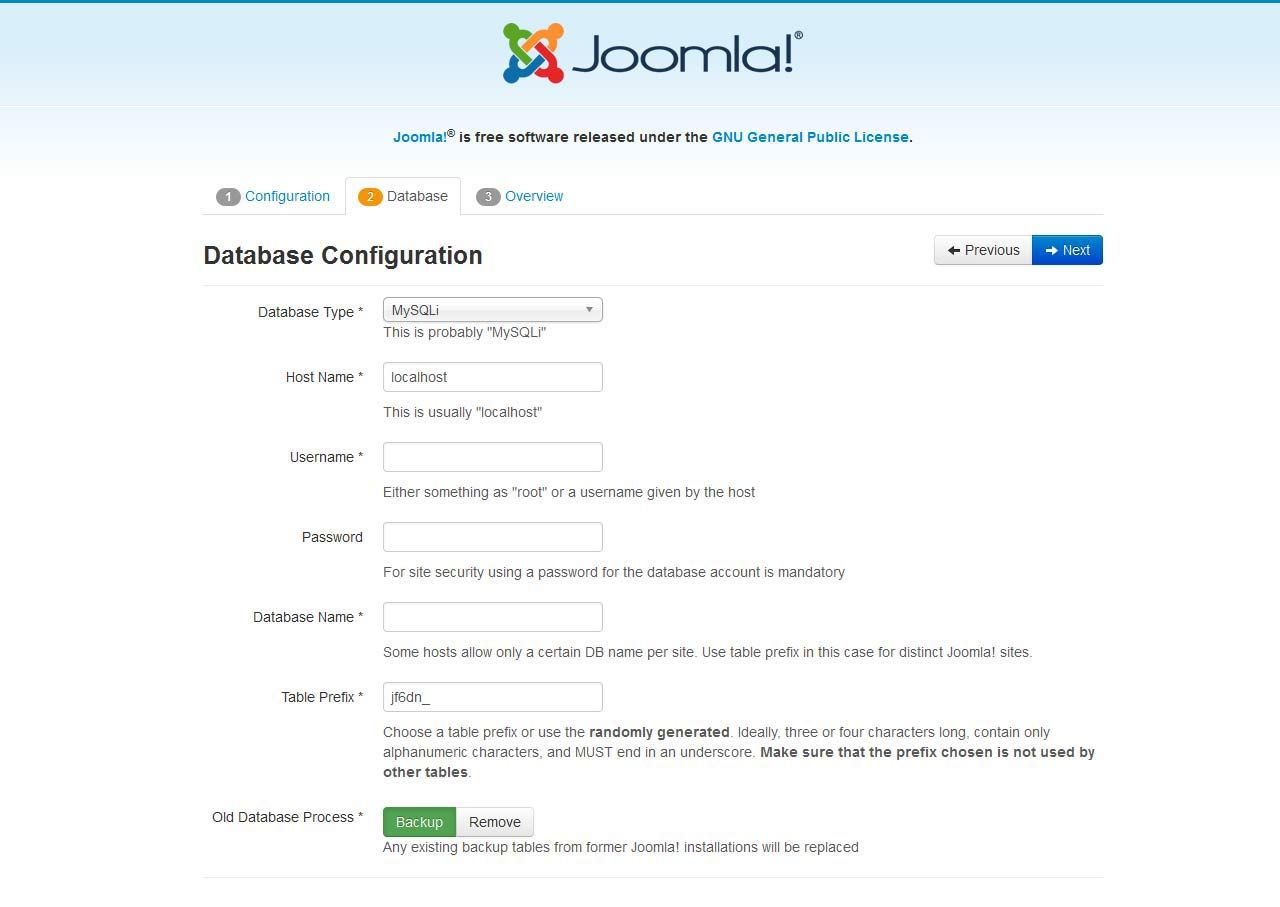
Database Configuration:
This is where you will need to set up your database configuration for your Joomla install. Select the type of database from the drop down list. This will generally be MySQL. Enter the hostname of the database server Joomla! will be installed on. This may not necessarily be the same as your Web server so check with your hosting provider if you are not sure. Enter the MySQL username, password and database name you wish to use with Joomla!. These must already exist for the database you are going to use. If you are unsure about Database set up, please contact your hosting company.
Joomla Install: Page Three
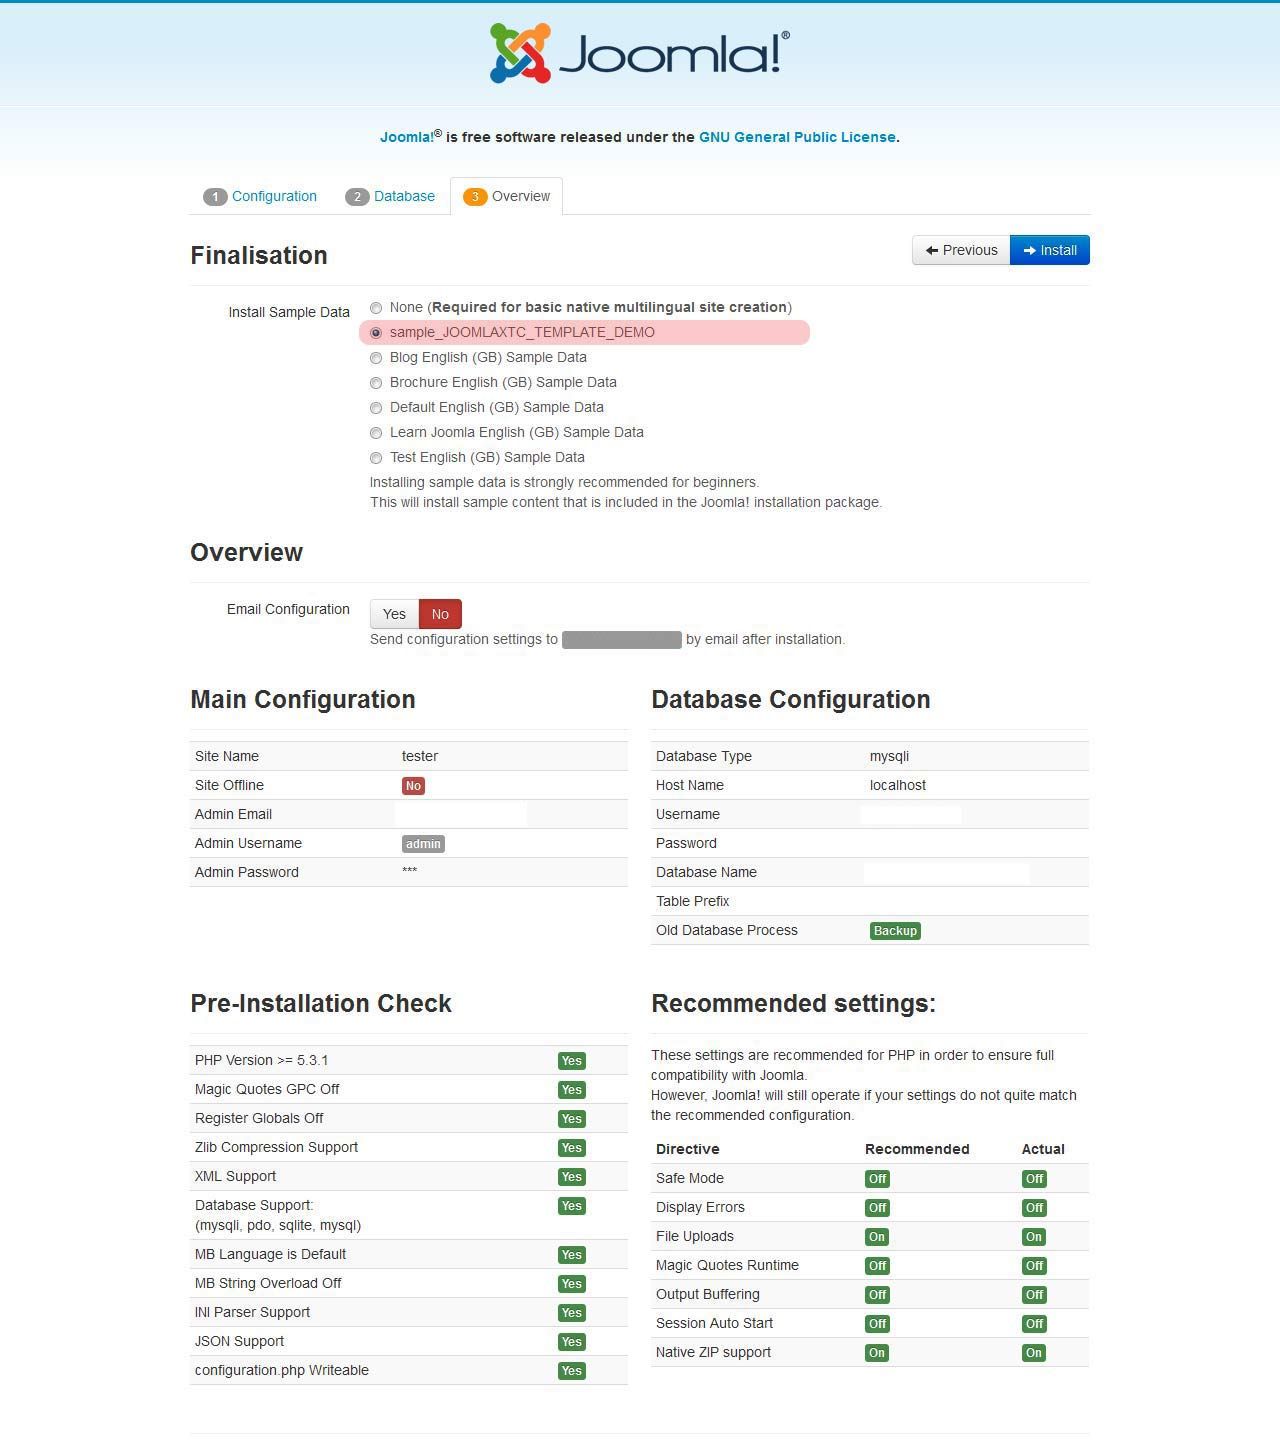
Sample Data Installation
In order to install all the demo content and extensions to re create the demo, you will need to select the sample_JXTC demo content.
Pre Installation Check
This is the pre installation check page of the Joomla install. The first area is critical to running Joomla on your server, If any of these items are not supported (marked as No), your system does not meet the minimum requirements for installation. Please take appropriate actions to correct the errors. Failure to do so could lead to your Joomla! installation not functioning properly.
The Second area checks your core PHP settings, These are the recommended settings for PHP in order to ensure full compatibility with Joomla!. Joomla! will still operate even if your settings do not match.
Joomla Install: Page Four
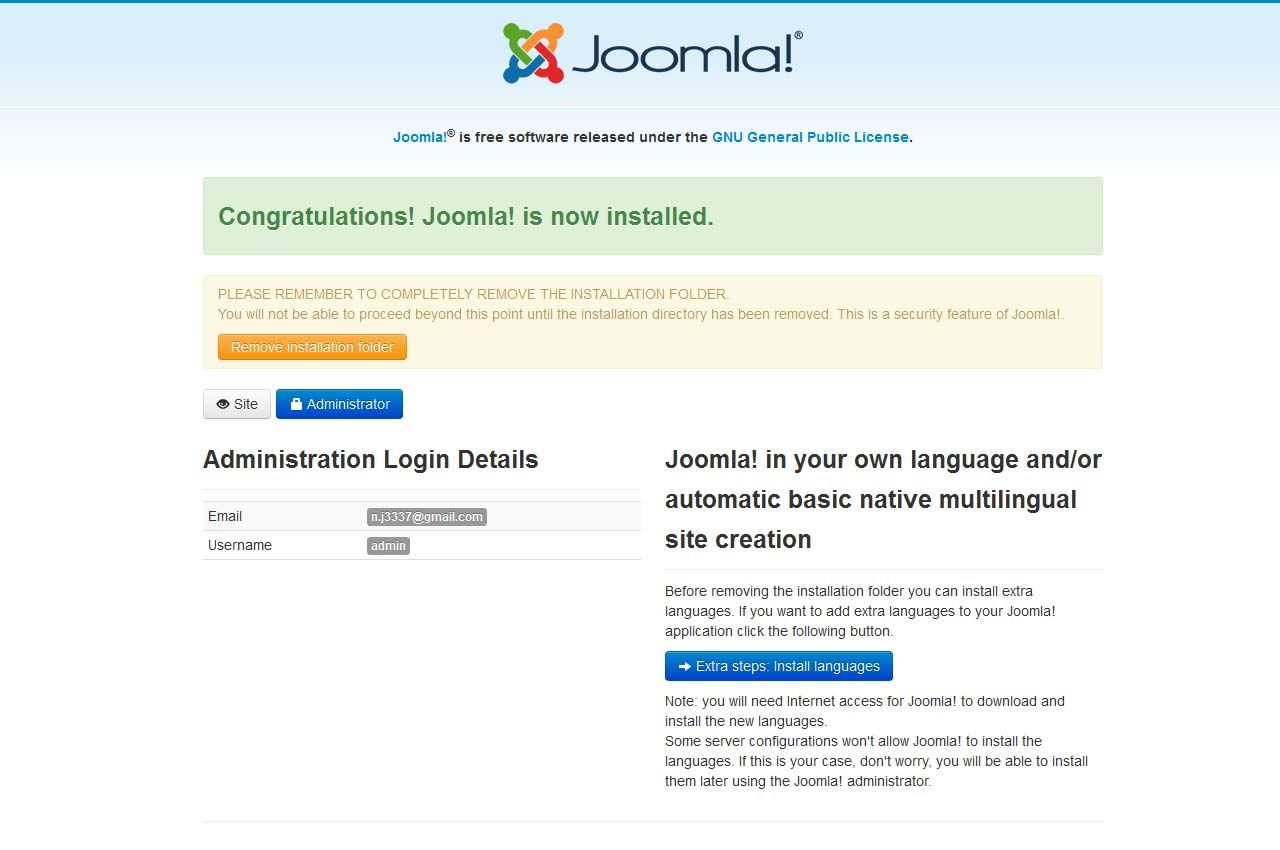
Final Installation Page:
At this point make sure you have written down your admin login and password and then click the Remove Installation Folder to finish the install
Trouble Shooting
In some cases you may bet a Server 500 Error: Depending on the template and your hosting company, you may need to change permissions on the install folders and sub-folders 0777 to 0755.
{youtube 1Fi3581a3ik}Using Web Inspector
Most current browsers support a feature for web developers called inspector. This is an invaluable resource for finding CSS and more! The video above is a quick tutorial on web inspector and finding CSS and editing it in our templates.
The Web Inspector can be opened by right clicking anywhere on a web page and choosing Inspect Element. Once open, it highlights the node on the page as it is selected in the hierarchy. You can also search for nodes by node name, id and CSS class name.
Under the Style pane we show all the CSS rules that apply to the focused node. These rules are listed in cascade order with overridden properties striked-out—letting you truly see how cascading stylesheets affect the page layout. All shorthand properties have a disclosure-triangle to show and hide the expanded properties created by the shorthand.
The Metrics pane provides a quick visual look at how margins, borders and padding affect the current node.Various HTML and JavaScript properties, including length of text nodes, offsetWidth / Height, class names, and parent/sibling information are vieweable in the Properties pane.
Web Inspector Browser Documentation Links
Using Web Inspector with Google Chrome . Using Web Inspector with Mozilla Firefox . Using Web Inspector with SafariCSS File Structure
Our templates come with multiple CSS files. Each CSS file is for a certain part of the template layout and design:

- All bootstrap.css files are included for a Bootstrapped Responsive Layout ( No need to edit )
- css3effects.css - This CSS file contains the CSS3 Effects CSS and the Responsive Break Points for the template.
- default.css - This CSS file contains the core default styling for Joomla and CSS overrides.
- grid.css - This CSS file contains the core layout CSS for the template.
- style.css - The style1.css - styleXX.css are the color themes and styled based CSS for each style.
- typo.css -This CSS file contains the core typography CSS for the template.
- template.css -This CSS file is left empty for your own custom CSS and Overrides
CSS Parameters
Our templates are coded with CSS / PHP Parameters allowing for most of the basic styling of the template to be edited from the Joomla Template Administrator without touching one line of code. If you are unfamiler with PHP Parameters here is a quick overview of how this works:
For this example we will look at the Drop Down Menu Styling. In the Style 1 parameters of the template will will look at the Drop Down Menu color styling. This is what you will see in the template administrator:
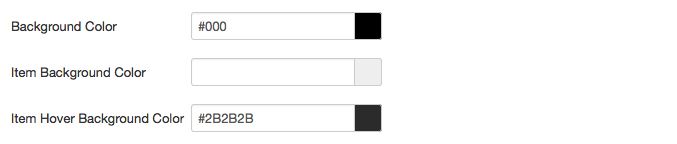
The first background color is the background color for the dropdown UL container and the item background color is the LI container background color. For this example let's focus on the main background color. This color is editable in the template parameters and is called into the CSS via a PHP parameter. Since we are looking at STYLE 1 in the template administrator to find the will will look into style1.css. In order to find the CSS you can open the style1.css and look for the /* Drop Level */ comment or you can find the exact line of CSS by using web inspector ( see below ) . Once you find the line you will see the parameter being called like this:
/* Drop Level */
#menuwrap ul.menu li.parent > ul {background-color: <?php echo $params->droplevelbgcolor;?>;}
You can see that we are calling the background color: then we inject the PHP param for "droplevelbgcolor". If you do not wish to use the Template parameters and hardcode the CSS you simply need to remove the PHP and replace with your color value
The template parameters XML files are found in the parameters folder of the the template. For this example we will again look at the drop down UL background color. In the style1.xml we will find the following:
<field name="droplevelbgcolor" type="colorpicker" default="#000" label="Background Color" description="Enter Hex or CSS3 RGBA Values Only - Enter transparent for none."/>
This is the XML code that presents the color picker in the back end of the template manager and assigns the color to the parameter "droplevelbgcolor".
For more information on the JoomlaXTC XTC Framework visit our Framework Documentation
Adding and Editing CSS
To add your own CSS or to edit the template CSS we suggest that you use the empty template.css file for all your custom CSS. We left this file empty to allow for ease of upgrading the template if we release a new version. Simply add or copy and CSS from another file and add it to this file. You many want to use the !important statement when overriding CSS used in another file. Also the CSS / PHP parameters will not function in this file. Once all your custom CSS and overrides are in this file you can simply back this one file up before upgrading the template and then overwrite the empty file after upgrade and you won't loose any of your custom CSS!
Logo Editing
When you install the template you have predefined settings for the logo within the selected style. In the parameters we have added in four parameters where you can select logo (from the images/templates/TEMPLATE_NAME/images/ logos folder of the template), set width and height of the logo(without px at the end) and set left and right padding for the logo (this will create space from the logo to the menus on each side).
The template also includes the option to swap out the Main Logo for a mobile logo at a certain breakpoint in pixels. If you do not wish to have a different mobile logo, leave these parameters blank and set the Mobile Logo Swap Width to '0'.
Uploading Your Custom Logo
You logo image need to be uploaded to the template folder under the image/logos folder. Simply click on the select button to upload and select the image. If you would like to upload the logo with an FTP program such as FileZilla, browse to the templates folder / template_name/images/logos/ and upload your logo there. If you are not experienced with FTP programs please head over to our FTP Video Tutorials and learn something new today! [View FTP Video Tutorials]
Style Parameters
First you will need to open the template manager by selecting Extensions / Template Manager from the Joomla Administrator Backend. Next, select the template and select the Styles Tab and select the Style you wish to edit from the Thumbnails.
Once you have select the style, scroll down to the logo parameters under the Header Options continue with the set up:
Logo Parameters
- Website Logo Image - The main site logo
- Logo Width - This is the width of the image. This is not what width you want it to be displayed at but the actual width in Pixels.
- Logo Height - This is the height of the image. This is not what height you want it to be displayed at but the actual height in Pixels.
- Logo Padding - This is the overall top, right, bottom, and left padding you want for the logo in Pixels.
- Website Mobile Logo Image - The main site mobile logo
- Mobile Logo Width - This is the width of the image. This is not what width you want it to be displayed at but the actual width in Pixels.
- Mobile Logo Height - This is the height of the image. This is not what height you want it to be displayed at but the actual height in Pixels.
- Mobile Logo Padding - This is the overall top, right, bottom, and left padding you want for the logo in Pixels.
- Mobile Logo Swap Width - This is the website width in Pixels to swap out the Main logo for the Mobile logo.
- Suckerfish - Single Column Drop Down
- Dualfish - Dual Column Drop Down
- None - Optional for use with a 3rd Party Menu Module
- Menu Style: Suckerfish, Dualfish, or None
- Drop Down Position: Position for the Drop Down in pixels from the top of the site.
- Mobile Menu Width: The width in pixel you want the menu menu to switch to the mobile menu
Main Menu Setup

For the main menu we use the core Joomla! menu module. First you will need to open your Joomla Module Manager from Extensions / Module Magager menu in the backend administration side of Joomla.
Main Menu Module Assignment
Create a new Menu Module and assign the module to the menubarleft module position and select the mainmenu.
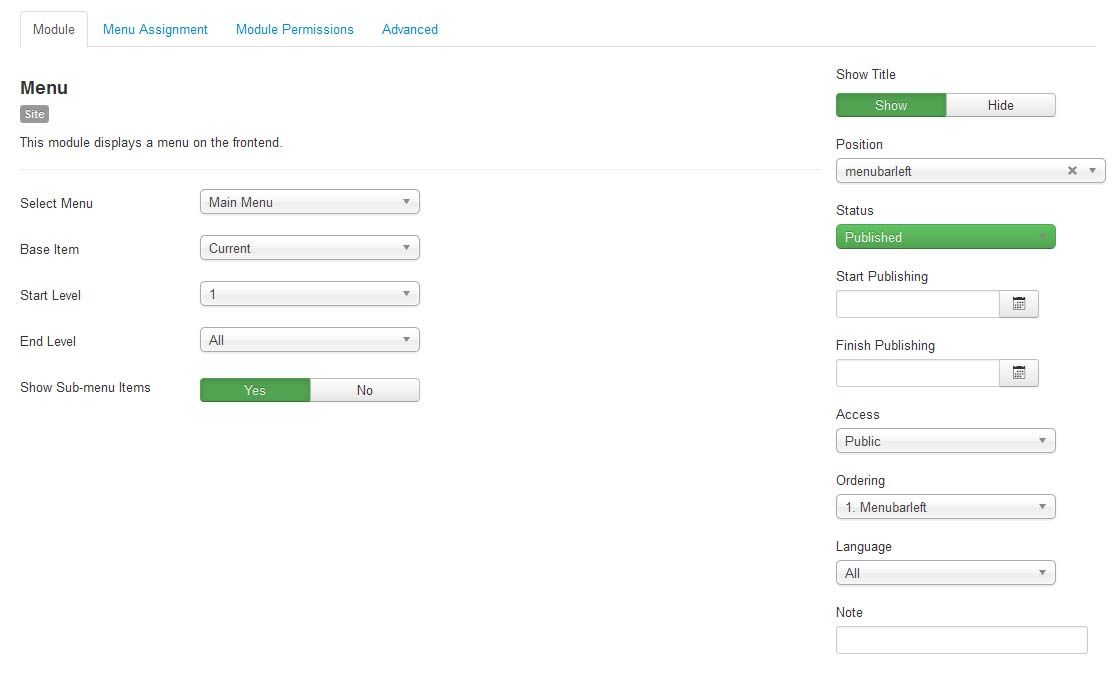
Main Menu Menu Parameters
Select the Menu Tab and make sure that the menu is displayed on all pages.

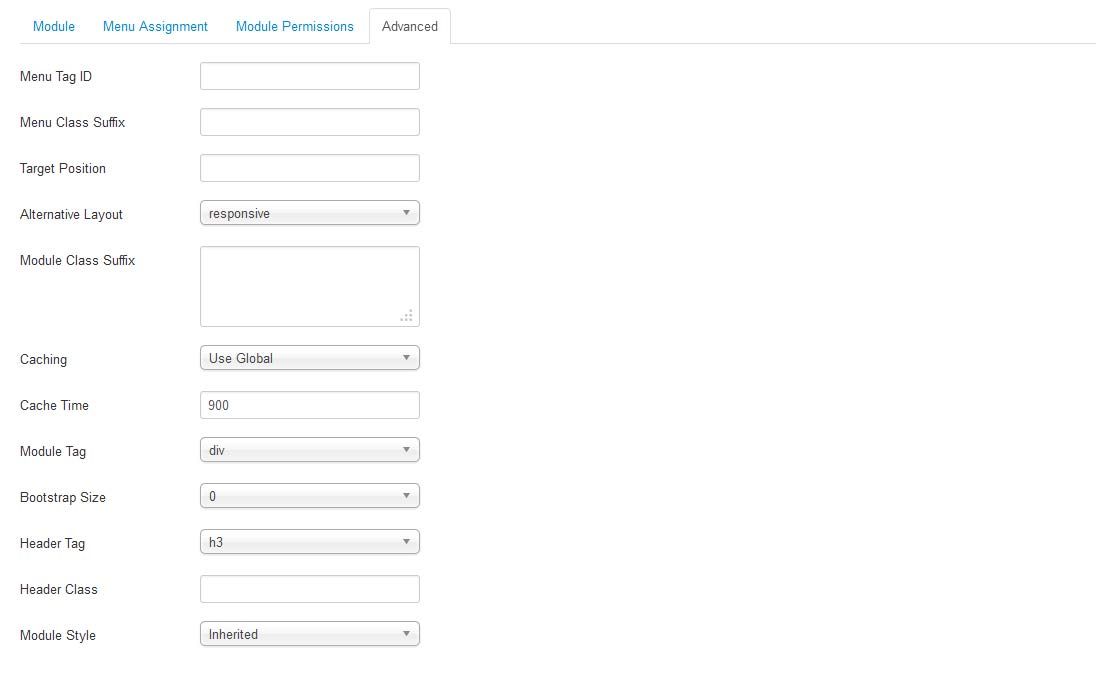
Main Menu Advanced Parameters
In order to use the the responsive features of the menu, you must select the advanced features tab and under alternative layout select the 'Responsive' layout.
Editing the Main Menu style
The Main Menu works with the three different menu classes built into our framework (suckerfish, dualfish and none).

To select the Menu Class first open the Template Manager and select the template. Next, select the Grid Parameters and scroll down to the Menu parameters.
Editing the Main Menu Javascript files
To change the MooTools effects of the Menu you must edit the code in the xtcMenu.js found the in the templates js/ folder. We have made this simple for you by including the basic JS code in the templates Layout folder. To edit: Open the templatename/layouts/default/layout.php file and edit the following:
xtcMenu(null, 'menu', 250,150,'h', new Fx.Transition(Fx.Transitions.Quint.easeInOut), 80, false, false);
The following is a quick reference guide to the Javascript Settings:
xtcMenu(container, menu-class, fx-duration, pause, fx-type, transition-type, fps, center, align);
- container: The menu container element or ID as string. When null passed, the container by default is the whole document body.
- menu-class: The class of the menus to be apply the script on.
- fx-duration: The duration of the menu animation (slide, fade or slide&fade) in miliseconds.
- pause: The amount of time in miliseconds the dropdown will wait before it starts to hide.
- fx-type: The effect type: 'h' for height, 'f' for fade, and 'hf' for both height and fade at the same time.
- transition-type: a Mootools transition object. Defautls to: new Fx.Transition(Fx.Transitions.Quint.easeInOut). (More at: http://mootools.net/docs/core/Fx/Fx.Transitions)
- fps: Frames per second for the animation. Recommended value is from 50 to 80. (It is NOT recommendable to increase the fps in order to achieve a better performance, if the browser and the DOM is too overloaded increasing the fps will actually add more load and the result may be worse. Fx smoothness is also determined by the browser video processing, always check how Chrome and IE are doing with the effect, Firefox is actually the worse at this.)
- center: When set to true, it will center the dropdowns under it's top level parent.
- align: When set to true it will prevent the dropdowns to go out from its wrapper.
Front Page Module Set Up
If you are not using the Quickstart version of our template you will need to set up all the Components, Modules, Plugins and Content. This is fairly easy, but does require a moderate level of Joomla experience. To start you must first know what module positions we use and which modules are used in those positions. Below is map of the Templates home page with each use module position listed. Keep in mind this should only take a few minutes for the experienced user, but if you are new to Joomla we highly suggest you use the Quickstart Installer and go from there.

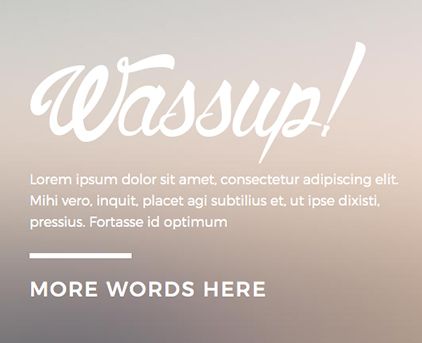
Top1 - JoomlaXTC HTML Module
In the TOP1 position we use our JoomlaXTC HTML Module to create text for inset area. Use the module suffix class 'wassup nopad' this class adds no module padding.
Use the following mark up for the Module HTML.
HTML
<div class="txtlrg">
<img src="/images/wassup.png" />
<p>Lorem ipsum dolor sit amet, consectetur adipiscing elit. Mihi vero, inquit, placet agi subtilius et, ut ipse dixisti, pressius. Fortasse id optimum</p>
<div class="bbottom"></div>
<h2>More Words Here</h2>
</div>
For more information on configuring the HTML Module visit the full documentation HERE
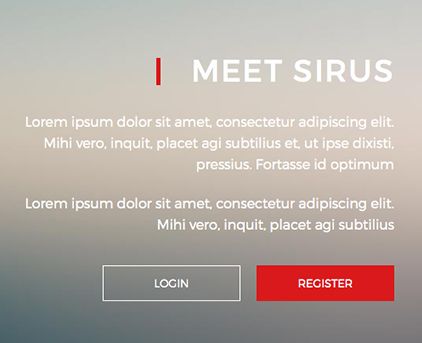
Top2 - JoomlaXTC HTML Module
In the TOP2 position we use our JoomlaXTC HTML Module to create text for inset area. Use the module suffix class 'nopad' this class adds no module padding.
Use the following mark up for the Module HTML.
HTML
<div class="sect-title textright textlight toptitle" style="max-width:450px; float:right">
<div data-sr='reset wait 0.2s then scale up 30%'><h2>Meet Sirus</h2>
</div>

<div data-sr='reset wait 0.6s then scale up 20%' class="toptext">
<p style="font-size:16px;"> Lorem ipsum dolor sit amet, consectetur adipiscing elit. Mihi vero, inquit, placet agi subtilius et, ut ipse dixisti, pressius. Fortasse id optimum
</p>
</div>
<div data-sr='reset wait 0.6s then scale up 20%'>
<p style="font-size:16px;"> Lorem ipsum dolor sit amet, consectetur adipiscing elit. Mihi vero, inquit, placet agi subtilius
</p>
<a class="custlogin">Login</a>
<a class="custregister">Register</a>
</div>
</div>
For more information on configuring the HTML Module visit the full documentation HERE
Left2 - JoomlaXTC Deluxe News Pro
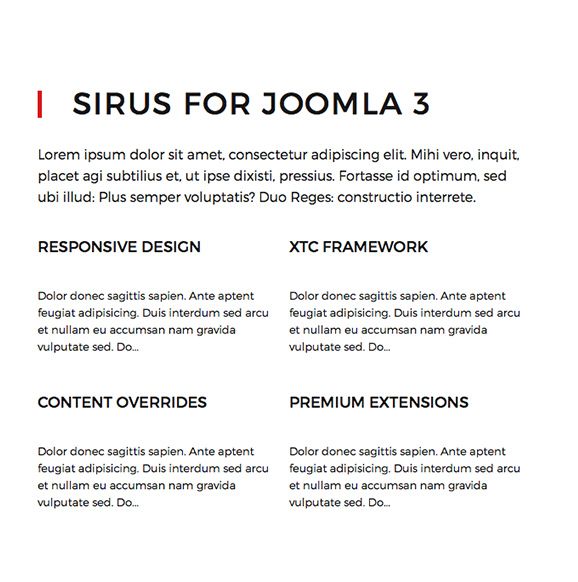
In the LEFT2 module position we use our Deluxe NewsPro to display a grid of Joomla articles. In order to recreate the layout you will first need to upload the Module to your Joomla install. Next publish the module in LEFT2 position and open then module. Next, select the sirus_left2_newspro template from the demo Templates included in the module.
Make sure to set the advanced parameters layout parameter to select 'bootstrap' and add the module class suffix 'pad80'.
For more information on styling and configuring the Deluxe News Pro Module visit the full documentation HERE
USER1 - JoomlaXTC HTML Module
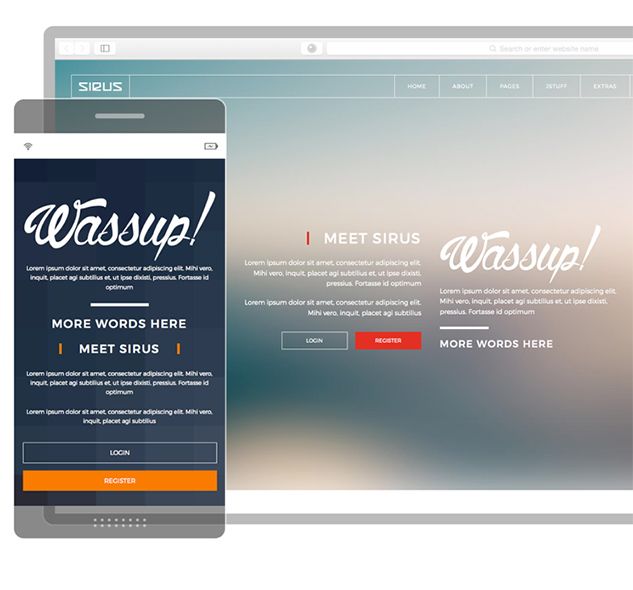
In the USER1 position we use our JoomlaXTC HTML Module to create the devices image. Use the module suffix class 'nopad nomarg devices' this class adds no module padding or margin.
Use the following mark up for the Module HTML.
HTML
<img src="/images/devices.png" />
For more information on configuring the HTML Module visit the full documentation HERE
BANNER - JoomlaXTC HTML Module

In the BANNER position we use our JoomlaXTC HTML Module to create the Do More With Joomla text . Use the module suffix class 'pad70 nomarg' this class adds special module padding and nomargin.
Use the following mark up for the Module HTML.
HTML
<div class="sect-title textlight constrainmod toptitle">
<div data-sr='reset wait 0.2s then scale up 30%'><h2 style="border-color:#fff!important;">Do More with Joomla 3.4</h2>
</div>

<div data-sr='reset wait 0.6s then scale up 20%'>
<p> Lorem ipsum dolor sit amet, consectetur adipiscing elit. Mihi vero, inquit, placet agi subtilius et, ut ipse dixisti, pressius. Fortasse id optimum, sed ubi illud: Plus semper voluptatis? Duo Reges: constructio interrete. Quaesita enim virtus est, non quae relinqueret naturam, sed quae tueretur.
</p>
</div>
</div>
For more information on configuring the HTML Module visit the full documentation HERE
USER19 - JoomlaXTC K2 Content Wall
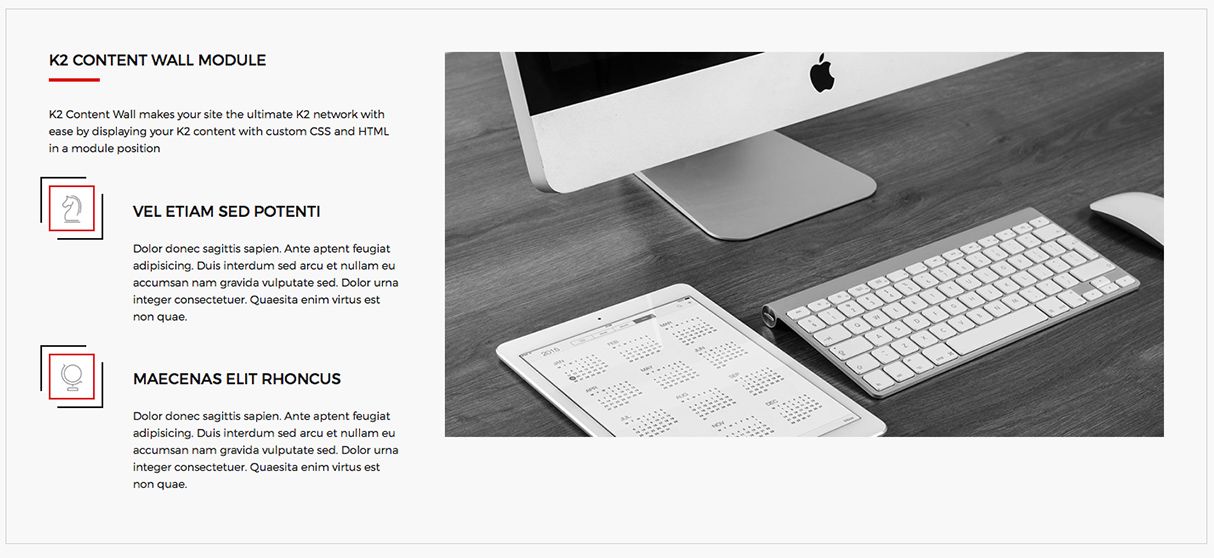
In the USER19 position we use our JoomlaXTC K2 Content Wall Module to create the box of articles. In order to recreate the layout you will first need to upload the Module to your Joomla install. Next publish the module in USER19 position and open then module. Next, select the sirus_user19_k2contentwall template from the demo Templates included in the module.
Make sure to set the advanced parameters layout parameter to select 'bootstrap' and add the module class suffix 'bwrap imgright'.
For more information on styling and configuring the K2 Content Wall Module visit the full documentation HERE
USER19 - JoomlaXTC Deluxe News Pro
In the USER19 position we use our JoomlaXTC Deluxe NewsPro Module to create the box of articles. In order to recreate the layout you will first need to upload the Module to your Joomla install. Next publish the module in USER19 position and open then module. Next, select the sirus_user19_newspro template from the demo Templates included in the module.
Make sure to set the advanced parameters layout parameter to select 'bootstrap' and add the module class suffix 'bwrap imgright'.
For more information on styling and configuring the Deluxe News Pro Module visit the full documentation HERE
LEFT6 - JoomlaXTC HTML Module
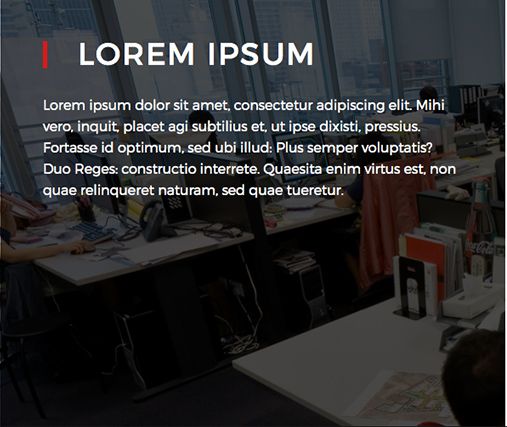
In the LEFT6 position we use our JoomlaXTC HTML Module to create the text. Use the module suffix class 'nomarg darktransbox pad60' this class adds the background, no margin and special module padding.
Use the following mark up for the Module HTML.
HTML
<div class="sect-title textleft textlight constrainmod toptitle">
<div data-sr='reset wait 0.2s then scale up 30%'><h2>Lorem Ipsum</h2>
</div>

<div data-sr='reset wait 0.6s then scale up 20%'>
<p> Lorem ipsum dolor sit amet, consectetur adipiscing elit. Mihi vero, inquit, placet agi subtilius et, ut ipse dixisti, pressius. Fortasse id optimum, sed ubi illud: Plus semper voluptatis? Duo Reges: constructio interrete. Quaesita enim virtus est, non quae relinqueret naturam, sed quae tueretur.
</p>
</div>
</div>
For more information on configuring the HTML Module visit the full documentation HERE
USER25 - JoomlaXTC Deluxe News Pro
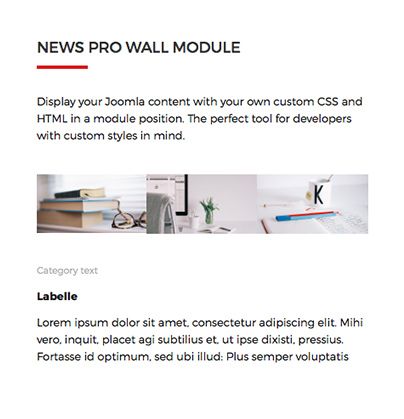
In the USER25 position we use our JoomlaXTC Deluxe NewsPro Module to create the box of articles. In order to recreate the layout you will first need to upload the Module to your Joomla install. Next publish the module in USER25 position and open then module. Next, select the sirus_user25_newspro template from the demo Templates included in the module.
Make sure to set the advanced parameters layout parameter to select 'bootstrap' and add the module class suffix 'pad60 lightbox nomarg'.
For more information on styling and configuring the Deluxe News Pro Module visit the full documentation HERE
RIGHT6 - Joomla Menu Module

In the RIGHT6 position we use the Menu Module to create links. Use the menu Alternative Layout 'iconside' and use the module suffix class 'darkbox menusmall bars nomarg basecolor1_box padbt20'.
BANNER7 - JoomlaXTC HTML Module

In the BANNER7 position we use our JoomlaXTC HTML Module to create the JOOMLA 3.4 AND BEYOND text . Use the module suffix class 'nomarg' this class adds nomargin.
Use the following mark up for the Module HTML.
HTML
<div class="sect-title textlight constrainmod toptitle">

<div data-sr='reset wait 0.2s then scale up 30%'>
<h2>JOOMLA 3.4 AND BEYOND</h2>
</div>

<div data-sr='reset wait 0.6s then scale up 20%'>
<p> Lorem ipsum dolor sit amet, consectetur adipiscing elit. Mihi vero, inquit, placet agi subtilius et, ut ipse dixisti, pressius. Fortasse id optimum, sed ubi illud: Plus semper voluptatis? Duo Reges: constructio interrete. Quaesita enim virtus est, non quae relinqueret naturam, sed quae tueretur.
</p>
</div>
</div>
For more information on configuring the HTML Module visit the full documentation HERE
USER31 - JoomlaXTC Deluxe News Pro

In the USER31 position we use our JoomlaXTC Deluxe NewsPro Module to create the timeline. In order to recreate the layout you will first need to upload the Module to your Joomla install. Next publish the module in USER31 position and open then module. Next, select the sirus_user31_newspro template from the demo Templates included in the module.
Make sure to set the advanced parameters layout parameter to select 'bootstrap' and add the module class suffix 'nomarg joomnews'.
For more information on styling and configuring the Deluxe News Pro Module visit the full documentation HERE
USER32 - JoomlaXTC HTML Module
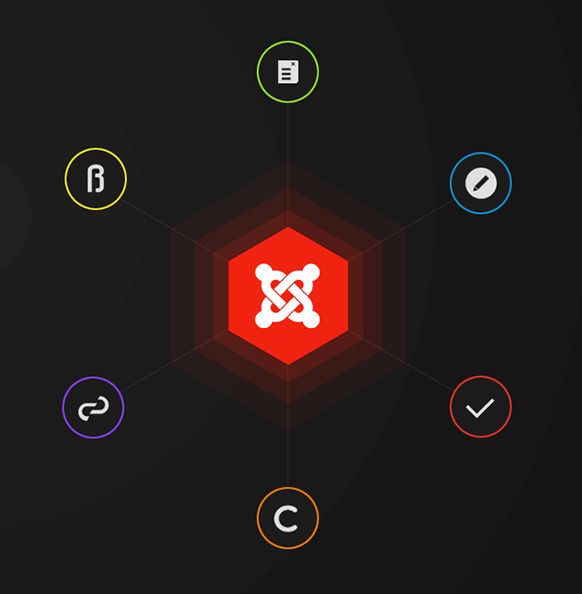
In the USER32 position we use our JoomlaXTC HTML Module to create the Joomla 3.4 Image.
Use the following mark up for the Module HTML.
HTML
<div align="center" class="hex-wrap">
<img src="/images/hex-wire.png" />
</div>
For more information on configuring the HTML Module visit the full documentation HERE
USER37 - JoomlaXTC HTML Module
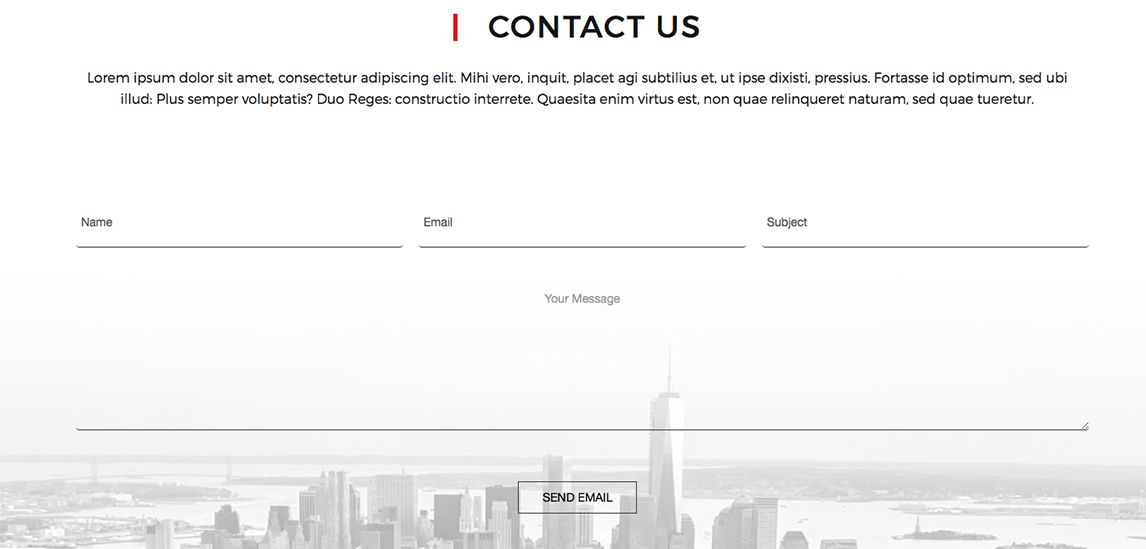
In the USER37 position we use our JoomlaXTC HTML Module to create the intro text for the contact form.
Use the following mark up for the Module HTML.
HTML
<div class="sect-title  constrainmod toptitle">
<div data-sr='reset wait 0.2s then scale up 30%'><h2>Contact Us</h2>
</div>

<div data-sr='reset wait 0.6s then scale up 20%'>
<p> Lorem ipsum dolor sit amet, consectetur adipiscing elit. Mihi vero, inquit, placet agi subtilius et, ut ipse dixisti, pressius. Fortasse id optimum, sed ubi illud: Plus semper voluptatis? Duo Reges: constructio interrete. Quaesita enim virtus est, non quae relinqueret naturam, sed quae tueretur.
</p>
</div>
For more information on configuring the HTML Module visit the full documentation HERE
USER37 - JoomlaXTC HTML Module
In the USER37 position we use our JoomlaXTC HTML Module to create the the contact form. use the module suffix 'nomarg'
Use the following mark up for the Module HTML.
HTML
<div class="contactwrap">


	<form id="contact-form" action="/motif/index.php" method="post" class="emailForm">
            <fieldset><dl>
		 <div class="ctwthird first">
				<input type="text" name="jform[contact_name]" id="jform_contact_name" value="Name"  class="required"/>
		</div>
		<div class="ctwthird">
			<input type="text" name="jform[contact_email]" class="validate-email required" id="jform_contact_email" value="Email"/>
		</div>
        	<div class="ctwthird">
			<input type="text" name="jform[contact_subject]" id="jform_contact_emailmsg" value="Subject" class="required"/>
		</div>
		<div style="clear:both"></div>
		<div class="ctwfull">
			<textarea name="jform[contact_message]" id="jform_contact_message" cols="150" rows="8" value="Message" class="required" placeholder="Your Message"></textarea>
		</div>


		<div style="text-align:center; clear:both; ">
			<div class="buttonMore">
				<button class="button validate morebtn" type="submit">Send Email</button>
				<input type="hidden" name="option" value="com_contact" />
				<input type="hidden" name="task" value="contact.submit" />
				<input type="hidden" name="return" value="" />
				<input type="hidden" name="id" value="{slug}" />
				</div></div>
</dl>
</fieldset>
</form>
</div>
For more information on configuring the HTML Module visit the full documentation HERE
USER49 - JoomlaXTC HTML Module

In the USER49 position we use our JoomlaXTC HTML Module to create the intro text for meet the team.
Use the following mark up for the Module HTML.
HTML
<div class="sect-title  constrainmod toptitle">
<div data-sr='reset wait 0.2s then scale up 30%'><h2>Meet The Team</h2>
</div>

<div data-sr='reset wait 0.6s then scale up 20%' >
<p>Showcase your team members or testimonials with Joomla Content or K2 Users with our Deluxe NewsPro or K2 Wall modules!  The template comes with both a pre configured quick start and the individual extensions for Sirus!
</p>
</div>
For more information on configuring the HTML Module visit the full documentation HERE
USER49 - JoomlaXTC Deluxe News Pro
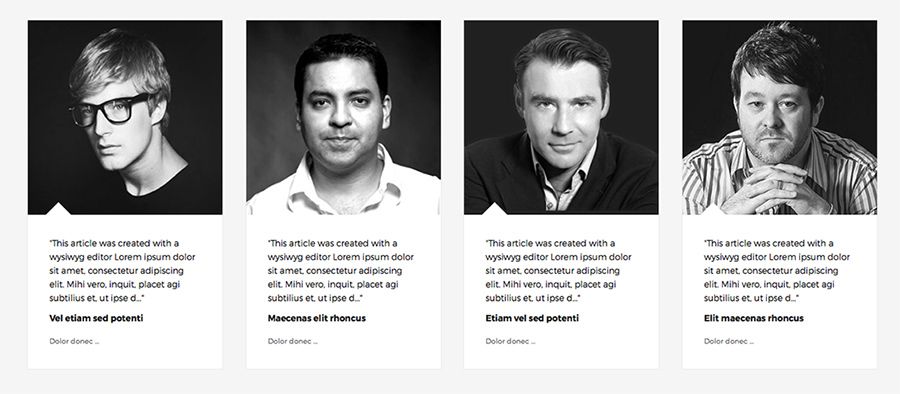
In the USER49 position we use our JoomlaXTC Deluxe NewsPro Module to create the column of team members. In order to recreate the layout you will first need to upload the Module to your Joomla install. Next publish the module in USER49 position and open then module. Next, select the sirus_user49_newspro template from the demo Templates included in the module.
Make sure to set the advanced parameters layout parameter to select 'bootstrap'
For more information on styling and configuring the Deluxe News Pro Module visit the full documentation HERE
USER49 - JoomlaXTCK2 Content Wall (Optional)
As an option you can use our K2 Content Wall other than the Delxue NewsPro module. In order to recreate the layout you will first need to upload the Module to your Joomla install. Next publish the module in USER49 position and open then module. Next, select the sirus_user49_k2contentwall template from the demo Templates included in the module.
Make sure to set the advanced parameters layout parameter to select 'bootstrap' and add make sure your K2 Authors have avatars set.
For more information on styling and configuring the K2 Content Wall Module visit the full documentation HERE
USER55 - JoomlaXTC HTML Module
In the USER55 position we use our JoomlaXTC HTML Module to create featured text and logos. Use the module suffix class 'nopad nomarg' this class adds no module padding or margin.
Use the following mark up for the Module HTML.
HTML
<div class="sect-title  constrainmod toptitle">
<div data-sr='reset wait 0.2s then scale up 30%'><h2>Powered By</h2>
</div>

<div data-sr='reset wait 0.6s then scale up 20%'  style="margin-bottom: 70px;">
<p>Siris's quickstart package comes with some of the top free extensions for Joomla! pre installed and styled.  From K2, one of the top CCK's for Joomla! to the number one forum component, Kunena, Sirus is feature packed!
</p>
</div>

<div data-sr='reset enter bottom over 2s'><ul class="logos">

<li class="first"><img src="/images/k2_logo.png" /></li>
<li><img src="/images/vm_logo.png" /></li>

<li><img src="/images/kunena_logo.png" /></li>
<li><img src="/images/jem_logo.png" /></li>
</ul>
</div>
For more information on configuring the HTML Module visit the full documentation HERE
BOTTOM1 - JoomlaXTC Contact Wall
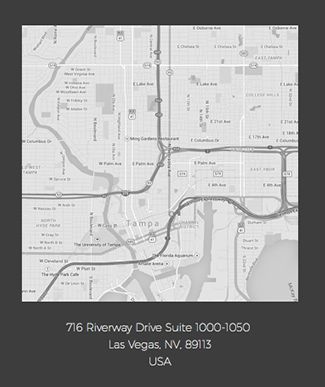
In the BOTTOM1 position we use our JoomlaXTC Contact Wall to create the contact info. In order to recreate the layout you will first need to upload the Module to your Joomla install. Next publish the module in BOTTOM1 position and open then module. Next, select the sirus_bottom1_contactwall template from the demo Templates included in the module.
Make sure to set the advanced parameters layout parameter to select 'bootstrap' and add the module class suffix 'rightborder nopadmcb nomargmcb'.
For more information on styling and configuring the Contact Wall Module visit the full documentation HERE
BOTTOM2 - JoomlaXTC HTML Module
In the BOTTOM2 position we use our JoomlaXTC HTML Module to create a newsletter sign up. We are using the mail chimp sign up html - if you use mail chimp simple put your id in and your set! Use the module suffix class 'bottomborder' this class adds a bottom border.
Use the following mark up for the Module HTML.
HTML
<center><!-- Begin MailChimp Signup Form -->
<link href="//cdn-images.mailchimp.com/embedcode/slim-081711.css" rel="stylesheet" type="text/css">
<style type="text/css">
	#mc_embed_signup{clear:left; font:14px}
	/* Add your own MailChimp form style overrides in your site stylesheet or in this style block.
	   We recommend moving this block and the preceding CSS link to the HEAD of your HTML file. */
</style>
<div id="mc_embed_signup">
<form action="#" method="post" id="mc-embedded-subscribe-form" name="mc-embedded-subscribe-form" class="validate" target="_blank" novalidate>
    <div id="mc_embed_signup_scroll">
	<label for="mce-EMAIL">Newsletter</label>
	<input type="email" value="" name="EMAIL" class="email" id="mce-EMAIL" placeholder="email address" required>
    <input type="submit" value="Subscribe" name="subscribe" id="mc-embedded-subscribe" class="button">
    </div>
</form>
</div>

<!--End mc_embed_signup-->
</center>
For more information on configuring the HTML Module visit the full documentation HERE
BOTTOM2 - JoomlaXTC HTML Module

In the BOTTOM2 position we use our JoomlaXTC HTML Module to create the social icons.
Use the following mark up for the Module HTML.
HTML
<p style="font-size:14px;color:#fff;text-align:center;margin-bottom:16px;">Follow Us</p> <div class="socialmr1"><a href="#"><i class="fa fa-facebook"></i></a> <a href="#"><i class="fa fa-google-plus"></i></a> <a href="#"><i class="fa fa-linkedin"> </i></a> <a href="#"><i class="fa fa-twitter"> </i></a> </div> </pre> <br /> <p>For more information on configuring the HTML Module visit the full documentation <a href="https://www.joomlaxtc.com/support/extension/extension-guides/custom-html-pro">HERE</a></p> <br /><br /> <br /> <h2>BOTTOM3 - JoomlaXTC HTML Module</h2> <img src="https://www.joomlaxtc.com/images/templatedocs/sirus/bottom3.jpg" /><br /><br /> <p>In the BOTTOM3 position we use our JoomlaXTC HTML Module to create the disclaimer texts. Use the module suffix 'leftborder' to create the left border. </p> <br /> <p>Use the following mark up for the Module HTML.</p> <h2>HTML</h2> <pre style="border:1px solid #cccccc;"><xmp> <div class="disclaimer"> <p style="font-size:12px; font-weight:100;color:#f1f1f1;">(C) 2015 Monev Software LLC / JoomlaXTC. </p><p style="font-size:12px; font-weight:100;color:#f1f1f1;margin-bottom:16px;">Disclaimer: This site is purely for demo use only and all the content relating to products and manufacturers are for demonstration purposes only. All images and logos are copyrighted to their respective owners.</p> <br><br> <p style="font-size:12px; font-weight:100;color:#f1f1f1;border-top:1px solid #999;padding-top:16px;"> <br><br> Joomla! is Free Software released under the GNU/GPL License. Joomla is a trademark of Open Source Matters and the name is used under a limited license from Open Source Matters in the United States and other countries. Joomlaxtc.com / Monev Software LLC is not affiliated with or endorsed by Open Source Matters or the Joomla! Project.<br></p> </div><br><br> </pre> <br /> <p>For more information on configuring the HTML Module visit the full documentation <a href="https://www.joomlaxtc.com/support/extension/extension-guides/custom-html-pro">HERE</a></p> <br /><br /> <p>Use the following mark up for the Module HTML.</p> <h2>HTML</h2> <pre style="border:1px solid #cccccc;"><xmp> <center> <div class="bottomlogo"> </div></center><br> <p style="font-size:12px; max-width:600px; text-align:center; margin:0 auto;font-weight:100;">(C) 2015 Monev Software LLC / JoomlaXTC. <br>Disclaimer: This site is purely for demo use only and all the content relating to products and manufacturers are for demonstration purposes only. All images and logos are copyrighted to their respective owners.</p>
For more information on configuring the HTML Module visit the full documentation HERE
LEFTSIDE - JoomlaXTC HTML Module

In the LEFTSIDE position we use our JoomlaXTC HTML Module to create the leftside social links. Use the module suffix class 'mobilehide' to hide at the mobile level.
Use the following mark up for the Module HTML.
HTML
<div class="socialleft">
<div data-sr="wait 1.2s and then enter left please, and hustle 20px" class="sleft facebook" >
<a href="#"><i class="fa fa-facebook"></i></a>
</div>
<div data-sr="wait 1.4s and then enter left please, and hustle 20px"  class="sleft google">
<a href="#"><i class="fa fa-google-plus"></i></a>
</div>
<div data-sr="wait 1.6s and then enter left please, and hustle 20px"  class="sleft linkedin">
<a href="#"><i class="fa fa-linkedin">
</i></a>
</div>
<div data-sr="wait 1.8s and then enter left please, and hustle 20px"  class="sleft twitter">
<a href="#"><i class="fa fa-twitter">
</i></a>
</div>
</div>
For more information on configuring the HTML Module visit the full documentation HERE
