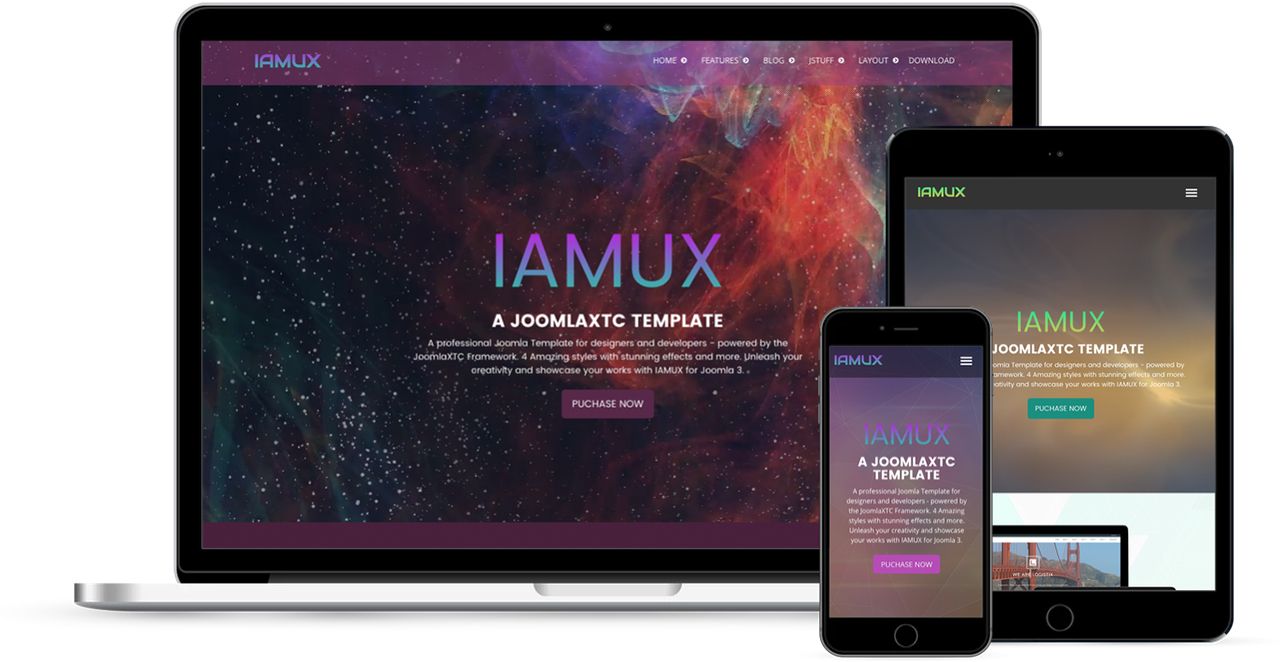
IAMUX
IAMUX is a colorful and stunning multi-use template for Joomla 3x. Utilizing the latest in design styles and effects, IAMUX comes packaged with 4 breathtaking styles. The template features a bootstrap design, CSS3 effects, background animations, and more
Requirements
- Joomla 3
- Apache 2.2+ or Microsoft IIS 7
- PHP 5.3+
- MySQL 5.0.4 or higher
Features
- XTC Framework
- 110+ module positions
- 60+ module styles
- Multiple Menu Styles
- CSS3 Effects
- JavaScript Effects
- Responsive Design
- Sticky Header Option
- Joomla Quickstart
- XTC Extensions
- Joomla Overrides
Intro Video Tutorial
XTC Framework Video Tutorial
Template Set Up
If this is for a brand new site, we suggest you use our QuickStart version of the template, which is a full pre-configured install of Joomla with all demo content in place.
Template Installation
Uploading the template:
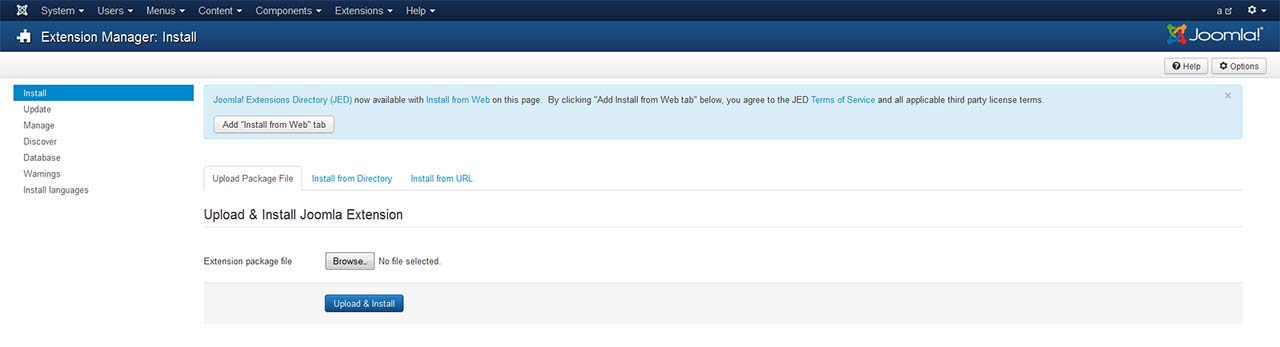
Login to the administration side of your Joomla install and from the Extensions menu select Install / Uninstall. Browse your computer for the "template_jxtc_templatename.zip" and upload the file to your Joomla site.
TemplateFramework Component:
XTC templates make use of a helper component required for it to work, if you are installing the stand-alone template then make sure to also install the XTC Helper Component also available in the template's download list before enabling the template.
Template Manager:
From the Extensions menu select the Joomla! template manager. You now should see the default Joomla templates and the new JoomlaXTC template displayed in a list. Please select the template you wish to use by checking the box next to the template name and clicking "default" in the top right of the page.
JoomlaXTC offers many training videos for Joomla for register users. If you are a new user to Joomla, we strongly suggest you view these videos for basic Joomla! training - View Videos
Extension Installation:
Each JoomlaXTC template comes with custom themes and extensions for the template. After you do your main install of the template you can install the custom extensions - please view the component or module documentation for docs on installing and configuring these extensions.
Quickstart Install
JoomlaXTC Quickstart Template Editions are complete Joomla installers with the latest versions of Joomla and our Template with demo content. The quickstart editions are only for fresh installs of Joomla, if you already have a joomla site built and are looking to change the template - use the basic template with your Joomla installer.
Installing Joomla
Step One:
Unzip the Quickstart edition .zip file. Next, using an FTP program such as Filezilla, upload the contents of the unzipped Quickstart edition folder to the root of your server. After you have uploaded the files go to step 2.
Step Two:
Login to your servers control panel and create a new Database for your Joomla Install - Make sure to write down the Host, DB Name, Username, and Password - You'll need it later.
Step Three:
Point your browser to your web address - www.mydomain.com to start the Joomla Install
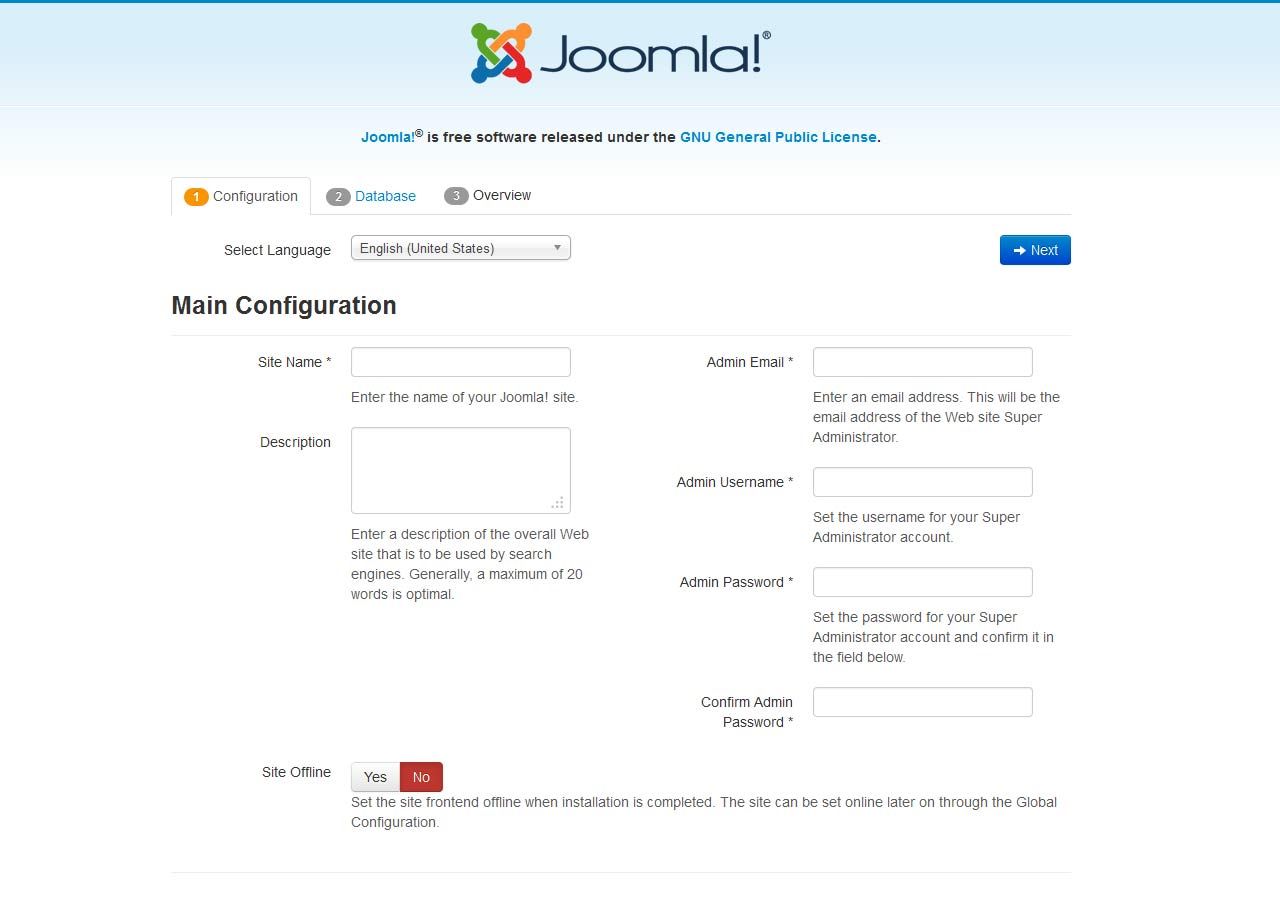
Joomla Install: Page One
Joomla Welcome Page:
This is the starting page of the Joomla installation. You should see this screen when you go to your web domain. On this page you set up your domain name information, Super User Name and Password
Joomla Install: Page Two
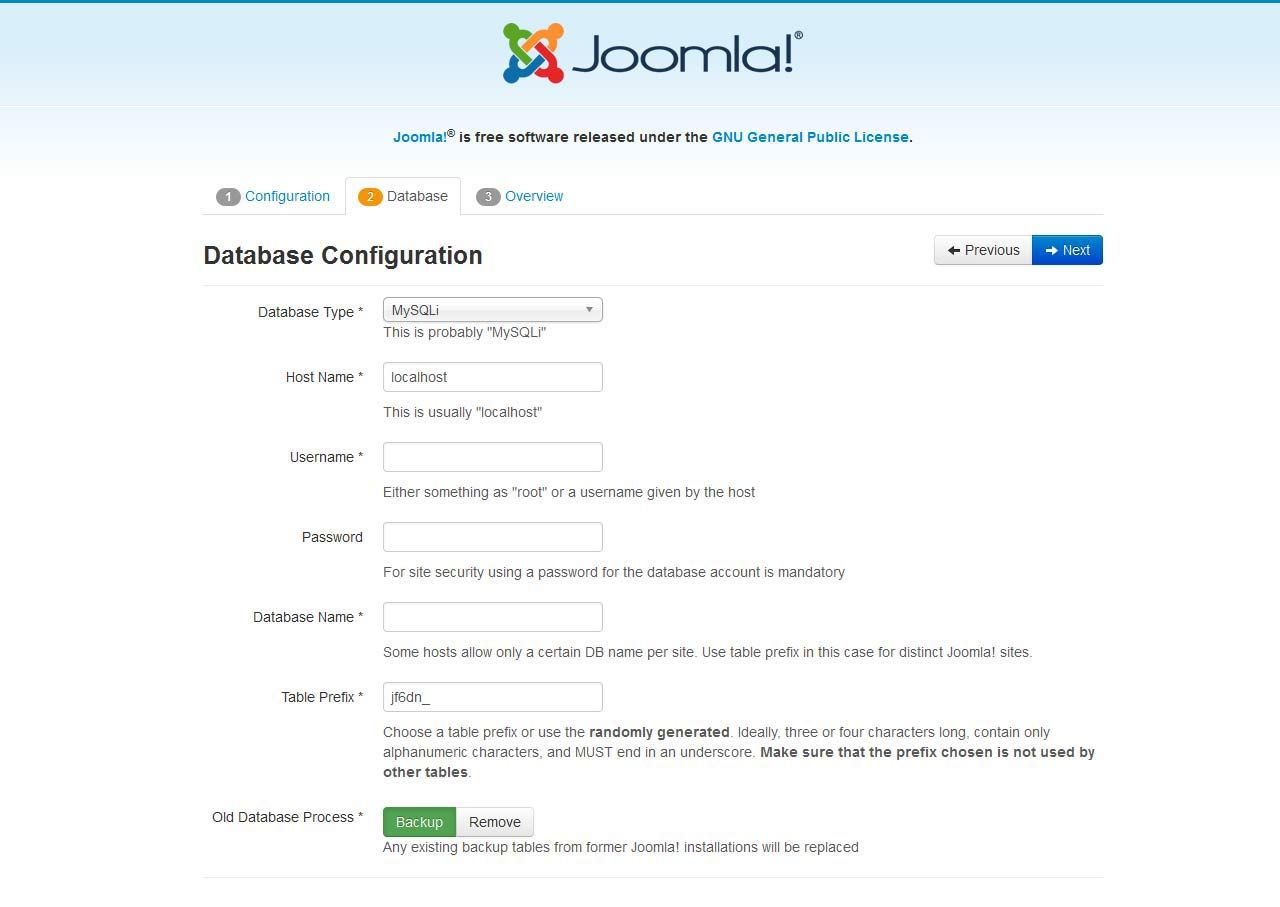
Database Configuration:
This is where you will need to set up your database configuration for your Joomla install. Select the type of database from the drop down list. This will generally be MySQL. Enter the hostname of the database server Joomla! will be installed on. This may not necessarily be the same as your Web server so check with your hosting provider if you are not sure. Enter the MySQL username, password and database name you wish to use with Joomla!. These must already exist for the database you are going to use. If you are unsure about Database set up, please contact your hosting company.
Joomla Install: Page Three
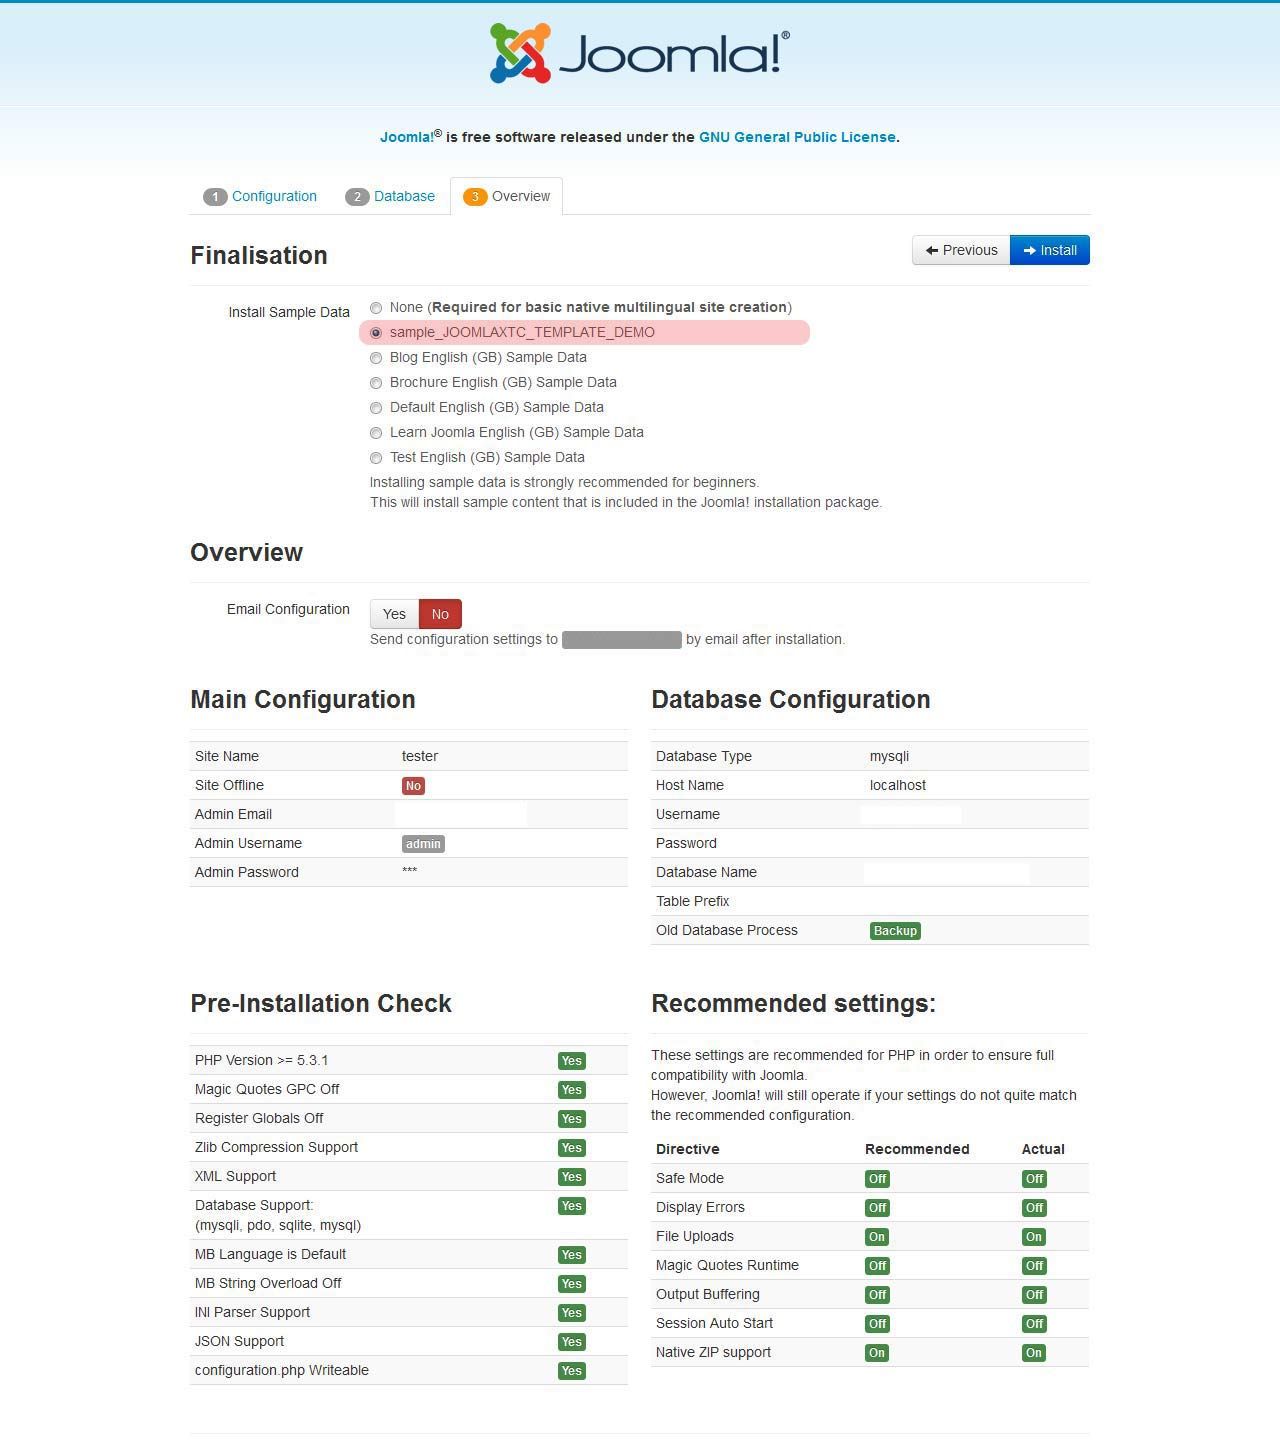
Sample Data Installation
In order to install all the demo content and extensions to re create the demo, you will need to select the sample_JXTC demo content.
Pre Installation Check
This is the pre installation check page of the Joomla install. The first area is critical to running Joomla on your server, If any of these items are not supported (marked as No), your system does not meet the minimum requirements for installation. Please take appropriate actions to correct the errors. Failure to do so could lead to your Joomla! installation not functioning properly.
The Second area checks your core PHP settings, These are the recommended settings for PHP in order to ensure full compatibility with Joomla!. Joomla! will still operate even if your settings do not match.
Joomla Install: Page Four
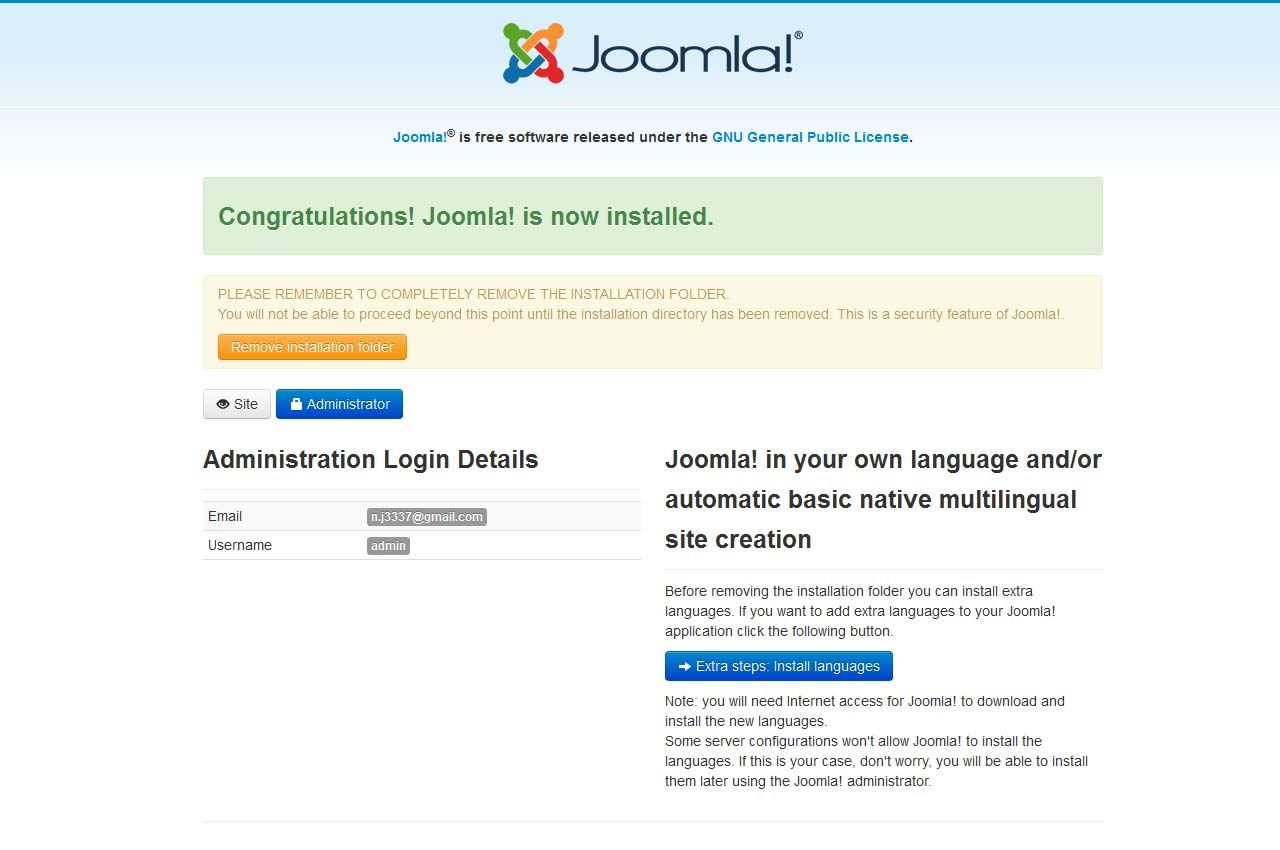
Final Installation Page:
At this point make sure you have written down your admin login and password and then click the Remove Installation Folder to finish the install
Trouble Shooting
In some cases you may bet a Server 500 Error: Depending on the template and your hosting company, you may need to change permissions on the install folders and sub-folders 0777 to 0755.
{youtube 1Fi3581a3ik}Background Videos
IAMUX comes with several background videos, due to the size of the videos they only come pre-packaged with the QuickStart edition. If you are installing IAMUX on a preexisting site you will need to download the IAMUX_ASSETS.ZIP file and extract the videos and upload them to the templates/iamux/images/backgrounds/ folder
Using Web Inspector
Most current browsers support a feature for web developers called inspector. This is an invaluable resource for finding CSS and more! If you are new to using web inspector,Joomla, or the XT Framework, we suggest you watch the video at the bottom of the page.
The Web Inspector can be opened by right clicking anywhere on a web page and choosing Inspect Element. Once open, it highlights the node on the page as it is selected in the hierarchy. You can also search for nodes by node name, id and CSS class name.
Under the Style pane we show all the CSS rules that apply to the focused node. These rules are listed in cascade order with overridden properties striked-out—letting you truly see how cascading stylesheets affect the page layout. All shorthand properties have a disclosure-triangle to show and hide the expanded properties created by the shorthand.
The Metrics pane provides a quick visual look at how margins, borders and padding affect the current node.Various HTML and JavaScript properties, including length of text nodes, offsetWidth / Height, class names, and parent/sibling information are vieweable in the Properties pane.
Browser Documentation Links
Using Web Inspector with Google Chrome
Using Web Inspector with Mozilla Firefox
Using Web Inspector with Safari
CSS File Structure
Our templates come with multiple CSS files. Each CSS file is for a certain part of the template layout and design:
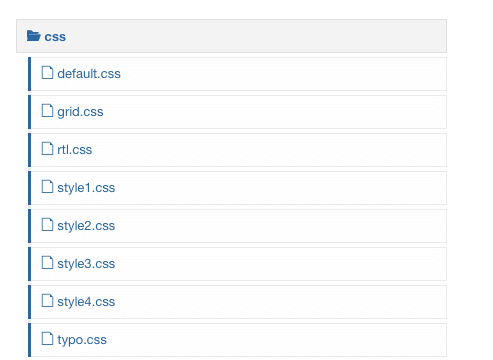
- default.css - This CSS file contains the core default styling for Joomla and CSS overrides.
- grid.css - This CSS file contains the core layout CSS for the template.
- rtl.css -This CSS file contains the RTL CSS for the template.
- style.css - The style1.css - styleXX.css are the color themes and styled based CSS for each style.
- typo.css -This CSS file contains the core typography CSS for the template.
CSS Parameters
Our templates are coded with CSS / PHP Parameters allowing for most of the basic styling of the template to be edited from the Joomla Template Administrator without touching one line of code. If you are unfamiler with PHP Parameters here is a quick overview of how this works:
For this example we will look at the Drop Down Menu Styling. In the Style 1 parameters of the template will will look at the Drop Down Menu color styling. This is what you will see in the template administrator:
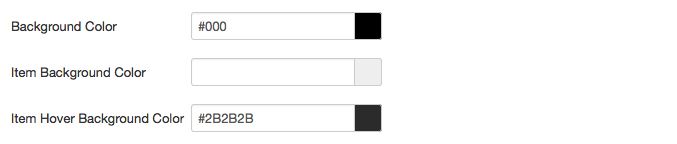
The first background color is the background color for the dropdown UL container and the item background color is the LI container background color. For this example let's focus on the main background color. This color is editable in the template parameters and is called into the CSS via a PHP parameter. Since we are looking at STYLE 1 in the template administrator to find the will will look into style1.css. In order to find the CSS you can open the style1.css and look for the /* Drop Level */ comment or you can find the exact line of CSS by using web inspector ( see below ) . Once you find the line you will see the parameter being called like this:
/* Drop Level */
#menuwrap ul.menu li.parent > ul {background-color: <?php echo $params->droplevelbgcolor;?>;}
You can see that we are calling the background color: then we inject the PHP param for "droplevelbgcolor". If you do not wish to use the Template parameters and hardcode the CSS you simply need to remove the PHP and replace with your color value
The template parameters XML files are found in the parameters folder of the the template. For this example we will again look at the drop down UL background color. In the style1.xml we will find the following:
<field name="droplevelbgcolor" type="colorpicker" default="#000" label="Background Color" description="Enter Hex or CSS3 RGBA Values Only - Enter transparent for none."/>
This is the XML code that presents the color picker in the back end of the template manager and assigns the color to the parameter "droplevelbgcolor".
For more information on the JoomlaXTC XTC Framework visit our Framework Documentation
Adding and Editing CSS
To add your own CSS or to edit the template CSS we suggest that you use the template.css file for all your custom CSS. Add a custom CSS file called template.css to store all of your custom CSS. Add or copy and CSS from another file and add it to this file. You many want to use the !important statement when overriding CSS used in another file. Also the CSS / PHP parameters will not function in this file. Once all your custom CSS and overrides are in this file you won't loose any of your custom CSS if you upgrade the template!
Video Tutorial
Front Page Module Set Up
If you are not using the Quickstart version of our template you will need to set up all the Components, Modules, Plugins and Content. This is fairly easy, but does require a moderate level of Joomla experience. To start you must first know what module positions we use and which modules are used in those positions. Below is map of the Templates home page with each use module position listed. Keep in mind this should only take a few minutes for the experienced user, but if you are new to Joomla we highly suggest you use the Quickstart Installer and go from there.

Logo Editing
Uploading Your Custom Logo
You logo image need to be uploaded to the template folder under the image/logos folder. Simply click on the select button to upload and select the image. If you would like to upload the logo with an FTP program such as FileZilla, browse to the templates folder / template_name/images/logos/ and upload your logo there.
When you install the template you have predefined settings for the logo within the selected style. We have included multiple parameter options for the logo:
Logo Padding: The logo padding adds padding around the logo.
Logo Image Position: The logo image position can be static, fixed, or absolute.
Logo Position: The logo position places it to the left, top, or right.
Logo Text: The template also includes the option for text. You can use the Text option with a logo image or without.
Logo Text Padding: The logo text padding adds padding around the logo.
Logo Text Color: The logo text color set the color of the logo text.
Logo Text Position: The logo text position places it to the left, top, or right.
LOGO MOBILE OPTIONS:
The template has the option to display and alternative logo for mobile display. We have included the following parameters:
Device Logo Width: What width to swap the logo: None, Phones, Phones to Tablets, Portrait Tablets.
Mobile Logo Image Position: The logo image position can be static, fixed, or absolute.
Mobile Logo Padding: The logo padding adds padding around the logo.
Main Menu Setup

For the main menu we use the core Joomla! menu module. First you will need to open your Joomla Module Manager from Extensions / Module Magager menu in the backend administration side of Joomla.
Main Menu Module Assignment
Create a new Menu Module and assign the module to the menubarleft module position and select the mainmenu.
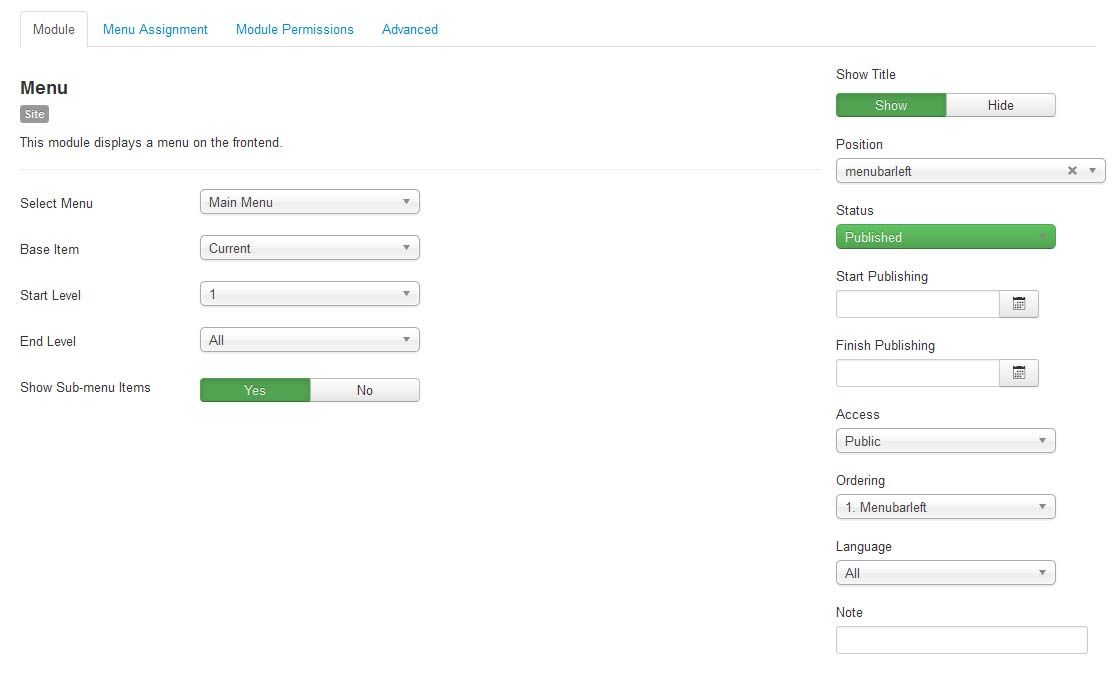
Main Menu Menu Parameters
Select the Menu Tab and make sure that the menu is displayed on all pages.

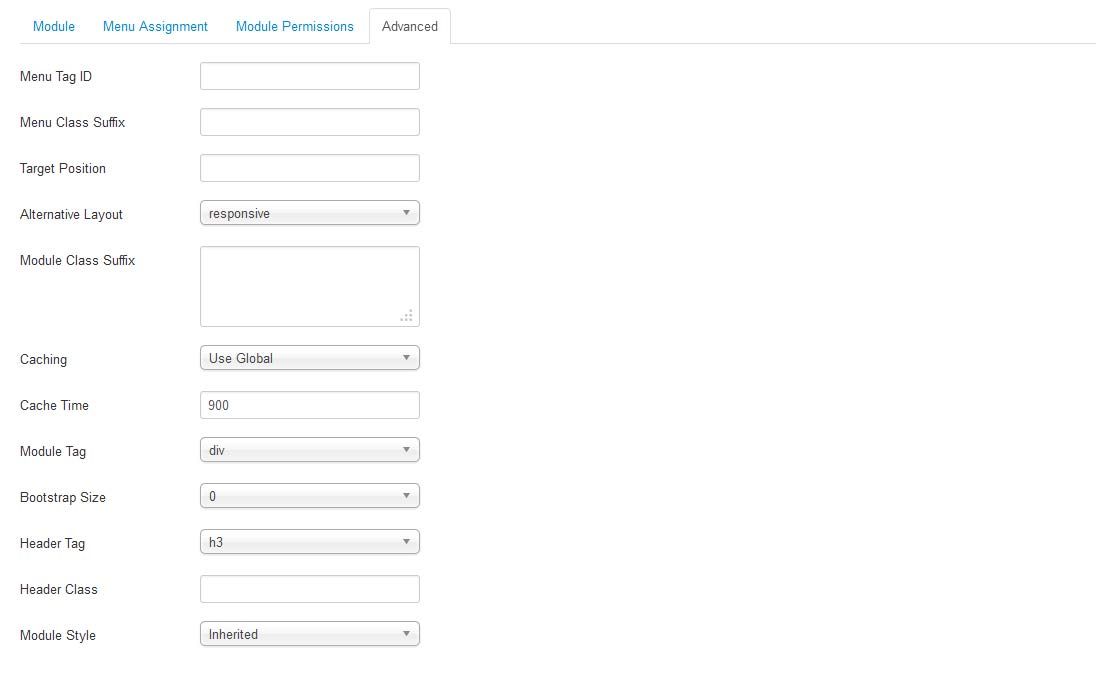
Main Menu Advanced Parameters
In order to use the the responsive features of the menu, you must select the advanced features tab and under alternative layout select the 'Main Menu' layout.
Editing the Main Menu style
The Main Menu has options for multi-column drop down menus. To view the options first open the Template Manager and select the template. Next, select the Grid Parameters and scroll down to the Menu parameters.
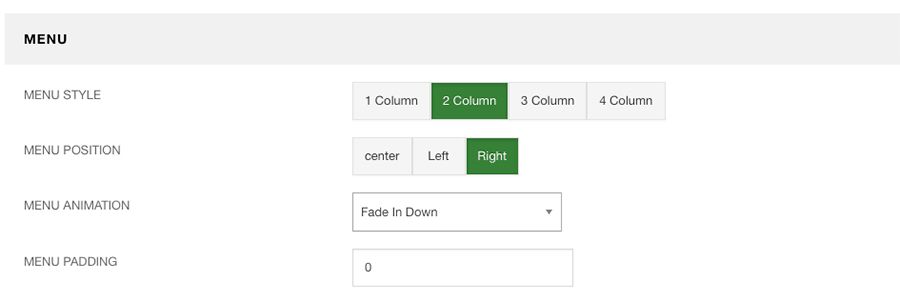
Menu Style: Select from single column drown downs, up to four columns.
Menu Position: The menu can be placed center, left or right.
Menu Animation: Select from multiple CSS3 animation styles.
Menu Padding: Adds padding around the menu.
Inset - JoomlaXTC HTML Module
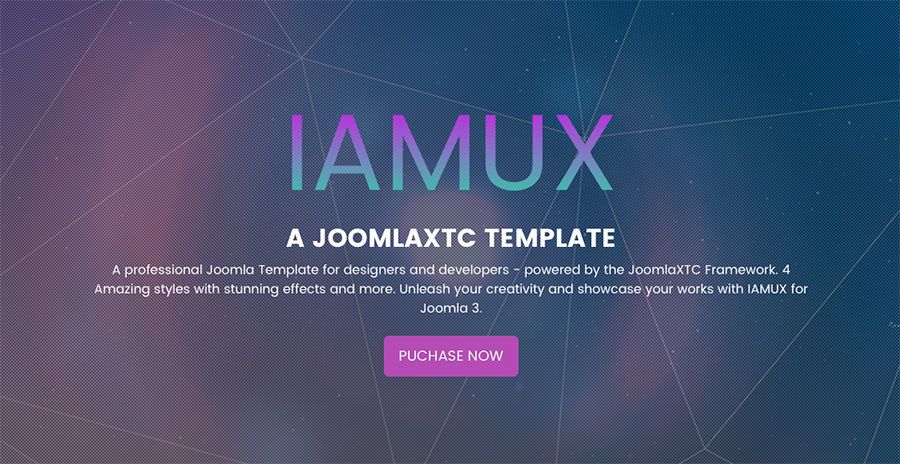
In the inset position use our JoomlaXTC HTML Module to display the hero text. Use the following mark up for the Module HTML.
HTML
<div id="insetmod">
 <h1 class="center back-text">
IAMUX
</h1>
<div>
<h2>A JoomlaXTC Template</h2>
</div>
<div>
<p>A professional Joomla Template for designers and developers - powered by the JoomlaXTC Framework.  4 Amazing styles with stunning effects and more. Unleash your creativity and showcase your works with IAMUX for Joomla 3. </p>
</div>
<br>
<a class="btn-large btn-primary" href="https://www.joomlaxtc.com">PUCHASE NOW</a>
</div>
NOTE: Make sure if you are using a WYSIWYG editor that you have HTML Stripping off or you may lose the HTML markup when saving
For more information on configuring the HTML Module visit the full documentation HERE
User1 - JoomlaXTC HTML Module

In the User1 position use our JoomlaXTC HTML Module to display the image and text. Use the following mark up for the Module HTML.
HTML
<div class="row-fluid">
<div class="span6">
<picture>
<source
    media="(min-width: 767px)" srcset="/images/macs.png">
  <source
    media="(min-width: 480px)" srcset="/images/macs_300.png">
  <img
    src="/images/macs.png"
    alt="macs">
</picture>
</div>
<div class="span6 user1mod">
<div data-sr="enter left please, and hustle 120px">
<hr data-sr="reset enter right and move 250px after 2s over 2s" class="divider">
<h2 data-sr="reset enter left and move 150px after 1s">We Create<br>Stunning Websites</h2>
<br>
<p>Lorem Ipsum is the single greatest threat. We are not - we are not keeping up with other websites. Lorem Ipsum is unattractive, both inside and out. I fully understand why it’s former users left it for something else. They made a good decision. </p>
<br>
<a href="#"><i class="fa fa-arrow-circle-right"></i> Read More</a>
</div>
</div>
</div>
Understanding the mark up:
In the HTML we are using the standard Bootstrap 2 classes. The SPAN6 class gives the div 50% width and collapses to 100% for device view. For more information on bootstrap grid classes, please see the bootstrap docs here: Bootstrap Grid Docs.
To create the animations we use scrollreveal.js markup. The scroll to reveal markup uses straightforward and easy to understand data-sr classes. For more information on the scroll to reveal markup, please view the examples: Scroll Reveal Keywords
For the images we use the HTML5 picture element to swap out the images for device levels. For more info on the HTML5 picture element, please see the HTML5 docs: HTML5 responsive picture element
NOTE: Make sure if you are using a WYSIWYG editor that you have HTML Stripping off or you may lose the HTML markup when saving
For more information on configuring the HTML Module visit the full documentation HERE
User13 - JoomlaXTC HTML Module

In the User 13 position use our JoomlaXTC HTML Module to display the image and text. Use the following mark up for the Module HTML.
HTML
<div class="row-fluid">
<div data-sr="reset vFactor 0.8 opacity 1 enter bottom please, and hustle 75px over 5s" class="span6 user13mod">
<hr data-sr="reset enter right and move 250px after 2s" class="divider">
<h2 data-sr="reset enter left and move 150px after 1s">We know <br>APP Development</h2>
<br>
<div data-sr="reset enter bottom and move 150px after 1s">
<p>Lorem Ipsum is the single greatest threat. We are not - we are not keeping up with other websites. Lorem Ipsum is unattractive, both inside and out. I fully understand why it’s former users left it for something else. They made a good decision. </p>
<br>
<a href="#"><i class="fa fa-arrow-circle-right"></i> Read More</a>
</div>
</div>
<div class="span6">
<br><br>
<div class="user13over">
<div data-sr="vFactor 0.7 opacity 1 wait 0.5s enter bottom please, and hustle 150px over 2s" >
<picture>
<source
    media="(min-width: 767px)" srcset="/images/phones.gif">
  <source
    media="(min-width: 480px)" srcset="/images/phones_300.gif">
<img src="/images/phones.gif" alt="mobile">
</picture>
</div>
</div>
</div>
</div>
The animated phone GIF's were made with a free resource from LStore Graphics - Download the animated phones here: Download
Understanding the mark up:
In the HTML we are using the standard Bootstrap 2 classes. The SPAN6 class gives the div 50% width and collapses to 100% for device view. For more information on bootstrap grid classes, please see the bootstrap docs here: Bootstrap Grid Docs.
To create the animations we use scrollreveal.js markup. The scroll to reveal markup uses straightforward and easy to understand data-sr classes. For more information on the scroll to reveal markup, please view the examples: Scroll Reveal Keywords
For the images we use the HTML5 picture element to swap out the images for device levels. For more info on the HTML5 picture element, please see the HTML5 docs: HTML5 responsive picture element
NOTE: Make sure if you are using a WYSIWYG editor that you have HTML Stripping off or you may lose the HTML markup when saving
For more information on configuring the HTML Module visit the full documentation HERE
User19 - JoomlaXTC HTML Module
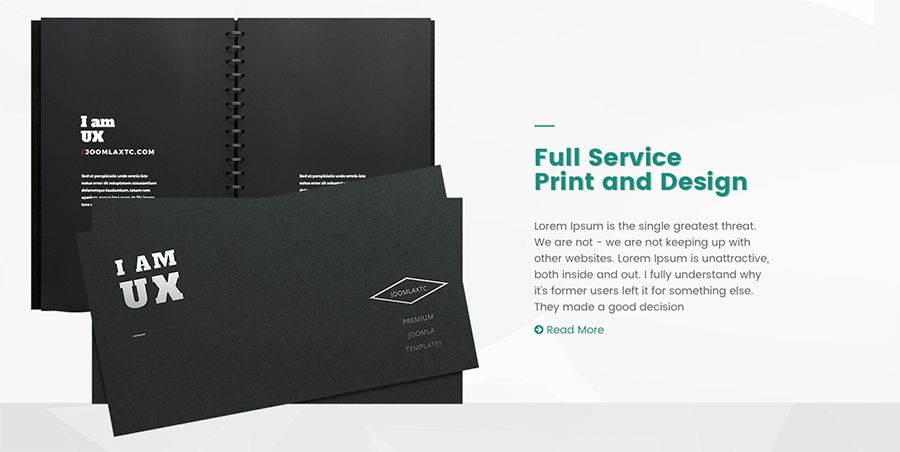
In the User19 position use our JoomlaXTC HTML Module to display the image and text. Use the following mark up for the Module HTML.
HTML
<div class="row-fluid">
<div class="span6">
<div data-sr="vFactor 0.5 opacity 1 reset enter left please, and hustle 100px over 3s">
<picture>
<source
    media="(min-width: 767px)" srcset="/images/uxfolder.png">
  <source
    media="(min-width: 480px)" srcset="/images/uxfolder_300.png">
  <img
    src="/images/uxfolder.png"
    alt="ux folder">
</picture>
</div>
<div class="user19over" data-sr="vFactor 0.5 opacity 1 wait 0.5s enter bottom please, and hustle 150px over 2s" >
<img src="/images/bcards.png" alt="business cards">
</div>
</div>
<div class="span6 user19mod">
<div data-sr="enter left please, and hustle 120px">
<hr data-sr="reset enter right and move 250px after 2s" class="divider">
<h2>Full Service<br>Print and Design</h2>
</div>
<br>
<div data-sr="reset enter bottom and move 150px after 1s">
<p>Lorem Ipsum is the single greatest threat. We are not - we are not keeping up with other websites. Lorem Ipsum is unattractive, both inside and out. I fully understand why it’s former users left it for something else. They made a good decision</p>
<a href="#"><i class="fa fa-arrow-circle-right"></i> Read More</a>
</div>
</div>
</div>
Understanding the mark up:
In the HTML we are using the standard Bootstrap 2 classes. The SPAN6 class gives the div 50% width and collapses to 100% for device view. For more information on bootstrap grid classes, please see the bootstrap docs here: Bootstrap Grid Docs.
To create the animations we use scrollreveal.js markup. The scroll to reveal markup uses straightforward and easy to understand data-sr classes. For more information on the scroll to reveal markup, please view the examples: Scroll Reveal Keywords
For the images we use the HTML5 picture element to swap out the images for device levels. For more info on the HTML5 picture element, please see the HTML5 docs: HTML5 responsive picture element
NOTE: Make sure if you are using a WYSIWYG editor that you have HTML Stripping off or you may lose the HTML markup when saving
For more information on configuring the HTML Module visit the full documentation HERE
User25 - JoomlaXTC HTML Module

In the User25 position use our JoomlaXTC HTML Module to display the image and text. Use the following mark up for the Module HTML.
HTML
<div class="row-fluid">
<div class="span6 user25mod">
<div data-sr="enter bottom please, and hustle 250px">
<hr data-sr="reset enter right and move 250px after 2s" class="divider">
<h2>We Are<br>Masters of SEO</h2>
</div>
<br>
<div data-sr="reset enter bottom and move 150px after 1s">
<p>Lorem Ipsum is the single greatest threat. We are not - we are not keeping up with other websites. Lorem Ipsum is unattractive, both inside and out. I fully understand why it’s former users left it for something else. They made a good decision. </p>
<a href="#"><i class="fa fa-arrow-circle-right"></i> Read More</a>
</div>
</div>
<div class="span6">
<div data-sr="reset vFactor 0.5 opacity 1 wait 0.2s enter right please, and hustle 50px over 2s" >
<picture>
<source
    media="(min-width: 767px)" srcset="/images/cloud.png">
  <source
    media="(min-width: 480px)" srcset="/images/cloud_300.png">
<img src="/images/cloud.png" alt="cloud" >
</picture>
</div>
<div data-sr="reset vFactor 0.5 opacity 1 wait 0.5s enter bottom please, and hustle 150px over 4s" class="user25over">
<img src="/images/rocket.png" alt="rocket">
</div>
</div>
</div>
Understanding the mark up:
In the HTML we are using the standard Bootstrap 2 classes. The SPAN6 class gives the div 50% width and collapses to 100% for device view. For more information on bootstrap grid classes, please see the bootstrap docs here: Bootstrap Grid Docs.
To create the animations we use scrollreveal.js markup. The scroll to reveal markup uses straightforward and easy to understand data-sr classes. For more information on the scroll to reveal markup, please view the examples: Scroll Reveal Keywords
For the images we use the HTML5 picture element to swap out the images for device levels. For more info on the HTML5 picture element, please see the HTML5 docs: HTML5 responsive picture element
NOTE: Make sure if you are using a WYSIWYG editor that you have HTML Stripping off or you may lose the HTML markup when saving
For more information on configuring the HTML Module visit the full documentation HERE
User31 - JoomlaXTC HTML Module
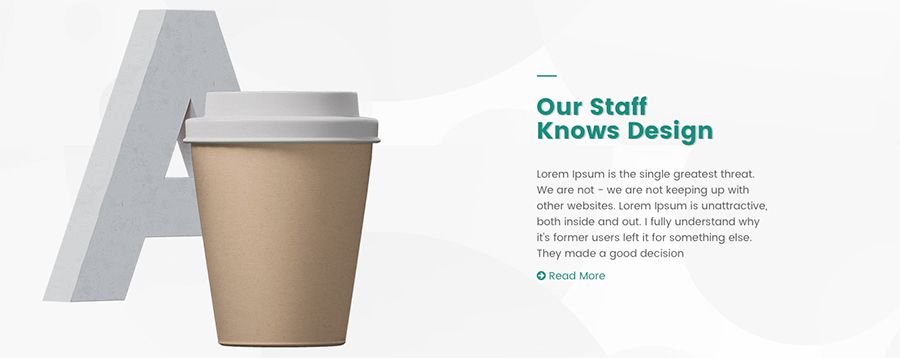
In the User31 position use our JoomlaXTC HTML Module to display the image and text. Use the following mark up for the Module HTML.
HTML
<div class="row-fluid">
<div class="span6">
<div data-sr="vFactor 0.5 opacity 1 reset enter left please, and hustle 100px over 1s">
<picture>
<source
    media="(min-width: 767px)" srcset="/images/aletter.png">
  <source
    media="(min-width: 480px)" srcset="/images/aletter_300.png">
<img src="/images/aletter.png" alt="responsive letter" >
</picture>
</div>
<div class="user31over">
<img src="/images/coffecup.png" alt="responsive coffee" >
</div>
</div>
<div class="span6 user31mod">
<div data-sr="enter left please, and hustle 120px">
<hr data-sr="reset enter right and move 250px after 2s" class="divider">
<h2>Our Staff<br>Knows Design</h2>
</div>
<br>
<div data-sr="reset enter bottom and move 150px after 1s">
<p>Lorem Ipsum is the single greatest threat. We are not - we are not keeping up with other websites. Lorem Ipsum is unattractive, both inside and out. I fully understand why it’s former users left it for something else. They made a good decision</p>
<a href="#"><i class="fa fa-arrow-circle-right"></i> Read More</a>
</div>
</div>
</div>
Understanding the mark up:
In the HTML we are using the standard Bootstrap 2 classes. The SPAN6 class gives the div 50% width and collapses to 100% for device view. For more information on bootstrap grid classes, please see the bootstrap docs here: Bootstrap Grid Docs.
To create the animations we use scrollreveal.js markup. The scroll to reveal markup uses straightforward and easy to understand data-sr classes. For more information on the scroll to reveal markup, please view the examples: Scroll Reveal Keywords
For the images we use the HTML5 picture element to swap out the images for device levels. For more info on the HTML5 picture element, please see the HTML5 docs: HTML5 responsive picture element
NOTE: Make sure if you are using a WYSIWYG editor that you have HTML Stripping off or you may lose the HTML markup when saving
For more information on configuring the HTML Module visit the full documentation HERE
User31 - JoomlaXTC HTML Module
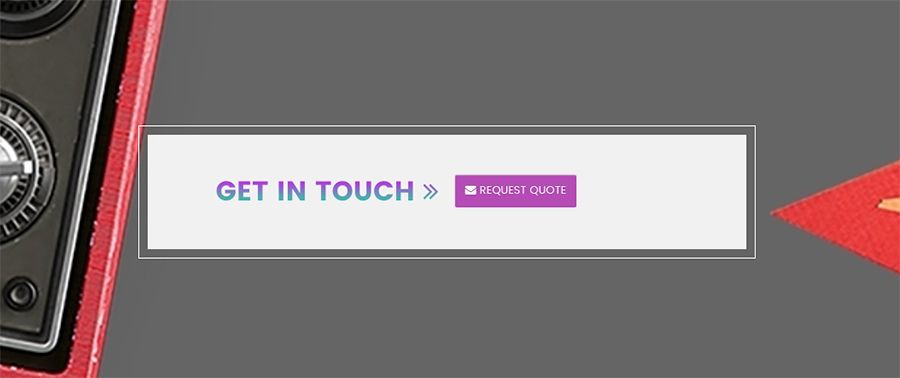
In the User37 position use our JoomlaXTC HTML Module to display the contact text. Use the following mark up for the Module HTML.
HTML
<div data-sr='reset scale up 80% opacity 1 over 2s' class="user37mod_wrap">
<div class="row-fluid user37mod">
<div class="span6">
<h2 class="gradient1">GET IN TOUCH <i class="fa fa-angle-double-right gradient1"></i> </h2>
</div>
<div class="span6">
<a href="#" class="btn btn-large btn-primary" style="margin-top:6px;"><i class="fa fa-envelope"></i> REQUEST QUOTE</a>
</div>
</div>
Understanding the mark up:
In the HTML we are using the standard Bootstrap 2 classes. The SPAN6 class gives the div 50% width and collapses to 100% for device view. For more information on bootstrap grid classes, please see the bootstrap docs here: Bootstrap Grid Docs.
To create the animations we use scrollreveal.js markup. The scroll to reveal markup uses straightforward and easy to understand data-sr classes. For more information on the scroll to reveal markup, please view the examples: Scroll Reveal Keywords
NOTE: Make sure if you are using a WYSIWYG editor that you have HTML Stripping off or you may lose the HTML markup when saving
For more information on configuring the HTML Module visit the full documentation HERE
User31 - Joomla Menu Modules
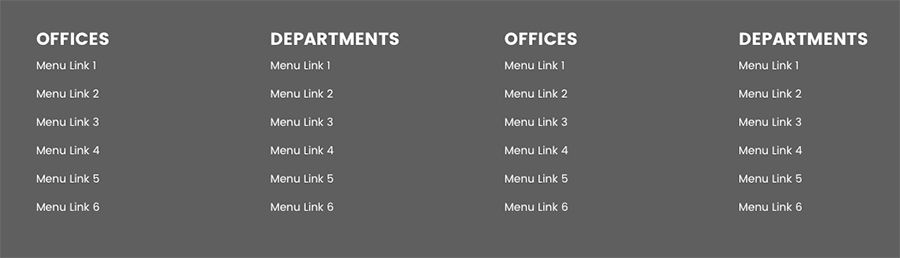
In the User49 - 52 positions use the Joomla Menu Modules to display bottom menu links. In the menu modules set the alternative layout to Bottom menu. Use the 'nopad' and 'nomarg' suffix class for each
Footer - JoomlaXTC HTML Module

In the footer position use our JoomlaXTC HTML Module to display the social icons. Use the following mark up for the Module HTML.
HTML
<div class="footercons"><i class="fa fa-facebook"></i>
<i class="fa fa-twitter"></i>
<i class="fa fa-youtube"></i>
<i class="fa fa-vimeo"></i>
<i class="fa fa-github"></i>
<i class="fa fa-joomla"></i>
<i class="fa fa-wordpress"></i>
</div>
Understanding the mark up:
In the HTML we are using font awesome icons to display the social icons. For a complete list of the icons please view the template typography page.
NOTE: Make sure if you are using a WYSIWYG editor that you have HTML Stripping off or you may lose the HTML markup when saving
For more information on configuring the HTML Module visit the full documentation HERE
Legals - Search Module

In the legals position we use the Joomla search module to create the search field.
Staff View
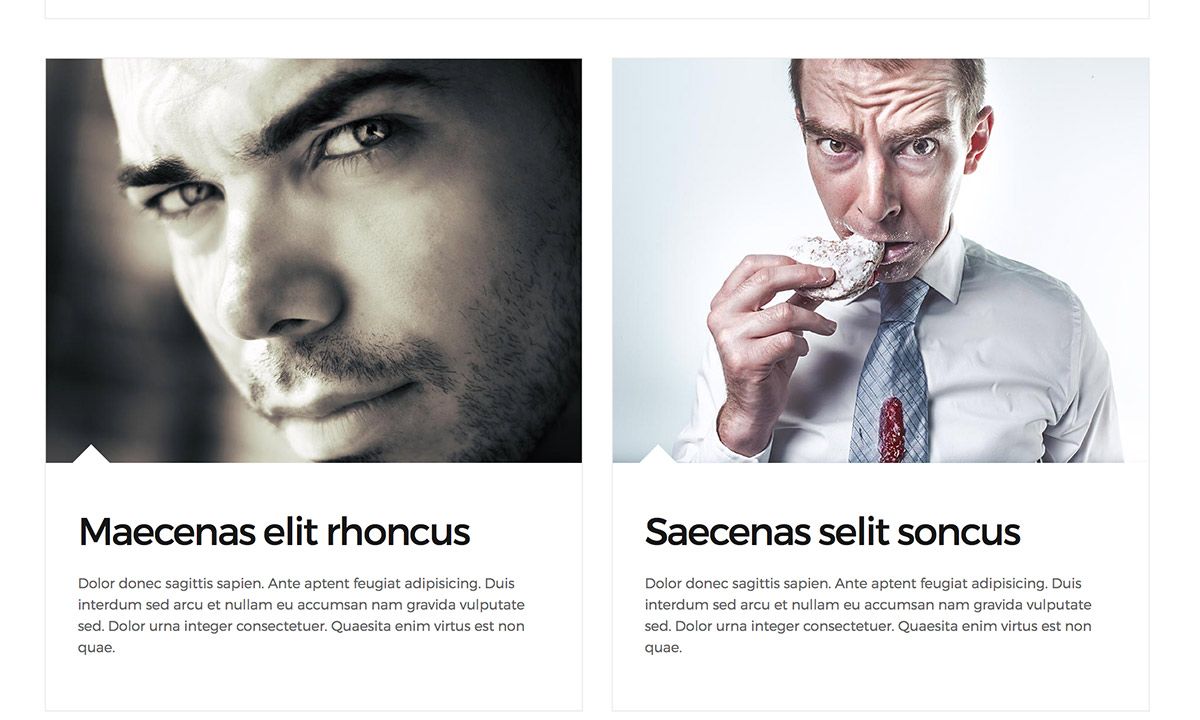
To create a Staff category view, use the the menu option Articles / Staff. Use the page class ' roundimage region3-constrain' to create a round image on the item view and to constrain the width of the content.
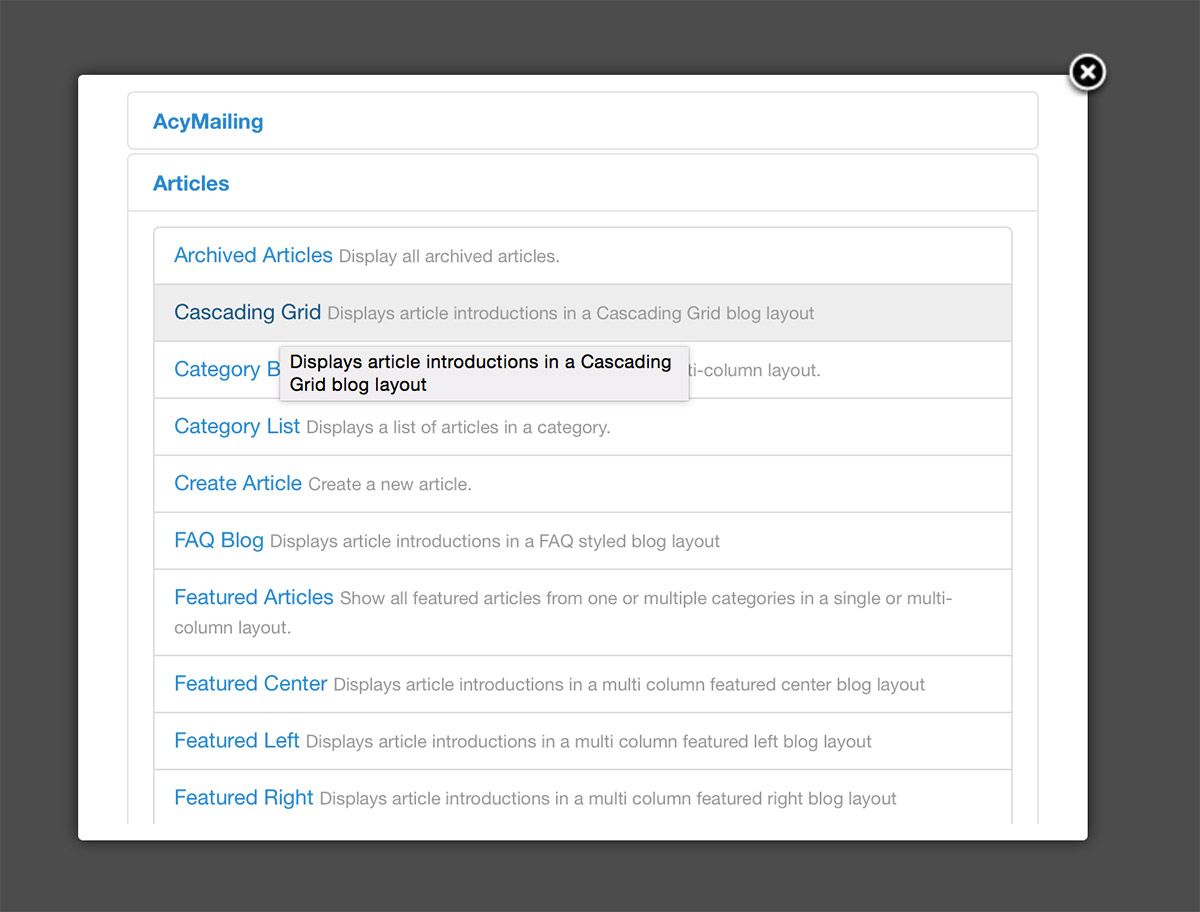
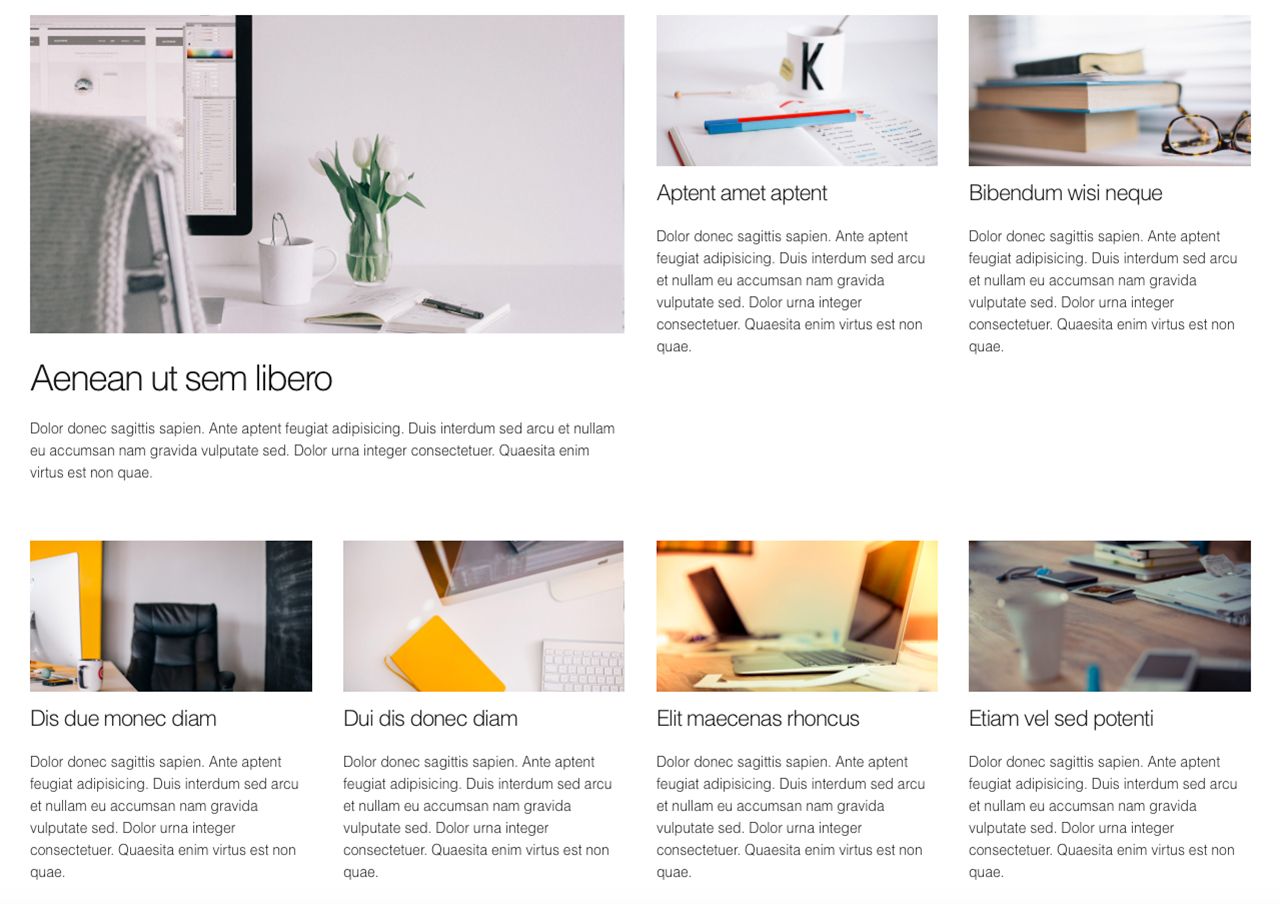
Cascading Grid
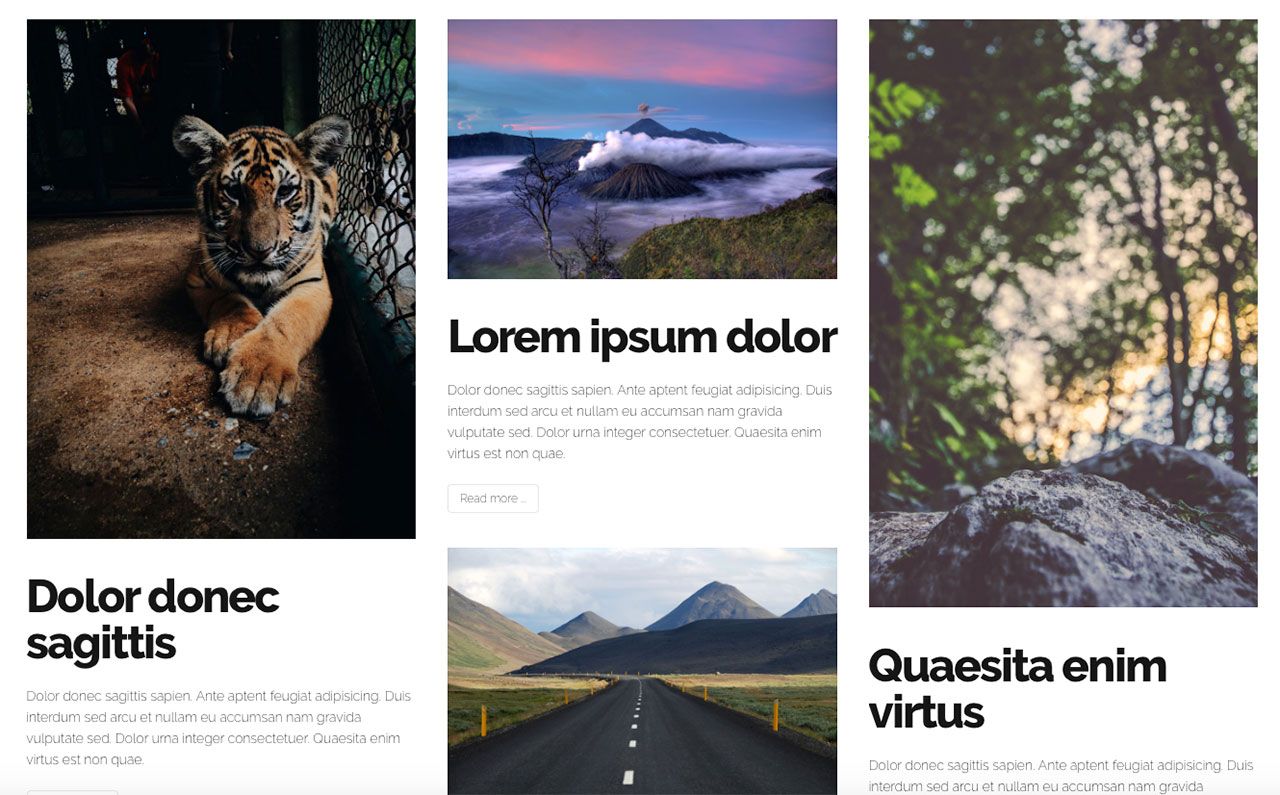
To create a category view with intro text and a grid layout, use the the menu option Articles / Cascading Grid.
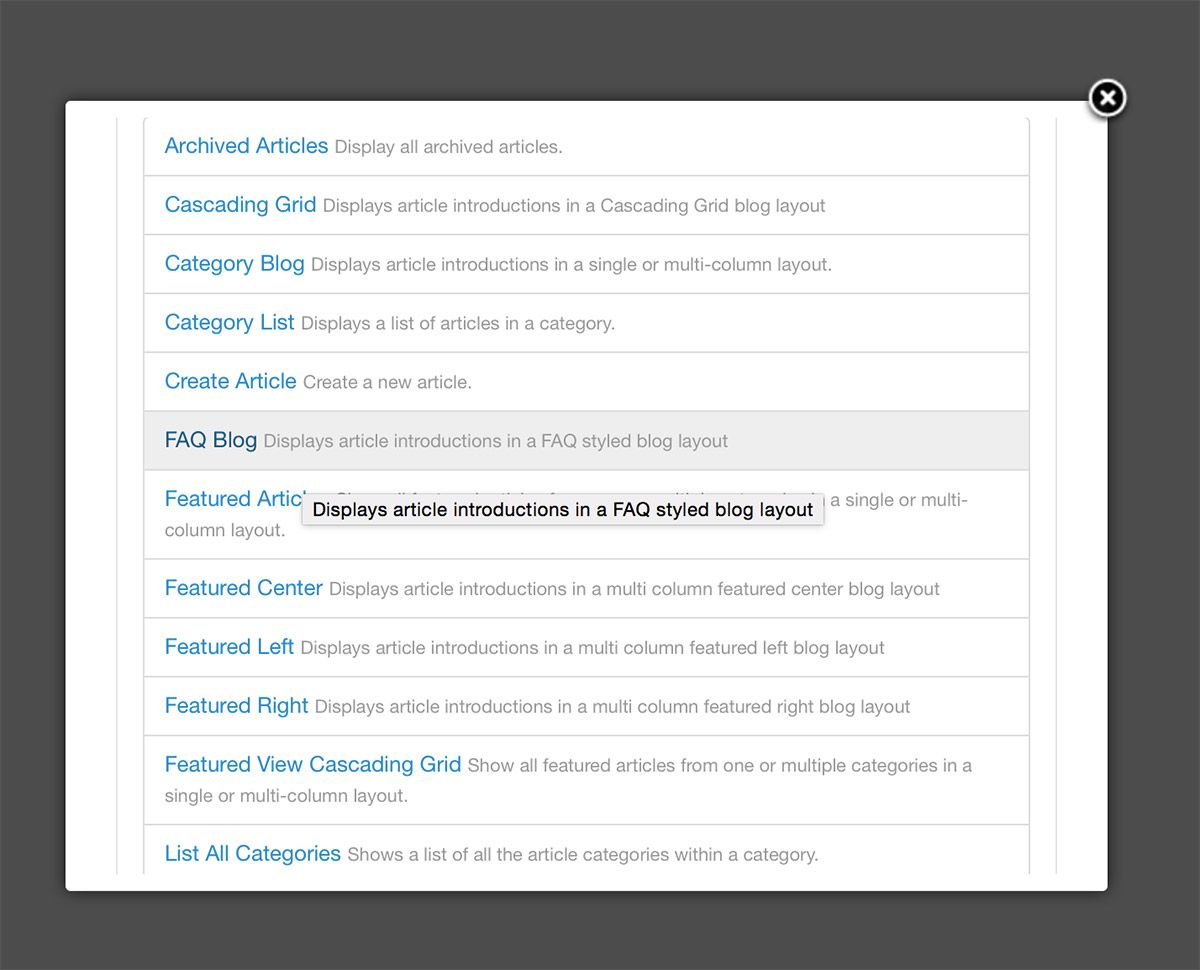
FAQ
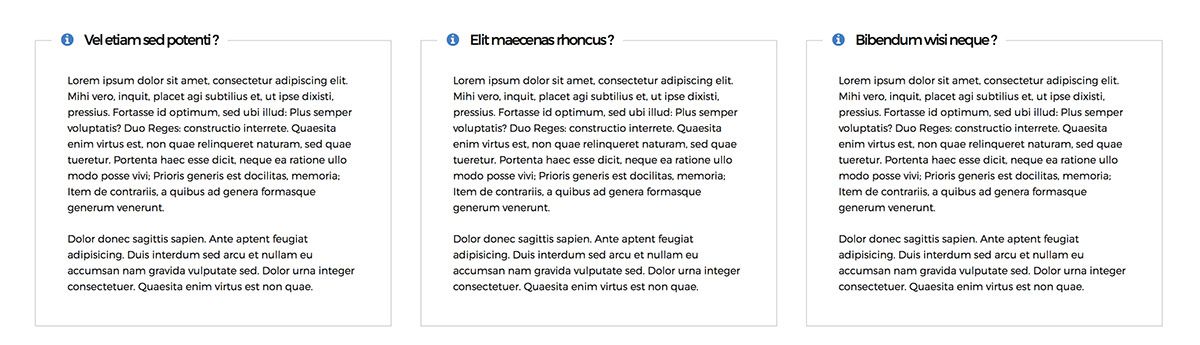
To create a FAQ category view, use the the menu option Articles / Frequently Asked Questions.
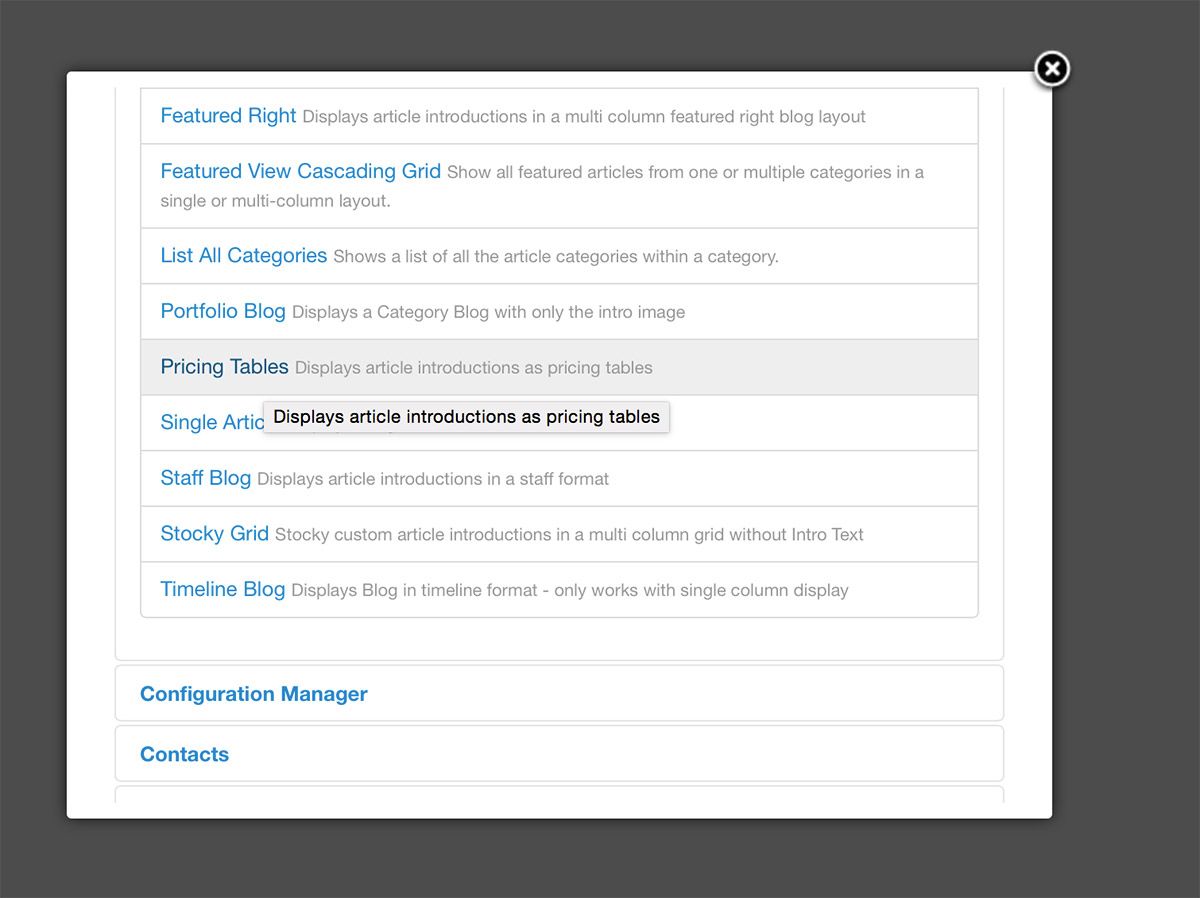
Pricing Tables
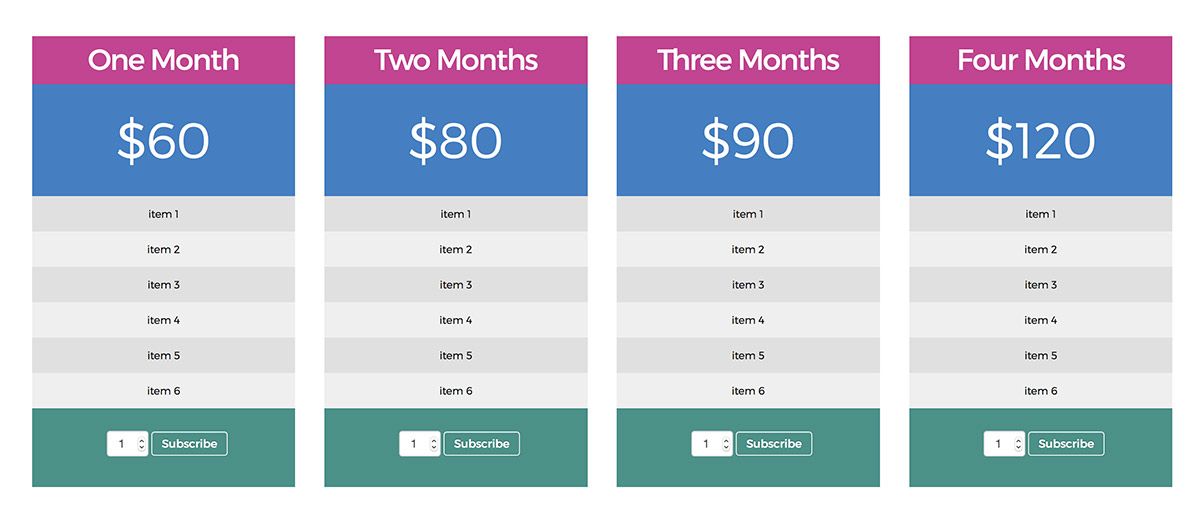
To create a Pricing Table category view, use the the menu option Articles / Pricing Tables. Use the page class ' content-constrain' to constrain the width of the content.
Pricing Table Page
To create a Pricing Table article - Use the follow format for the intro text: priceable-price div for the price and p classes for the items.
HTML
<div class="pricetbl-price">$60</div>
<p>item 1</p>
<p>item 2</p>
<p>item 3</p>
<p>item 4</p>
<p>item 5</p>
<p>item 6</p>
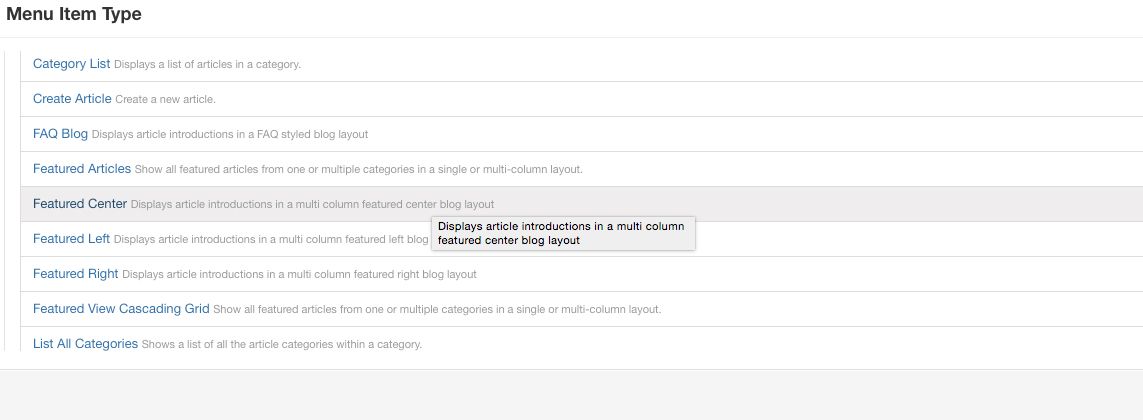
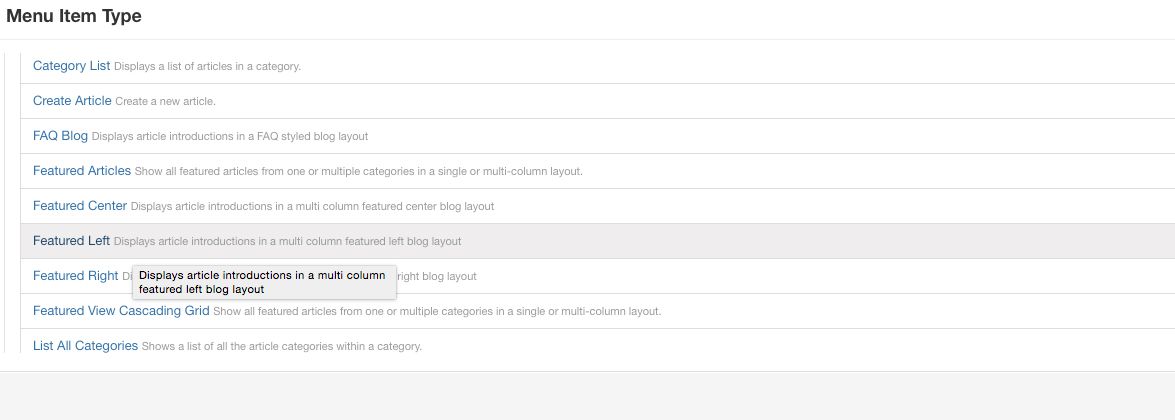
Featured Left
To create a Featured Left category view, use the the menu option Articles / Featured Left.
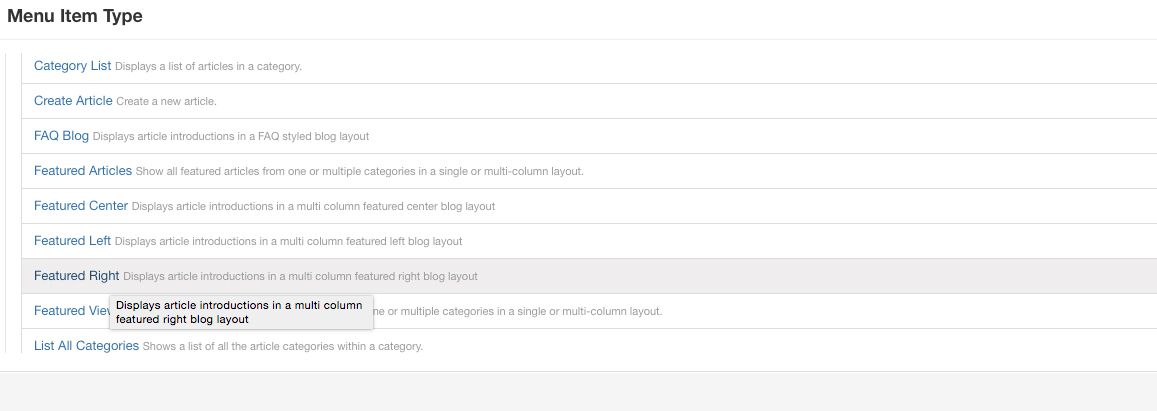
Featured Right

To create a Featured Right category view, use the the menu option Articles / Featured Right.
Featured Center

To create a Featured Center category view, use the the menu option Articles / Featured Center.